I just wanted another rod in our bedroom closet…that was the initial game plan!
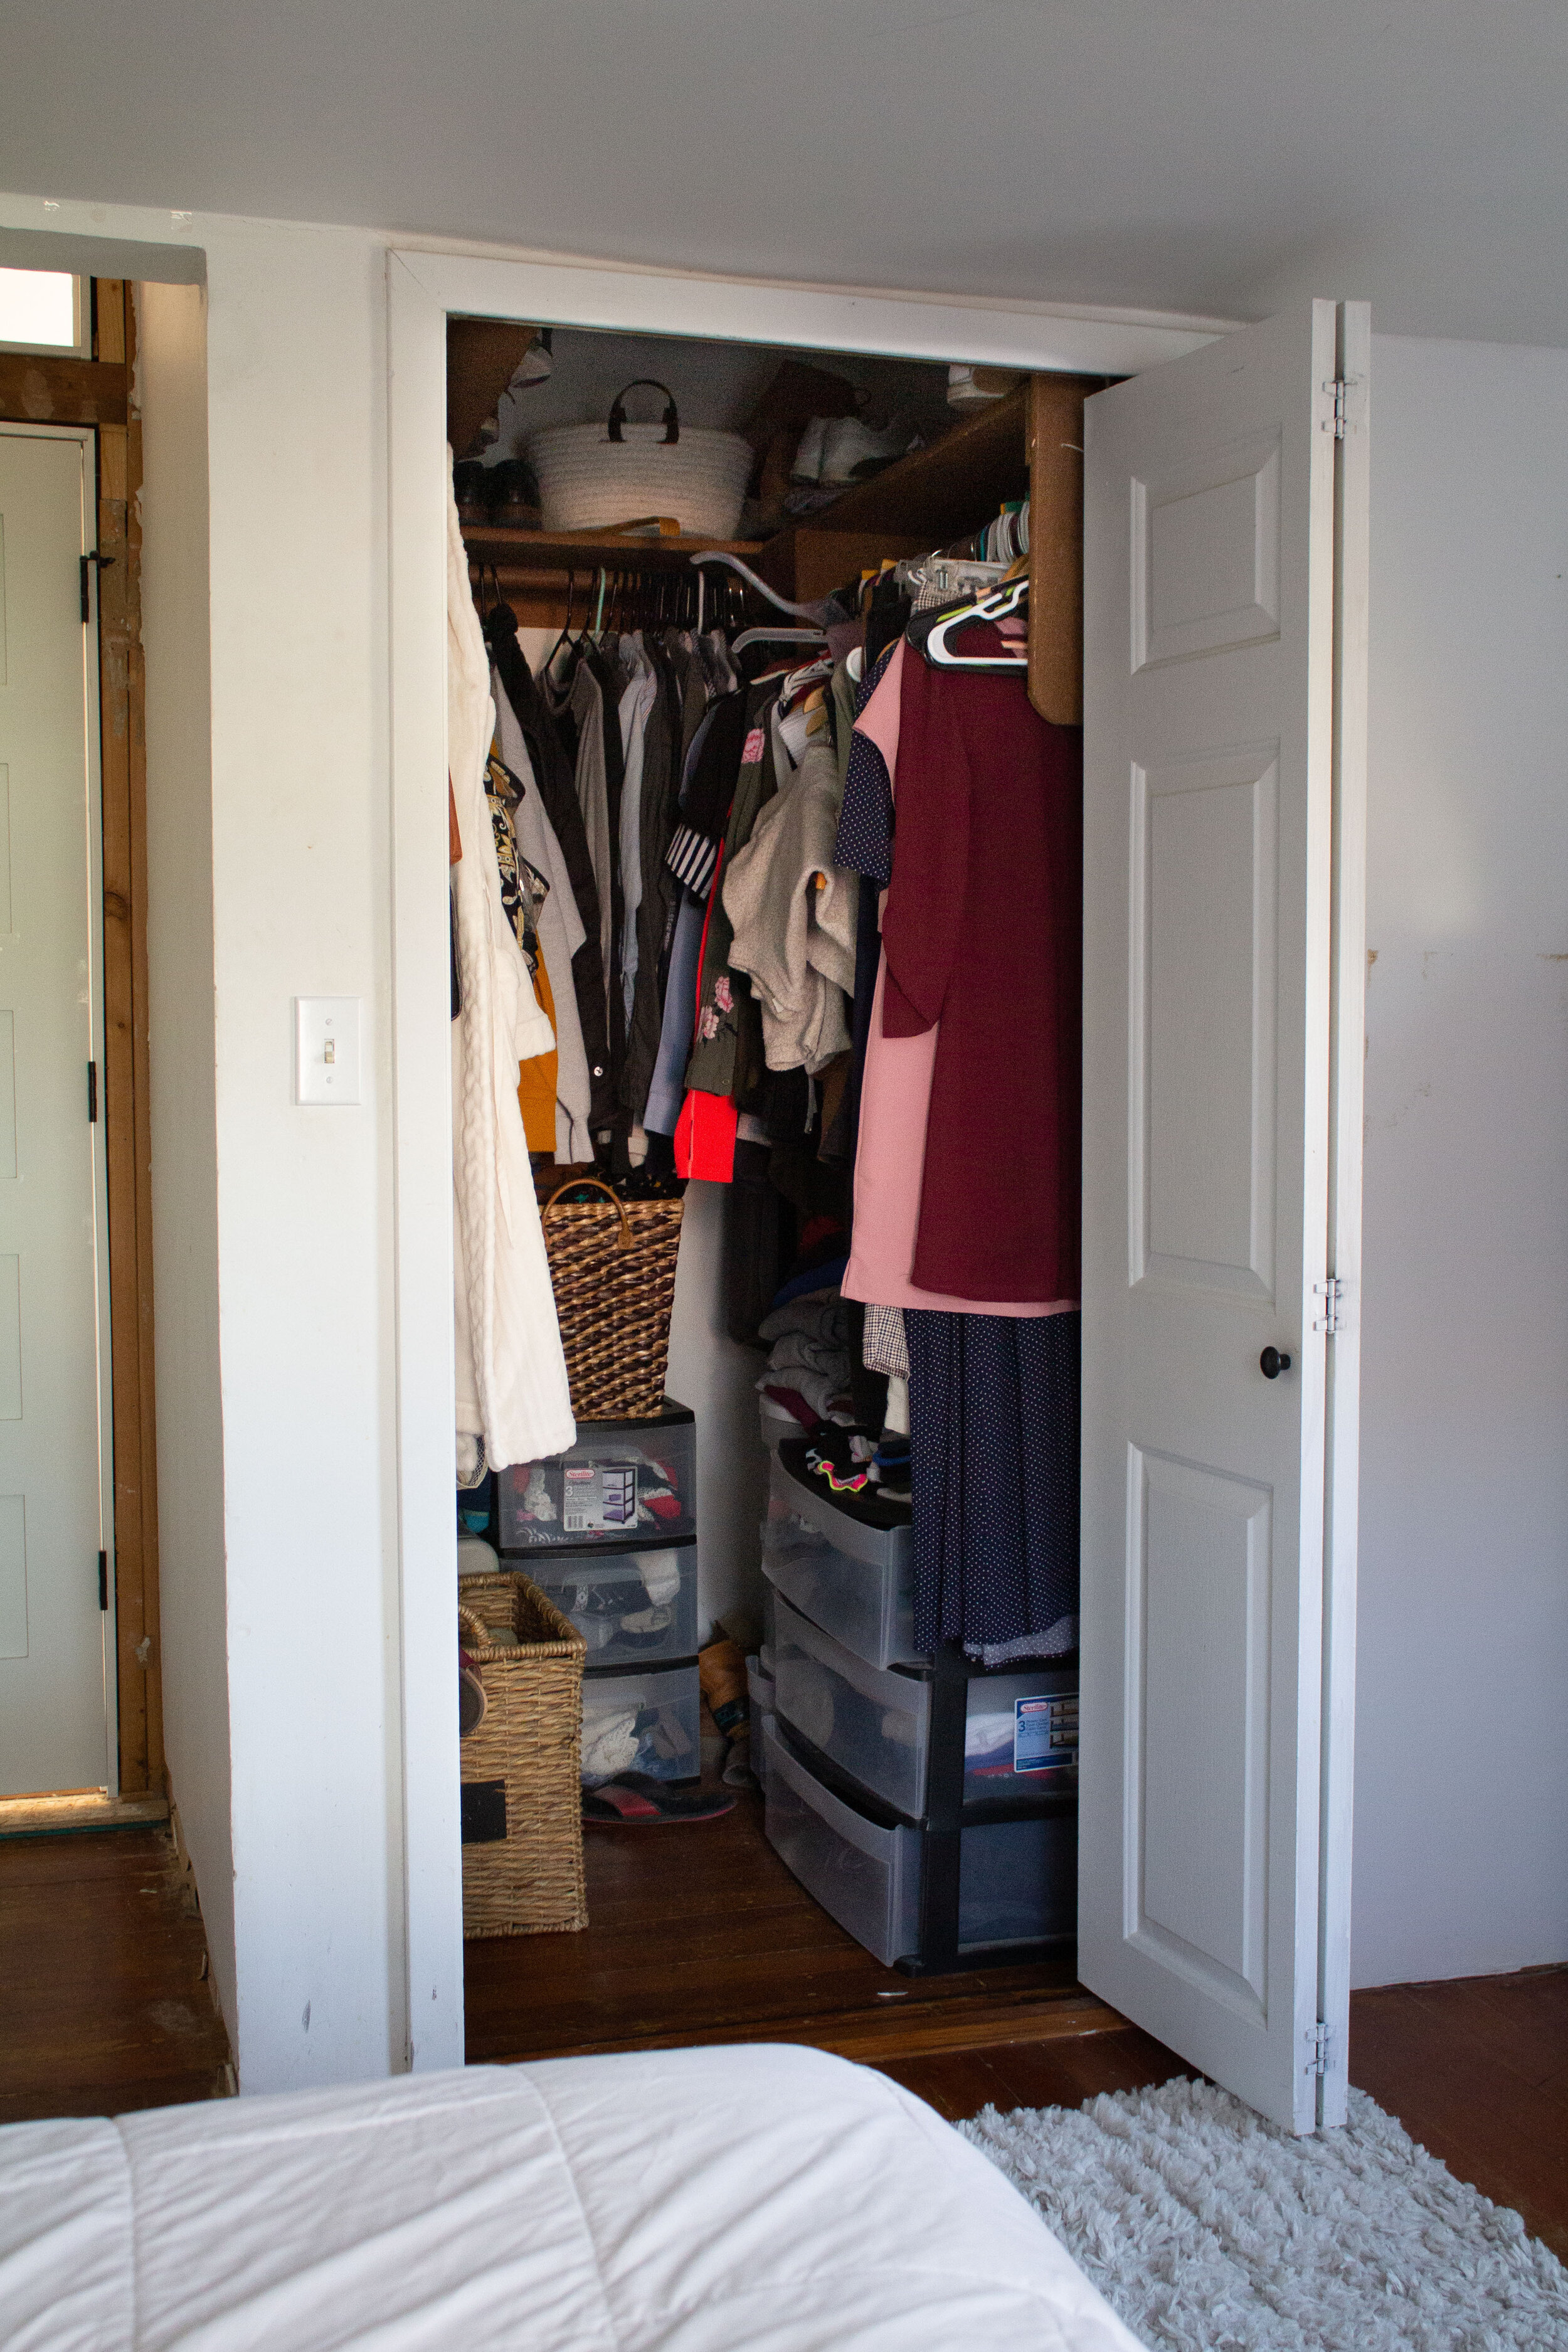
Our bedroom is on our to-do list and a MAJOR renovation is in store for this space down the road (we’re talking a whole new roof because the ceilings are only 6.5 feet tall). But I couldn’t ignore our closet situation any longer. It’s tight, over crowded, and I started hanging clothes from other clothes hangers because I ran out of rod space.
So I made an executive decision to rearrange a few things and add another rod. However after 20 minutes of clearing out the closet, Chris and I both decided that if we’re going through the trouble, we might as well do more than simply add a new rod…we decided to give this closet a proper makeover! The floors, door, and trim will eventually change, but the rest we designed the way we actually want it!
Here’s how it looked before…feeling claustrophobic? Ya me too!
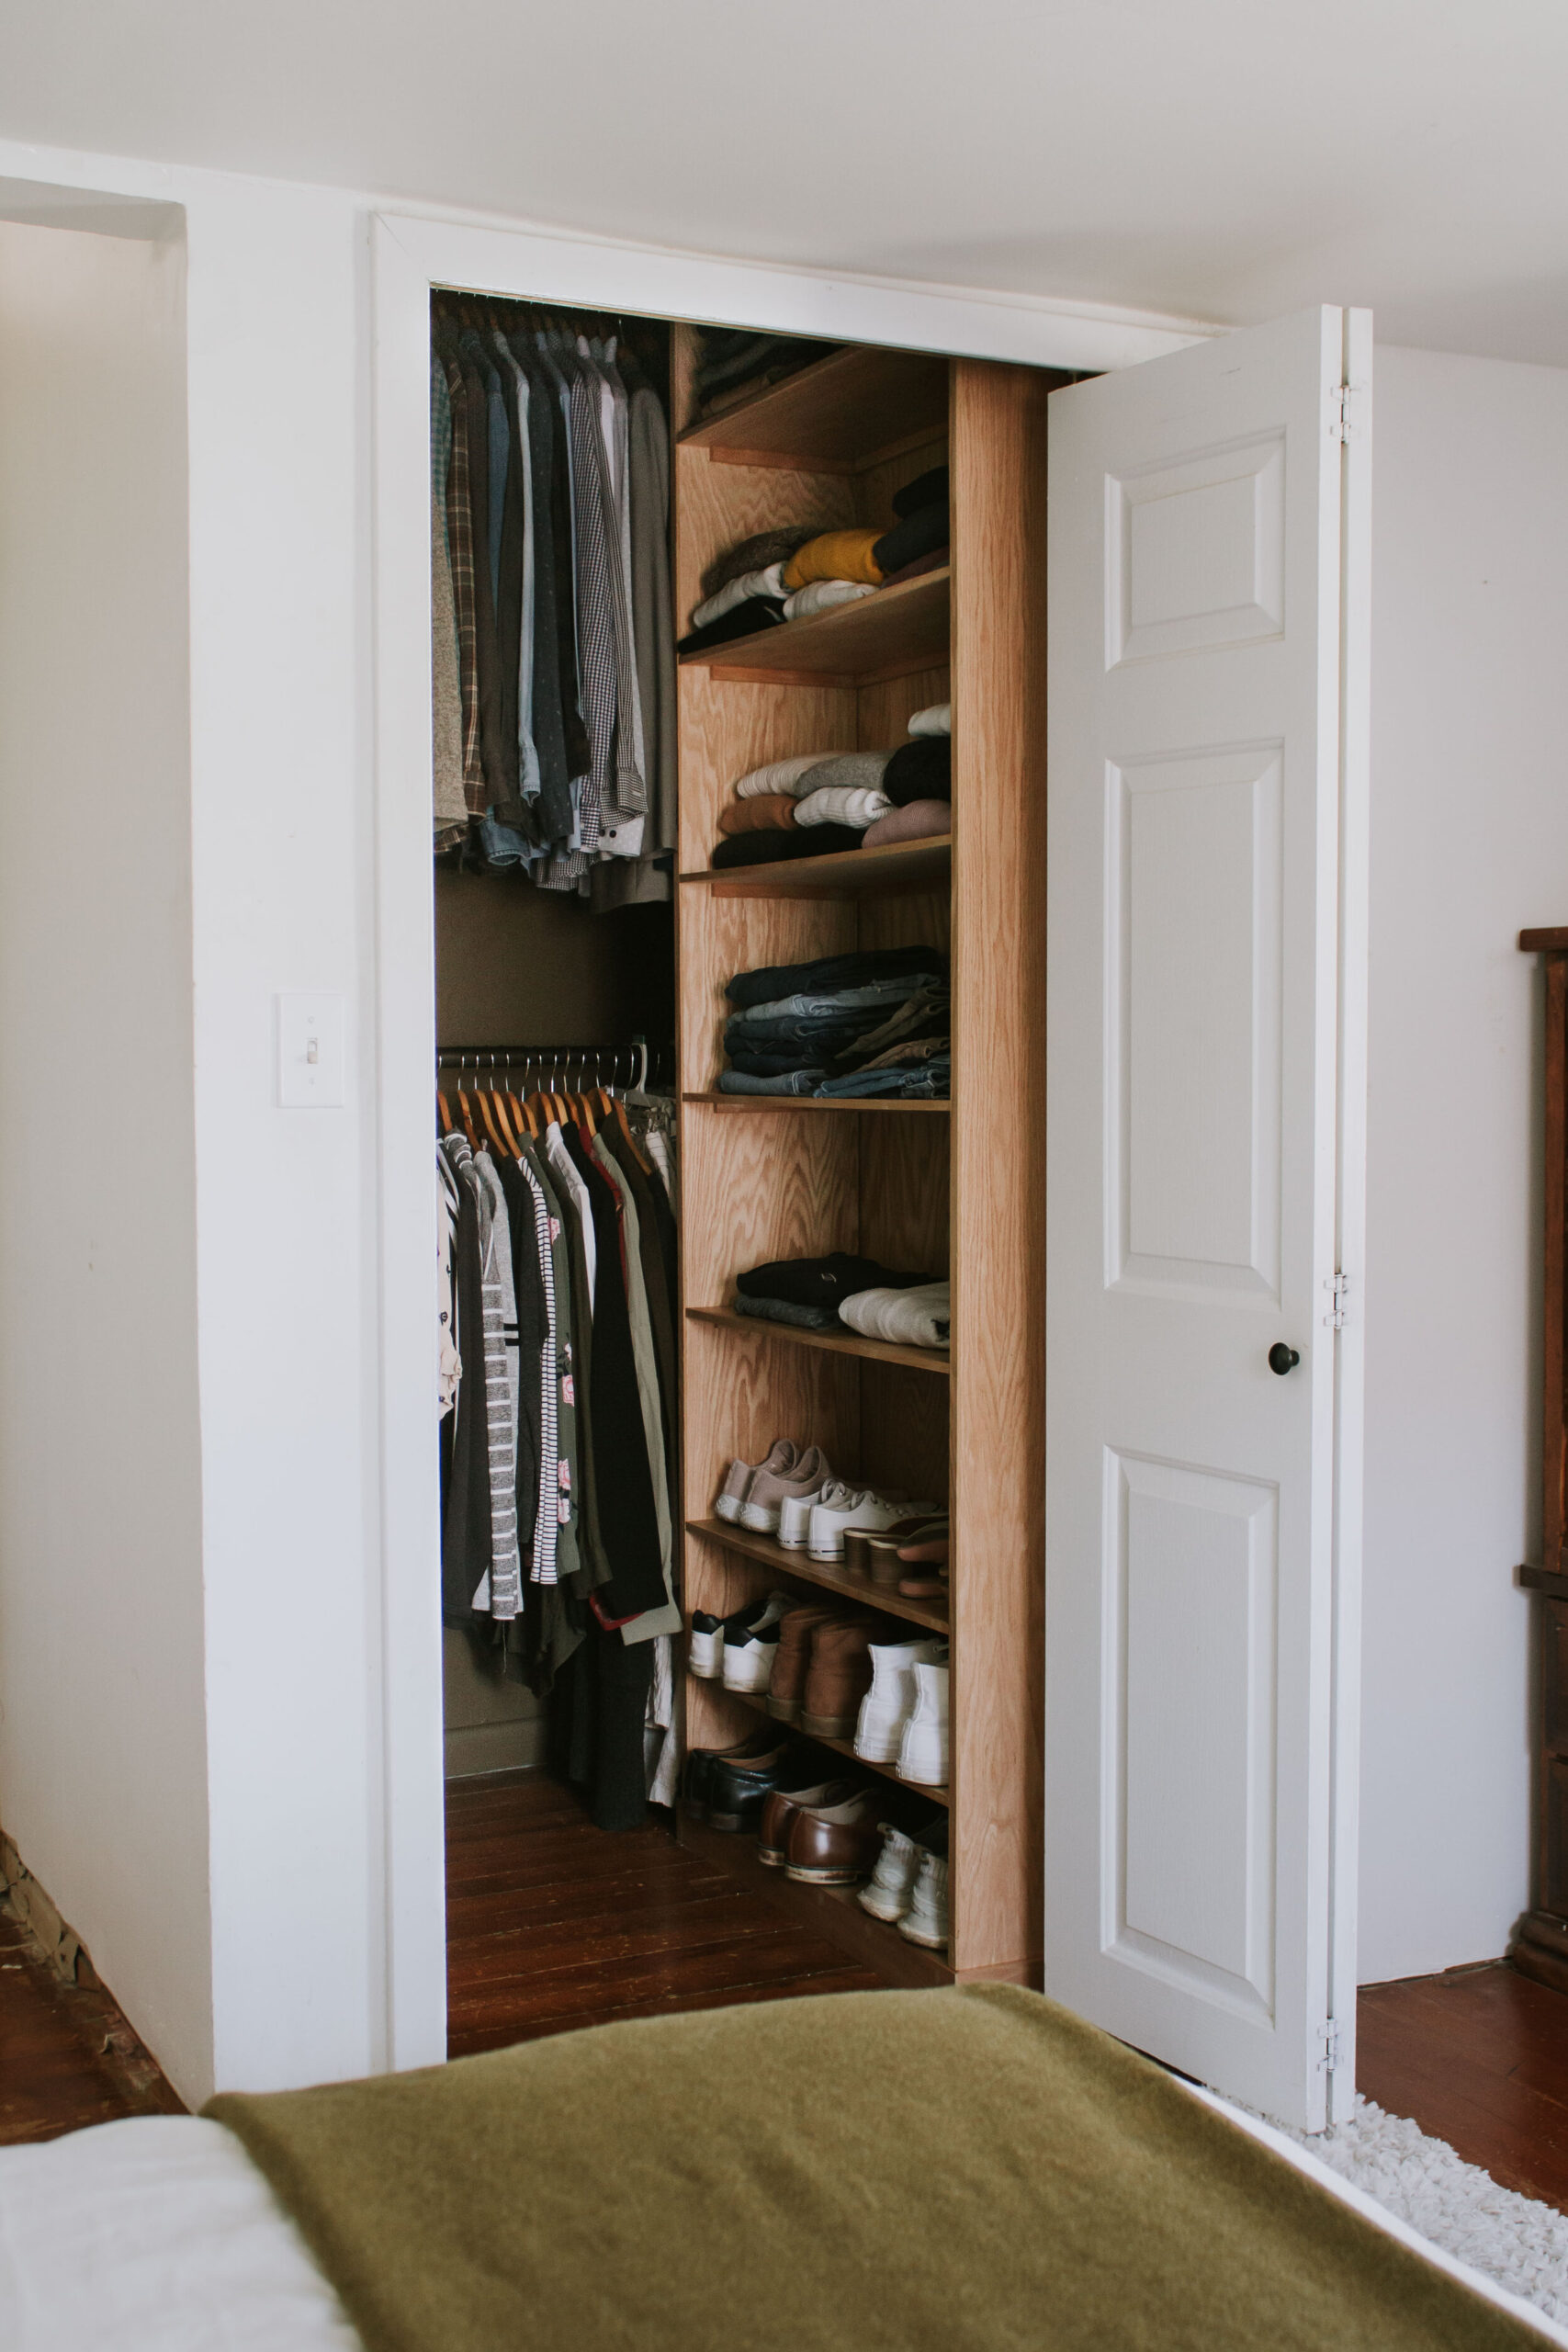
And here’s what it looks like now! The organization just makes me giddy! 🙂
The original layout needed to change. My clothes hung on the right and stuck out too far making an already cramped room feel smaller. We decided to dedicate the back wall to hold all our hanging clothes so that the right side of the closet could become floor to ceiling shelving for our sweaters, jeans, shoes, etc.
We built the wood cabinet with 3/4″ oak plywood for all 4 sides and 1/2″ oak plywood for the shelves. We also had some leftover 1/4″ oak plywood from another project that we used as a backing.
To set each shelf, we used leftover 1/2″ strips of oak wood and nailed 1 on each side of the cabinet for the shelf to sit on. We then used our brad nailer and popped a few 1″ brad nails through the top of the shelves to secure them to the supports.
We trimmed out the top and bottom of the cabinet with 1/2″ oak wood and quarter round trim. This not only made it feel custom built but it also covered the gaps between the cabinet and the floor or ceiling.
I can’t forget to mention that since we used plywood, the face of the cabinet showed the edges of the plywood…the part that’s not so pretty. To fix this we simply cut 1/4″ oak plywood strips the same width as the cabinet fronts and attached them to the shelves and vertical panels for a finished edge. To attach them, we used wood glue and nailed them on with our brad nailer.
To finish the cabinet I filled all the holes with wood filler and I applied a clear top coat for protection. I used Polycrylic in a matte finish and this 2″ angled paint brush to apply it.
The floors, closet door, and trim will all eventually change when we remodel the rest of our bedroom. but for now those will stay as is.

Chris suggested we paint the closet a dark, moody color and I loved that idea. We landed on “Buckwheat Brown” from HGTV Home by Sherwin Williams and it’s a really beautiful color. Depending on the light and time of day it can either lean more brown or army green and I love both! We painted the walls, trim, and ceiling all the same color and it actually made the room feel bigger!
We had a brass light fixture in the closet prior to us working on this space and I really liked how it looked with the new paint color so we kept the brass plate and I bought this stunning reeded opal glass globe to finish the look.
Once again, here’s how it looked before…
And here it is now. I can actually see the floors!
It’s one thing to have a pretty closet, but it’s the organization that really makes my heart skip a beat! I can’t tell you how amazing it is to have a spot for everything!
Chris and I recorded the whole process and I shared the videos on Instagram so if you want to watch the transformation in real time, click here!
CABINET MATERIALS:
CLOSET SOURCES:
Leave a Reply Cancel reply
DO YOU WANT
The Inside Scoop
Where behind the scenes, exclusive advice, and candid conversations are sent straight to your inbox every week.


Love your design work! Can you please tell me where you got the closet door handles? I have been looking and unable to find any products that look like what you have.
Thank you so much!!
100% sharing this with my partner. It looks really good!