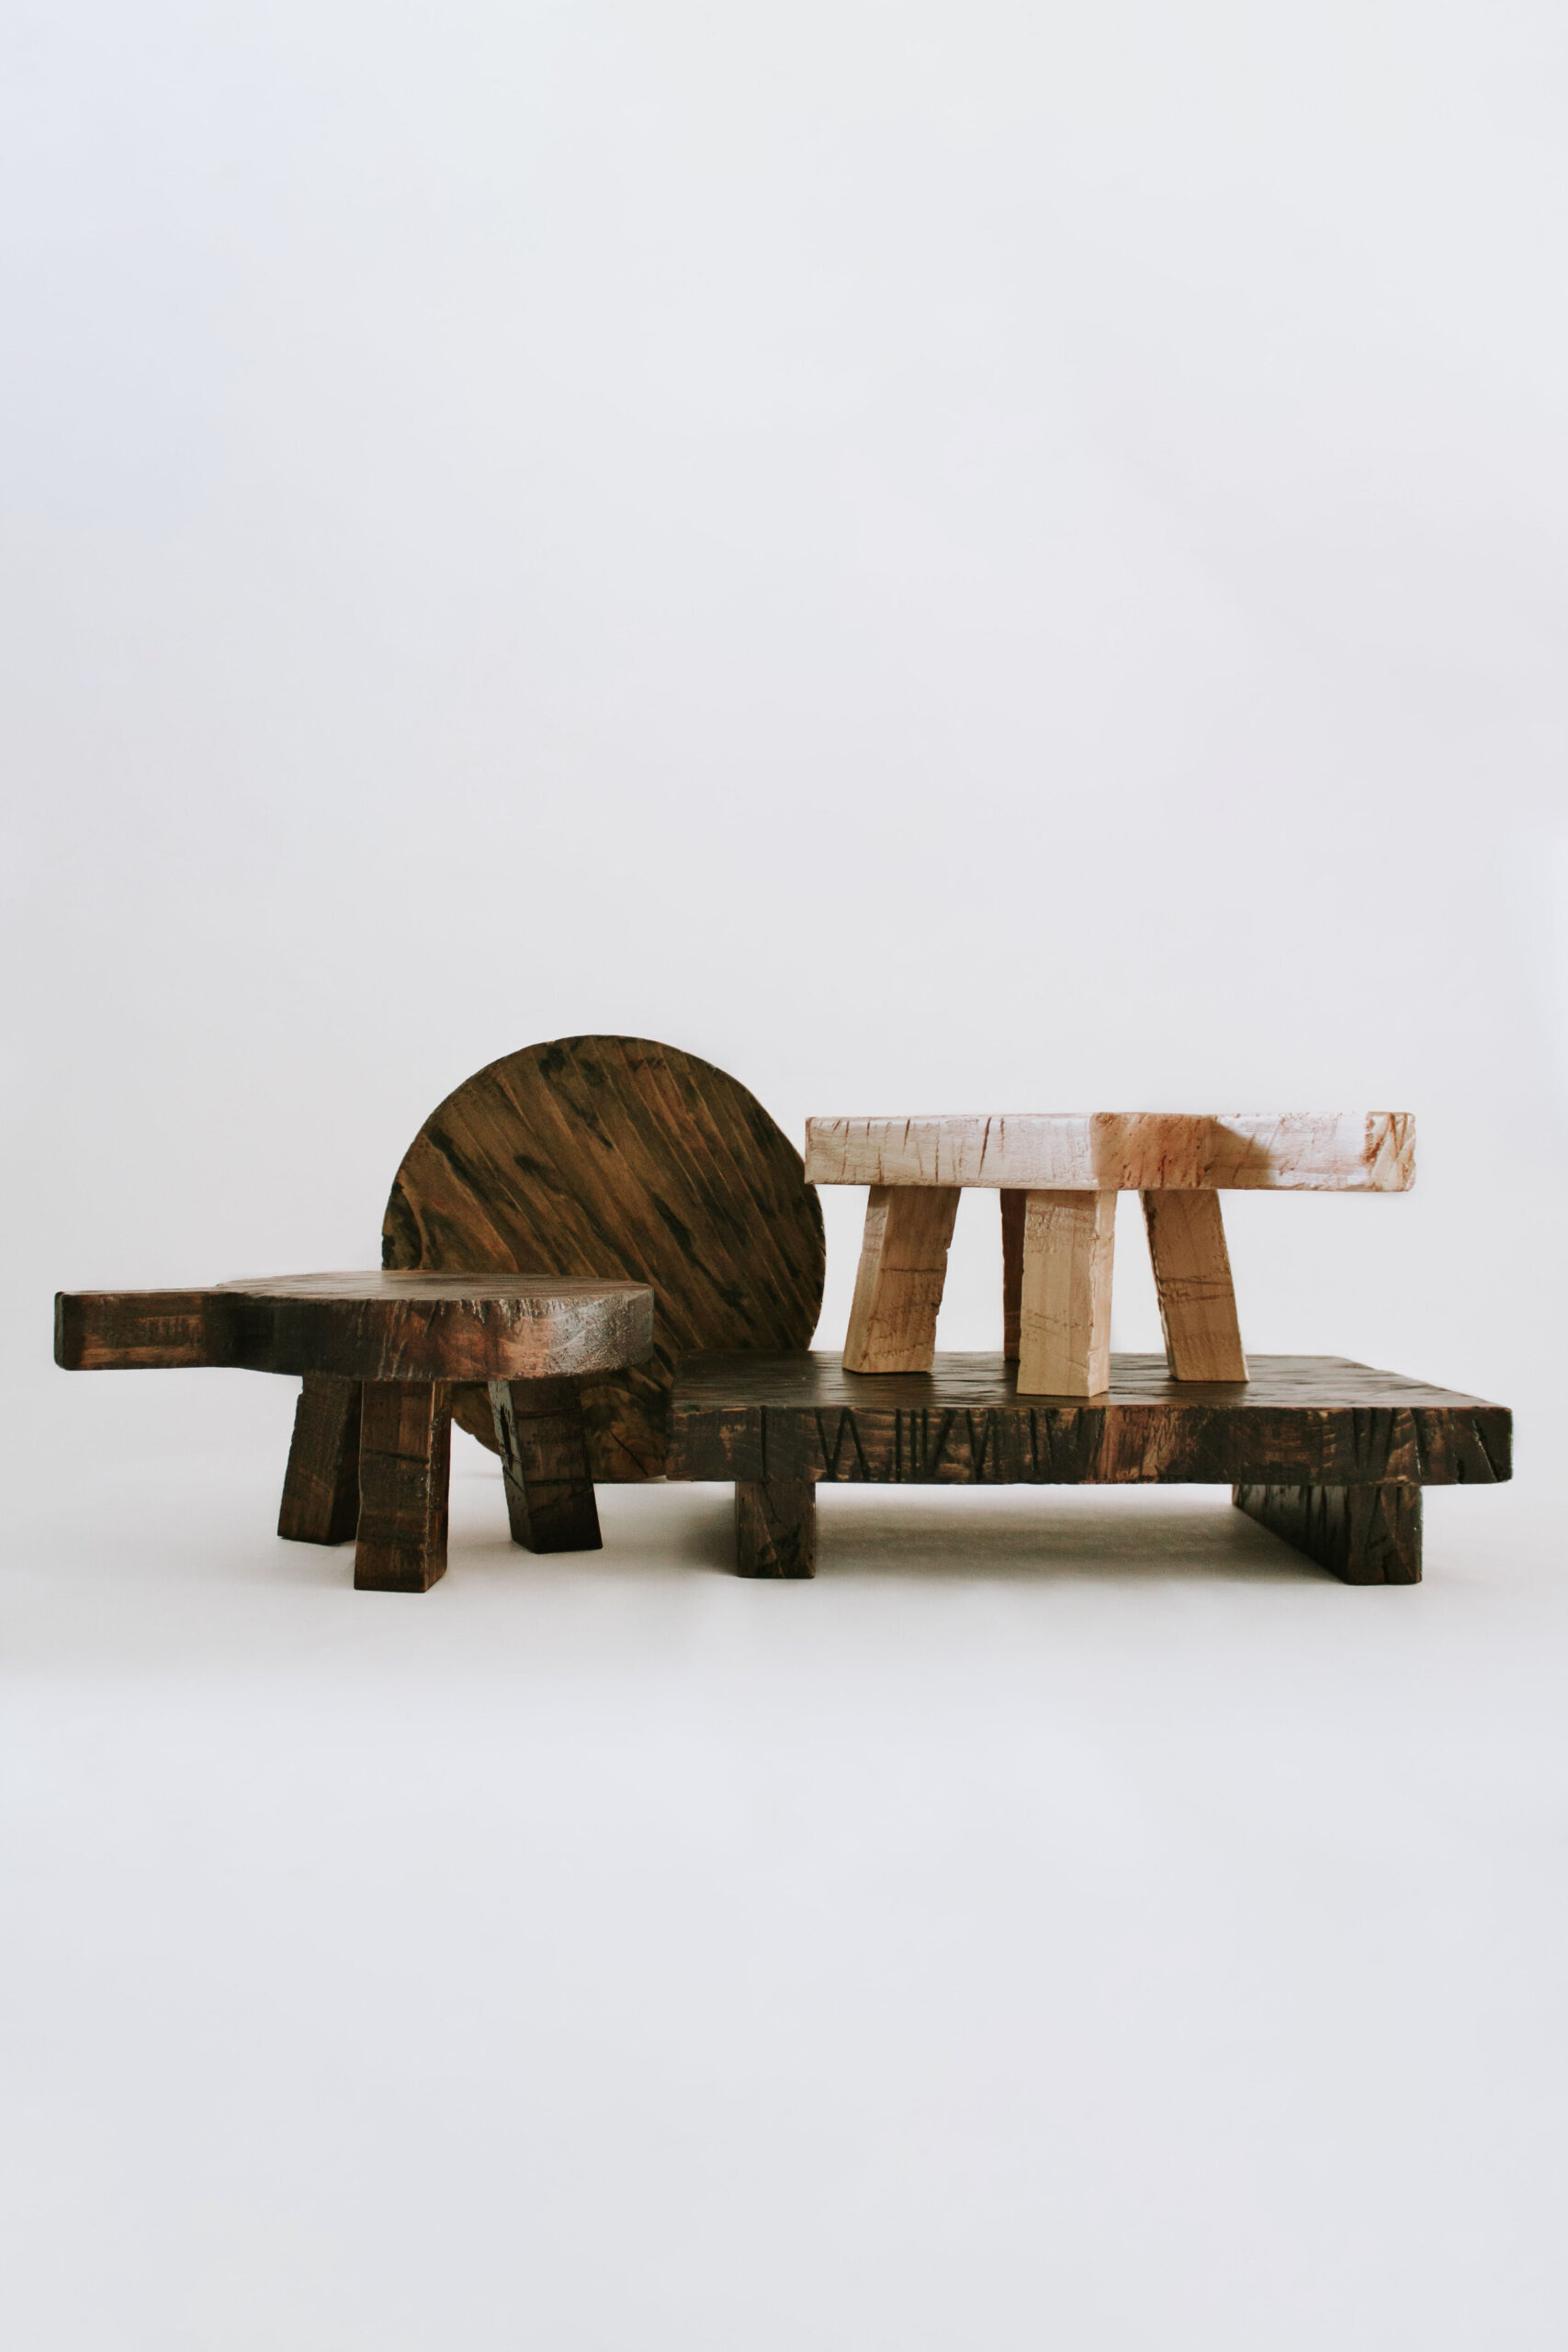
I’ve been seeing old rustic riser trays in so many designer’s homes for months now and I love them! They’re the perfect elevated element and “antique” addition for the kitchen, table top, open shelving…whatever! I contemplated buying a couple for myself but then I had a thought… “I could totally just make these myself!”
So for less than $20 and a few hours in the garage, I made 4 pedestal trays in 4 different shapes cause why not!?
Here’s how I made mine –
MATERIALS NEEDED:
-
Pine Lumber in the size of your choice (mine was 2”x12”x8’)
-
2”x2” Furring Strip in the length of your choice (Optional)
-
Any objects that will “weather” the wood
-
Stain (Optional) – I used Dark Walnut, Provincial, and Puritan Pine
TOOLS NEEDED:
STEP 1 // Cut out the shape of your trays
I drew 4 different shapes onto my 2x12x8 wood with a pencil. I traced a clock and bowl to get perfect circles and I eyeballed the other shapes. Then I used a scroll saw to cut out the shapes. If you don’t have a scroll saw, a jigsaw should do the job too! I didn’t worry about cutting along the lines too perfectly because I knew I was going for a very raw, weathered look.
STEP 2 // Cut the legs
This step is fairly simple! Figure out how tall you want your risers and cut your furring strip (or in my case, the leftover wood from my 2×12) to create the legs. I tried a few different leg styles including trestle style (2 long boards on either end) and slightly angled out legs.
I decided on 2” tall legs for two of my trays and 4” tall legs for the other two trays that had handles. I also wanted the legs on the paddle trays to angle out slightly so I cut the legs at a 10° angle on each end. (As shown below.)
STEP 3 // Rough em up!
This is where your creativity comes into play. For a weathered look, rough up the wood using whatever objects you have lying around. I used my jigsaw to put “cuts” along the edges, a hammer, a wire wheel brush that attached to my drill (this created somewhat of a rippled effect in the wood) , and a wood file to create a naturally worn look. Once you’re done, give it all a light sanding with your power sander and 220 grit sandpaper.
STEP 4 // Stain (Optional)
If you prefer a little color on your wood, grab an old rag or a t-shirt and wipe on a layer or two of stain. I used Provincial, Puritan Pine, and Dark Walnut for 3 of my trays and I left the 4th tray natural. (NOTE: with the wood so roughed up, the stain will go on pretty dark!)
STEP 6 // Apply a top coat
To preserve the wood and to make them easier to dust, I applied two coats of Polycrylic with a 2” paint brush. The matte sheen gave it a smoother finish without taking away that raw unfinished look.
STEP 5 // Attach the legs
Figure out the placement of your legs and mark them on the bottom of your trays. For the legs that I cut at an angle, I used a Kreg jig to drill a hole on the inside of my legs. Then I drilled another small pilot hole with a 5/64” drill bit into the bottom of the trays where the screw would go into. I added a dab of wood glue and screwed each leg on tight!
For the short 2” legs that were not cut at an angle, I attached them with screws through the bottom of the legs. To do this I flipped the legs over so the bottom sides faced up and I drilled a 3/8” hole half way through the wood. Then with my smaller 5/64” drill bit, I drilled another hole the rest of the way through the wood. Then I marked where the legs sat on the tray and drilled a small pilot hole with my 5/64” drill bit into the bottom of the trays where my screws would go.
I put a dab of wood glue on the end of each leg and drilled a screw into the legs until they were all tight.
And that’s it! Style them and scatter them throughout your home! If you give this fun and easy DIY a try, I’d love to see your riser trays! Tag me on instagram @nadine_stay to show off your work!
Where behind the scenes, exclusive advice, and candid conversations are sent straight to your inbox every week.


