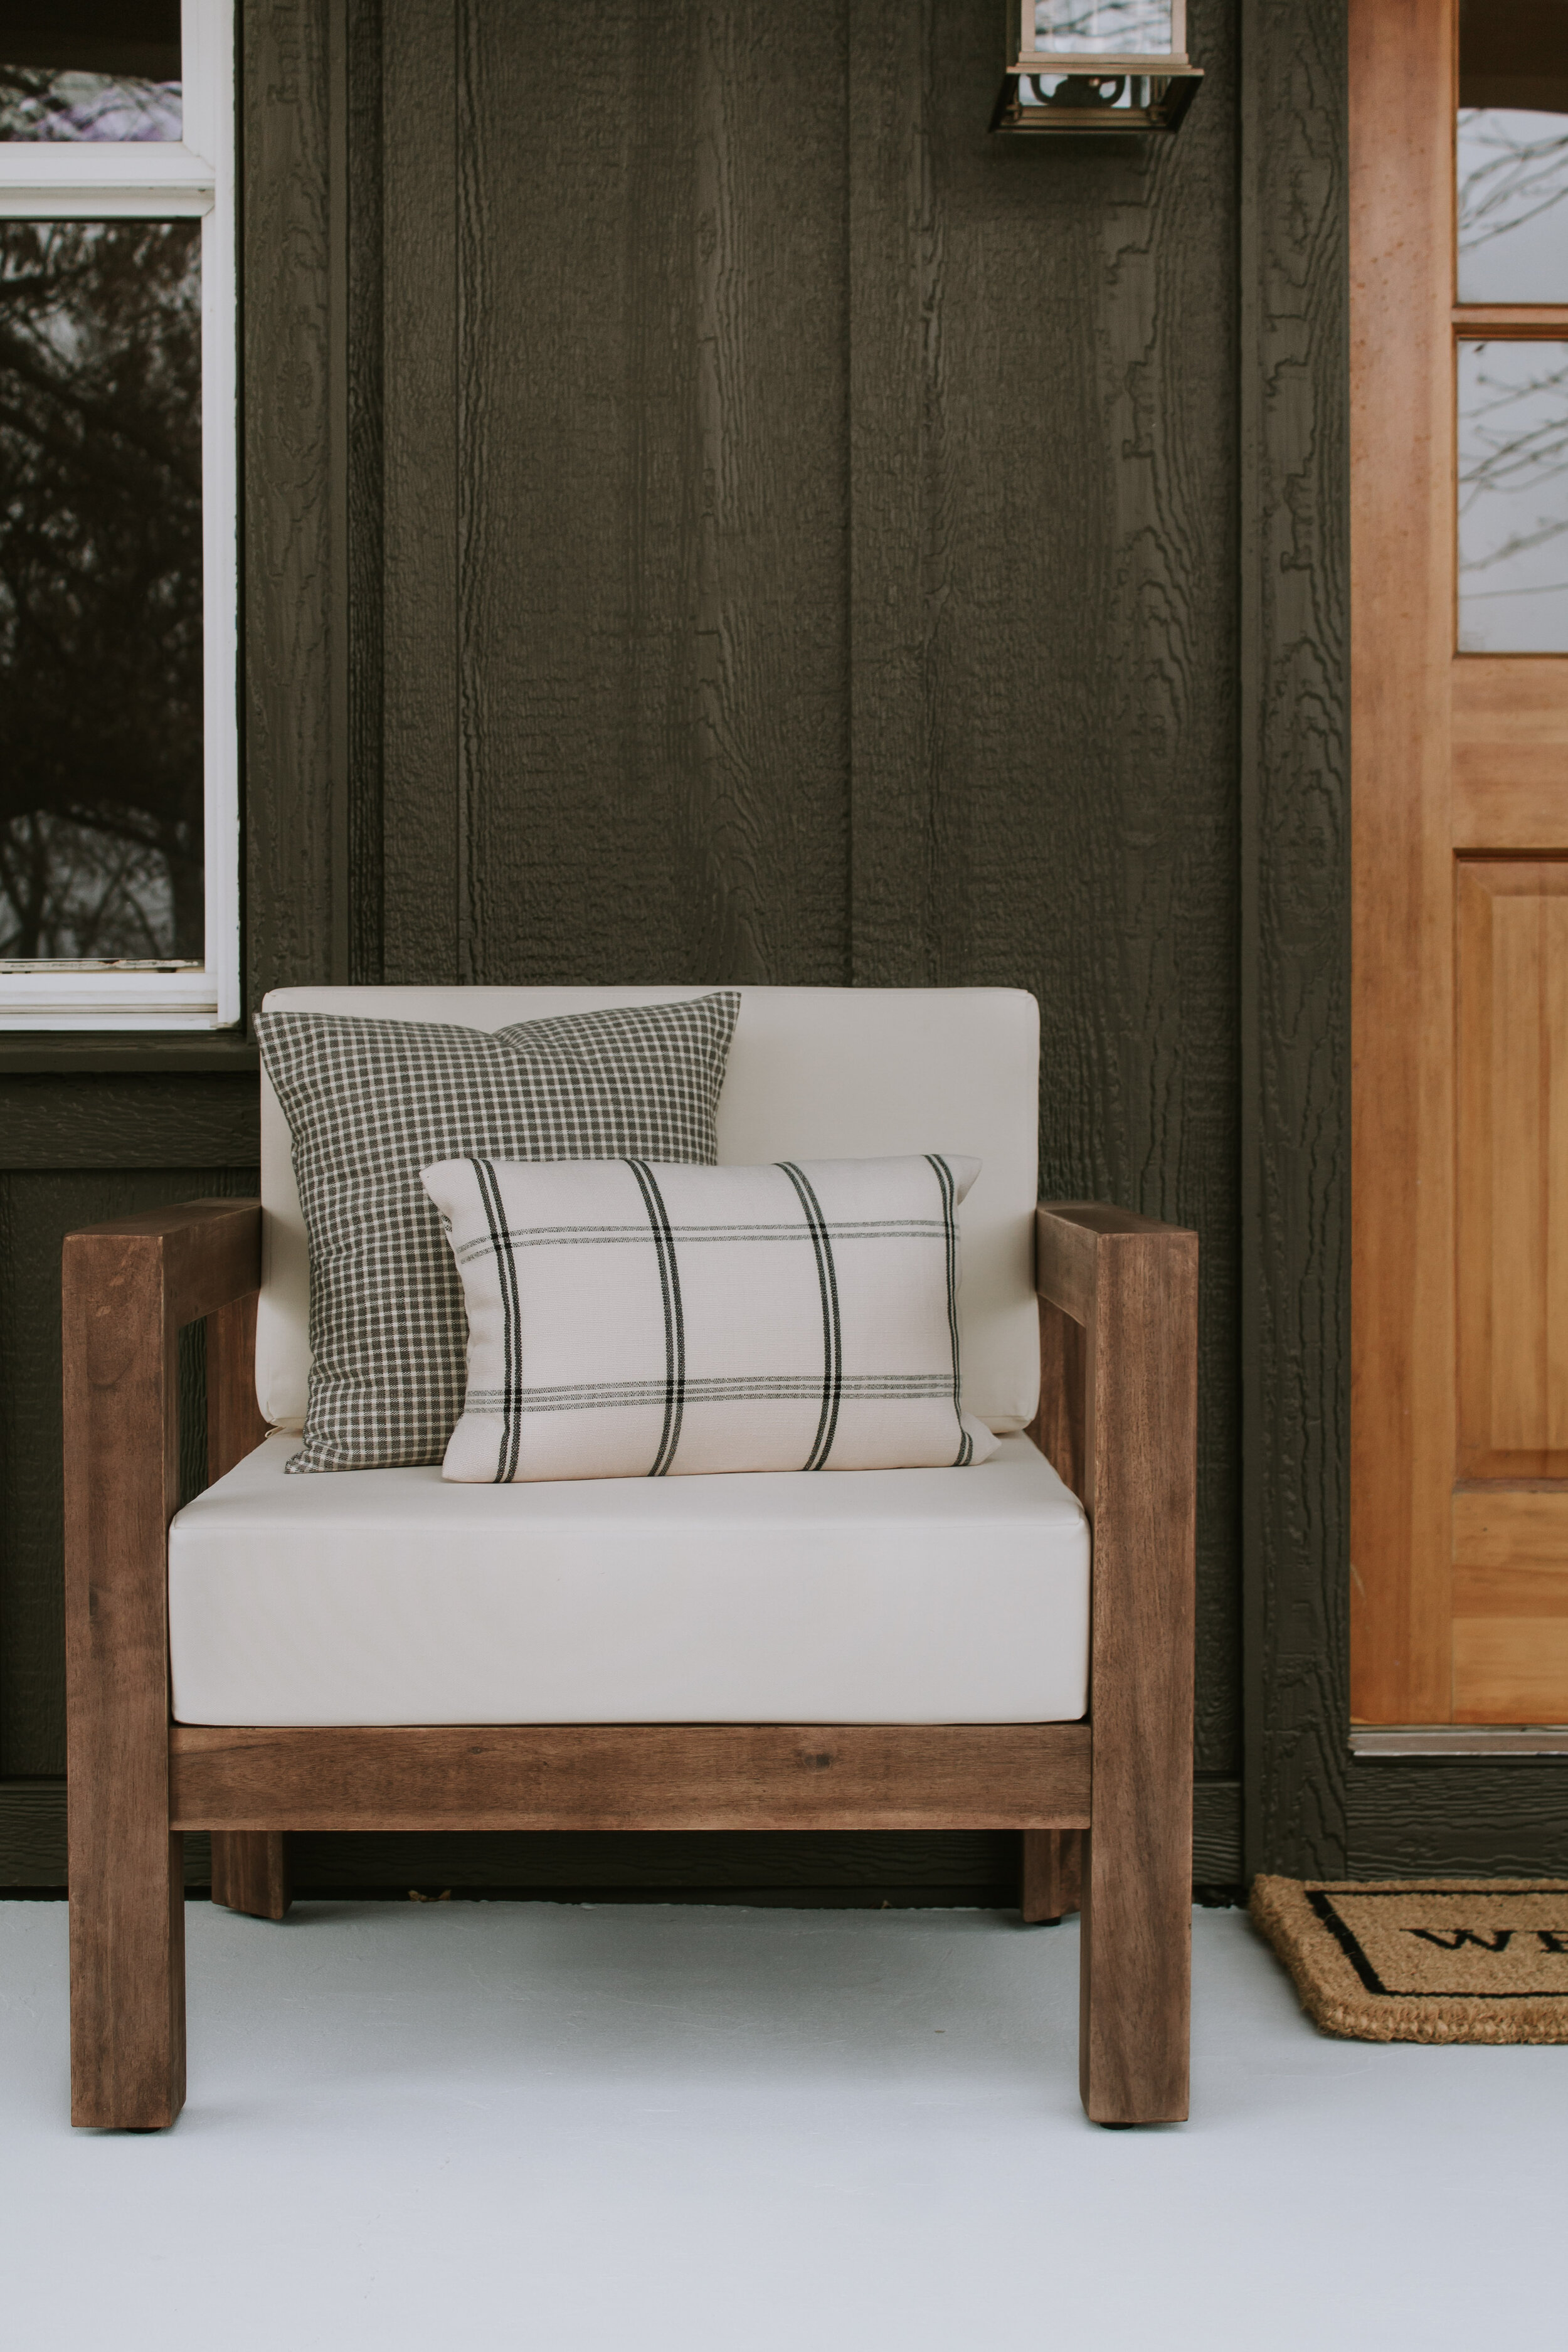
Our exterior renovation is quickly coming to an end and we’re wrapping up a few small projects before winter…like installing cedar shakes and styling our porch. Yay! After finding the perfect chairs for our front porch, I needed a few outdoor pillows to finish the look but dang…outdoor pillows are either super outdated or super expensive!
“Ok, fine. I’ll make my own indoor/outdoor pillow covers!”
Pillows are one of the easiest, quickest, and actually quite addictive projects for a DIYer. I’ll show you how I made mine!
MATERIALS NEEDED:
-
Fabric of your choice with a tight weave
-
I chose this windowpane fabric and this checkered fabric
-
Bonus points for picking outdoor fabric. This outdoor ticking stripe is pretty!
-
-
Scissors
-
Thread that matches your fabric
-
Sewing machine (preferably) or needle and thread
1 // MEASURE + CUT
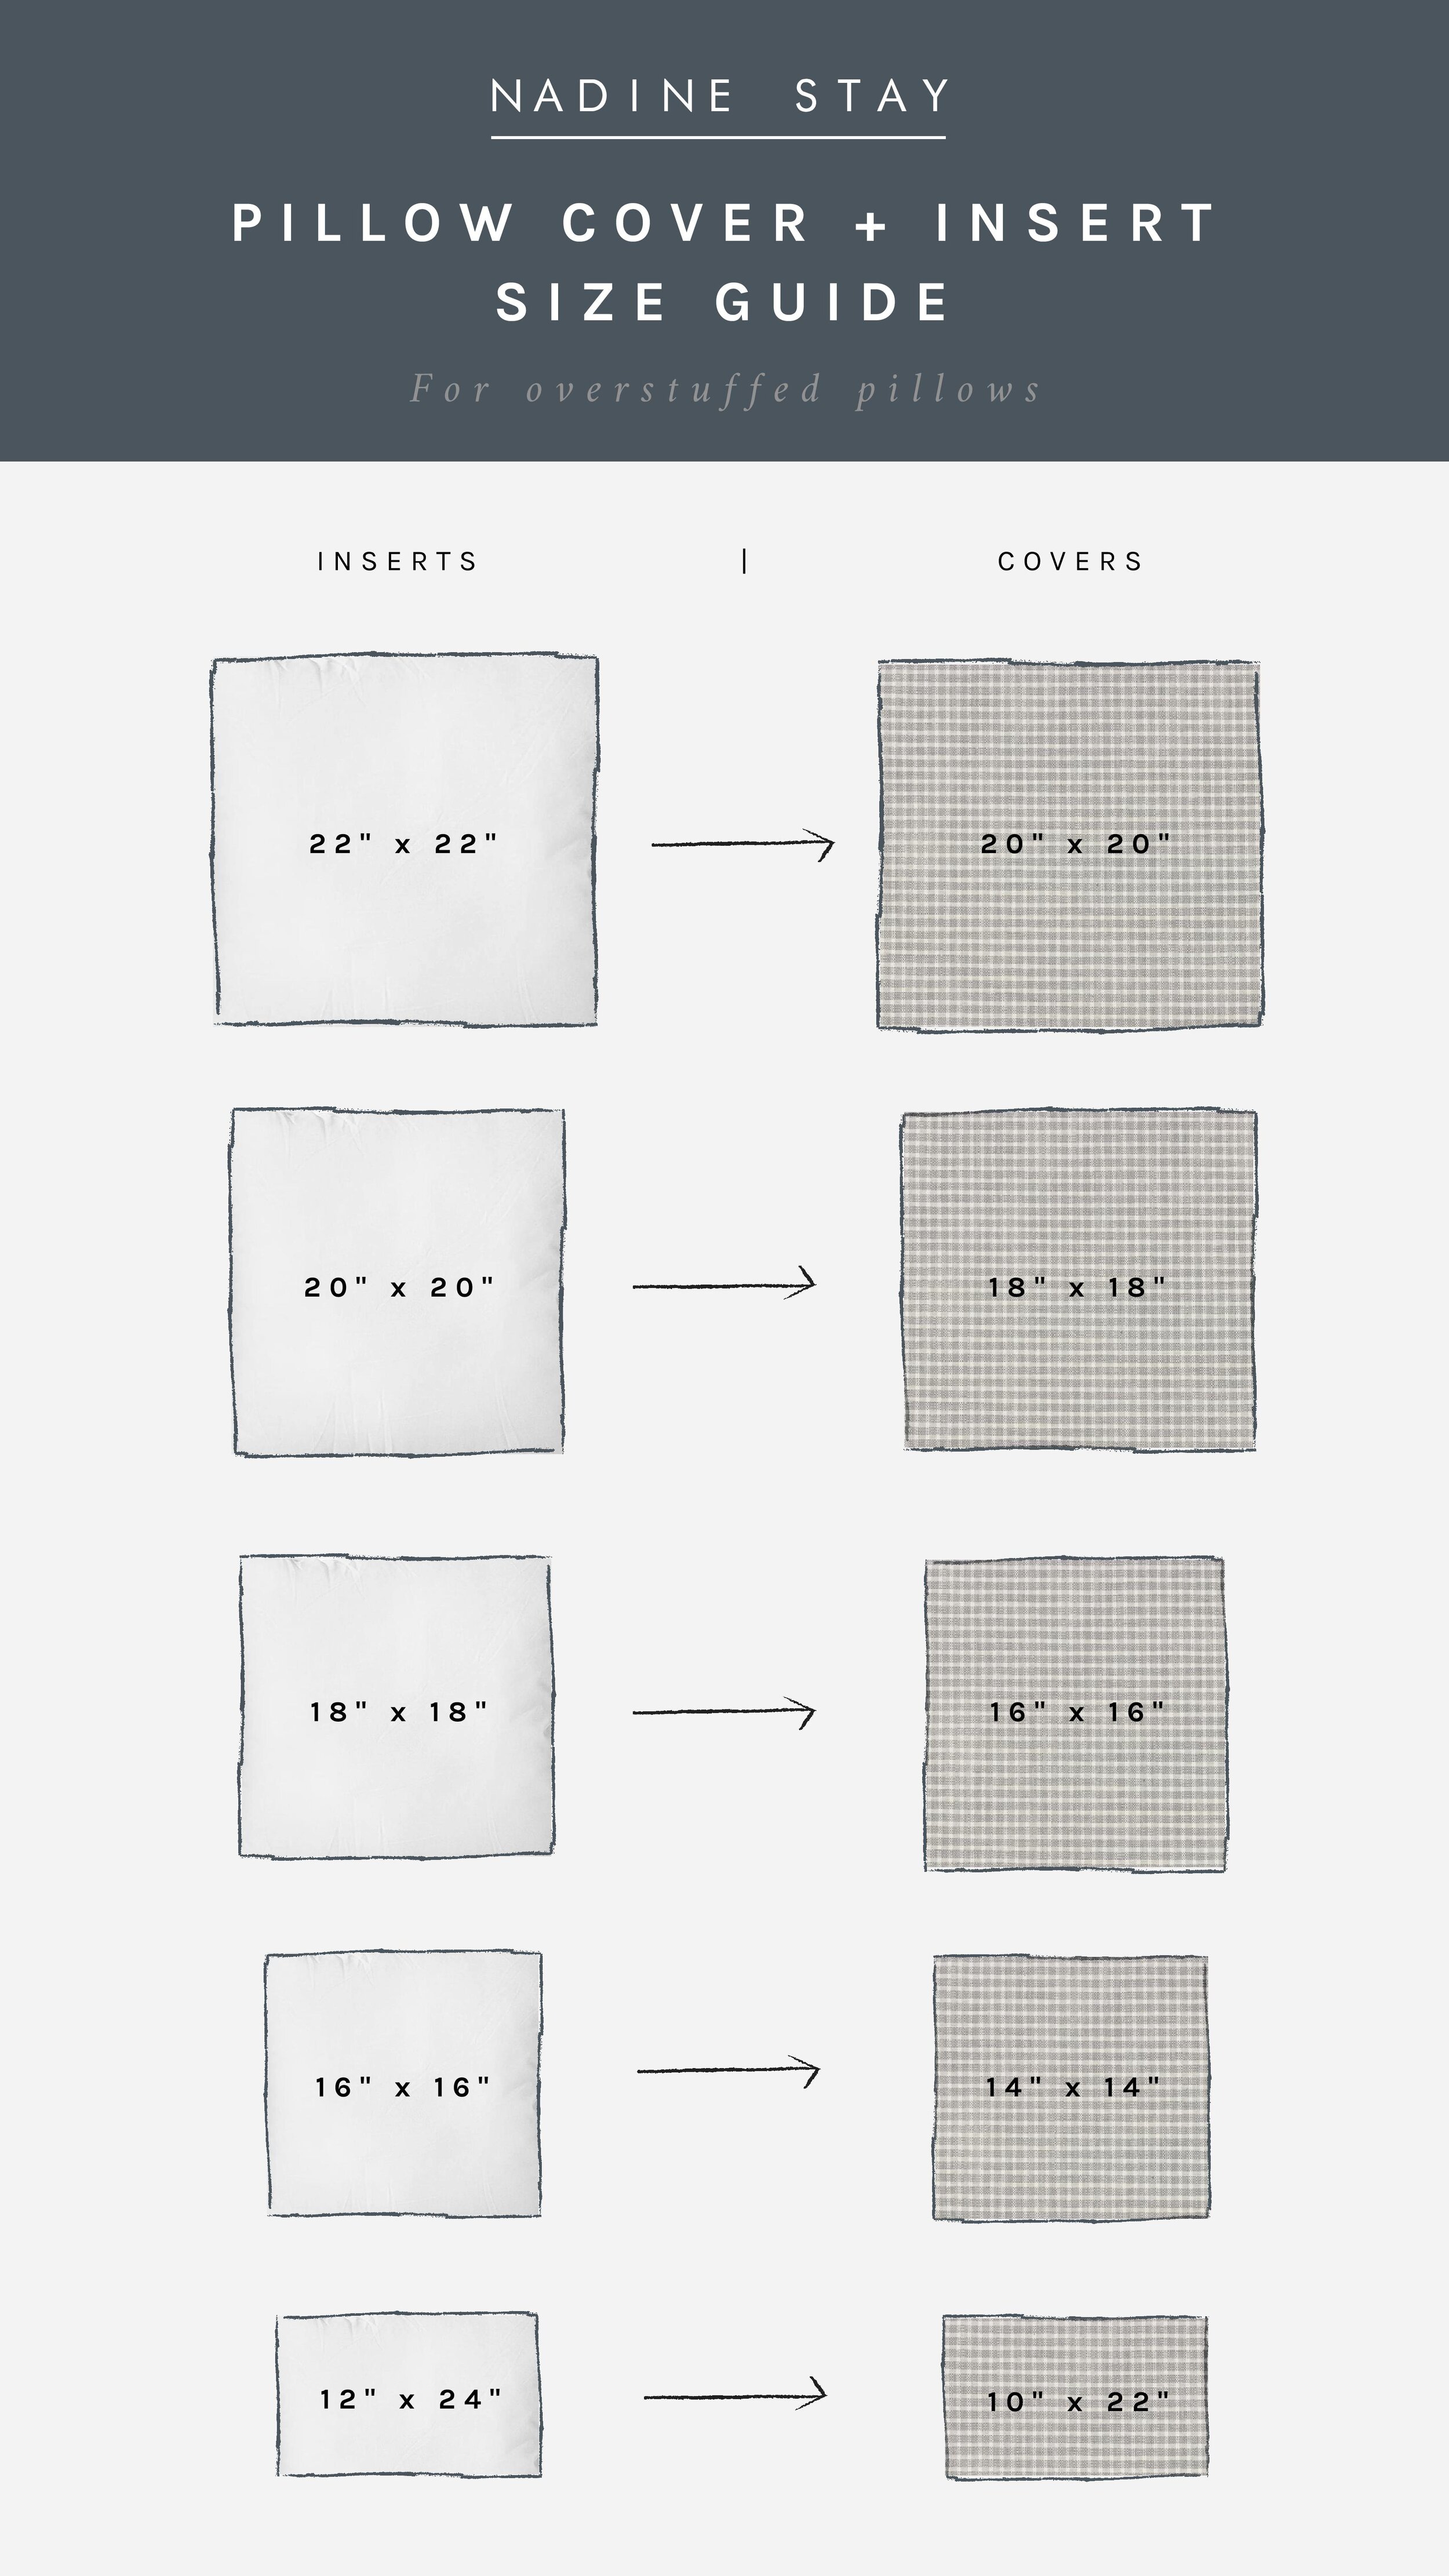
To start, I measured the size of my pillow inserts. I like an overstuffed pillow and to achieve this you generally want pillow inserts that are around 2” bigger than the pillow covers. So depending on the size of your pillow inserts, the pairings would be –
I made both a lumbar and square pillow cover. For simplicity sake, today’s tutorial will just show how I made my square pillow covers, but the same method applies to all sizes and shapes!
My inserts are 18”x18” wide so I’ll be making 16” pillow covers with a flap on the back to easily remove the cover when necessary. To achieve this, I cut one piece of fabric at 38” long x 18” wide.
2 // HEM THE ENDS
We’re creating a flap on the back so we’ll need to hem the two exposed edges. With the fabric facing down, grab one of the short ends and fold it over twice at about a 1/2” wide. Sew a line across and repeat on the other side.
3 // FOLD + SEW
Now with the fabric facing up (right side up), fold one end up about 8” and fold the other end down around 12” so it overlaps with the fold below. Adjust slightly if necessary so your square is 18” wide by 16” tall. Your fabric should be inside out at this point.

Pin the fabric together if necessary and sew the two sides with raw edges. Your sew lines should be 1” in from each edge.
Once sewn, flip the pillow cover right side out!
4 // STUFF EM!
For indoor pillows, I like these pillow inserts. For outdoor pillows, I’m using these pillow inserts.
5 // SPRAY SCOTCH GUARD (FOR OUTDOOR PILLOWS)
If you’re using your pillows indoors, you done! If you want to use them outdoors, I recommend spraying on a coat of Scotch Guard.
Technically if you used outdoor fabric this step isn’t necessary but it certainly doesn’t hurt. If you’re using indoor fabric like I did, a rain and sun protection is necessary to extend the life of the pillow covers. I chose this Scotch Guard since it dries clear, it doesn’t make the fabric stiff, it helps repel water, and it prevents the color from fading from the sun.
And that’s it! Easiest DIY ever right!? If you give this project a try, I’d love to see your pillow covers. Tag me on Instagram @nadine_stay.
Sources:
Leave a Reply Cancel reply
DO YOU WANT
The Inside Scoop
Where behind the scenes, exclusive advice, and candid conversations are sent straight to your inbox every week.


I am having trouble following your instructions. If you are making a 16×16 pillow for an 18" insert why is the measurement 18×16?
Thank you! I made 3 today and it was super easy!
Amazing! They’re so quick to make aren’t they!?