How We Customized Our Standard Bifold Door To Look Like Double Doors (For Less Than $25!)
·

I planned on waiting to share the details on our closet door until I had shared a full bedroom reveal first, but my dresser dilemma is delaying a reveal so let’s talk about our closet doors now instead. More specifically, let’s chat about how we transformed our standard bifold door to look like double doors…for less than $25 might I add!
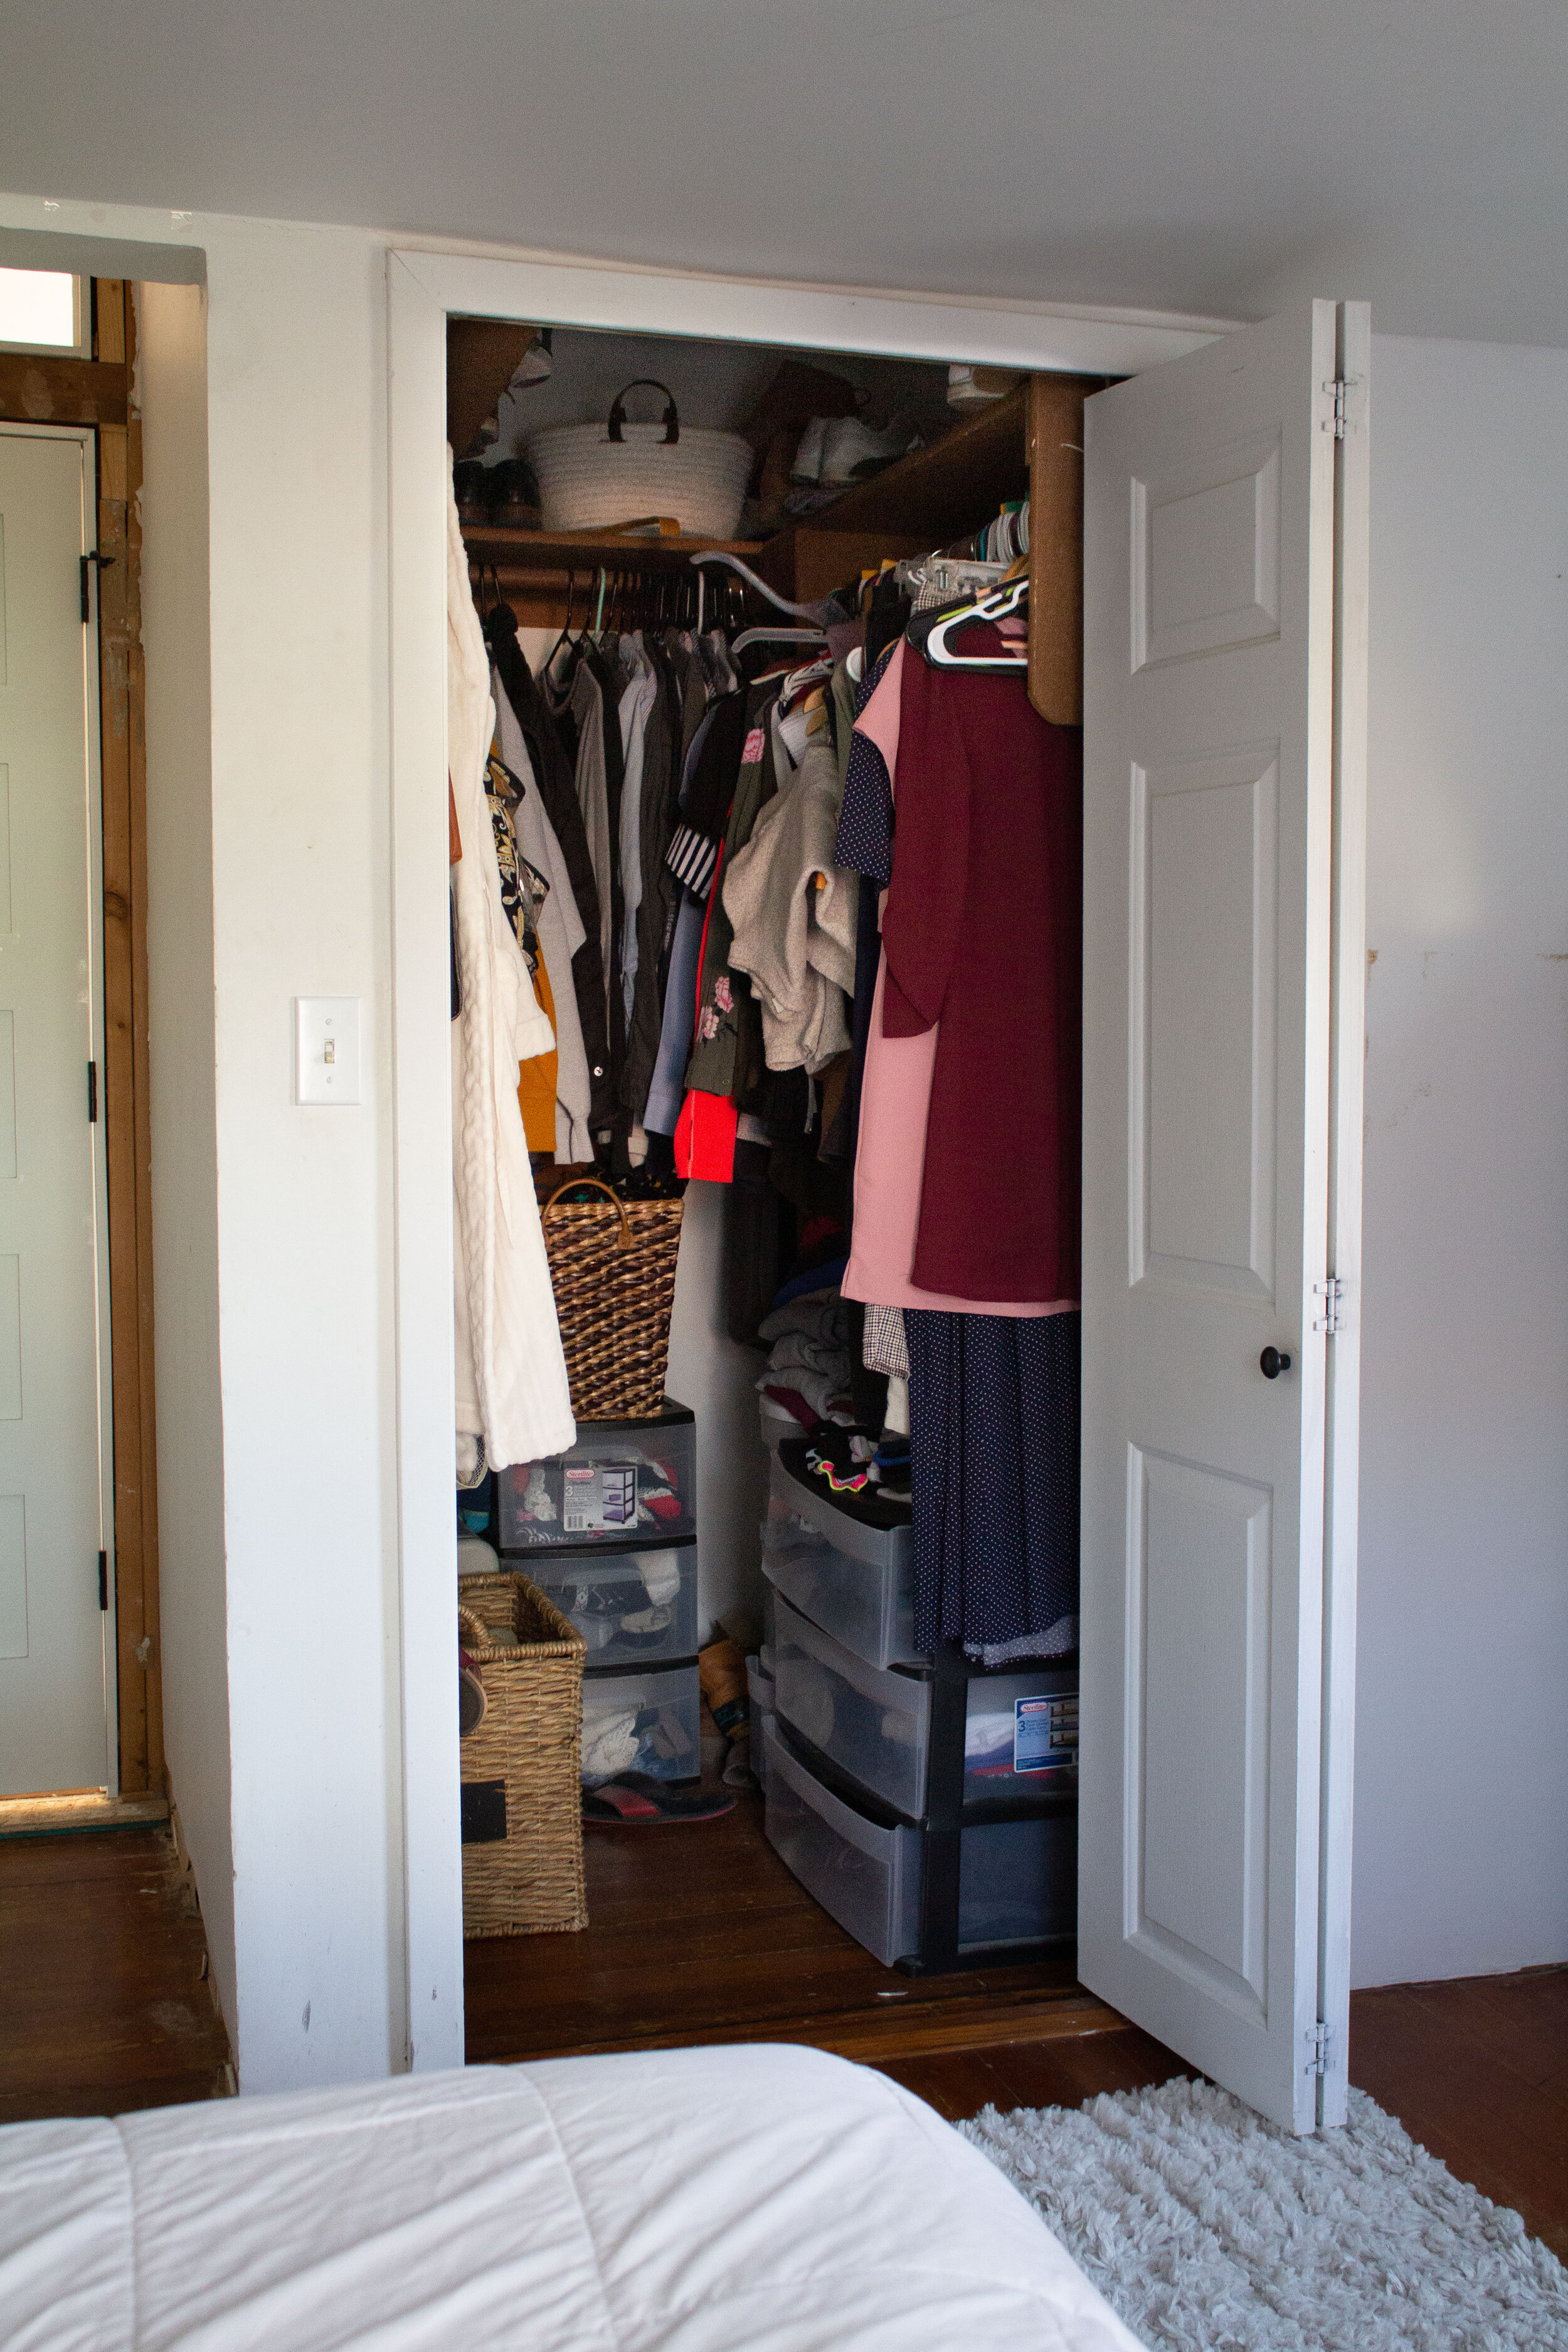
Originally our closet looked like this. ↑ Crowded and cluttered with a dated hollow core bifold door. Then we gave our closet a quick makeover last year with a much better flow. ↓
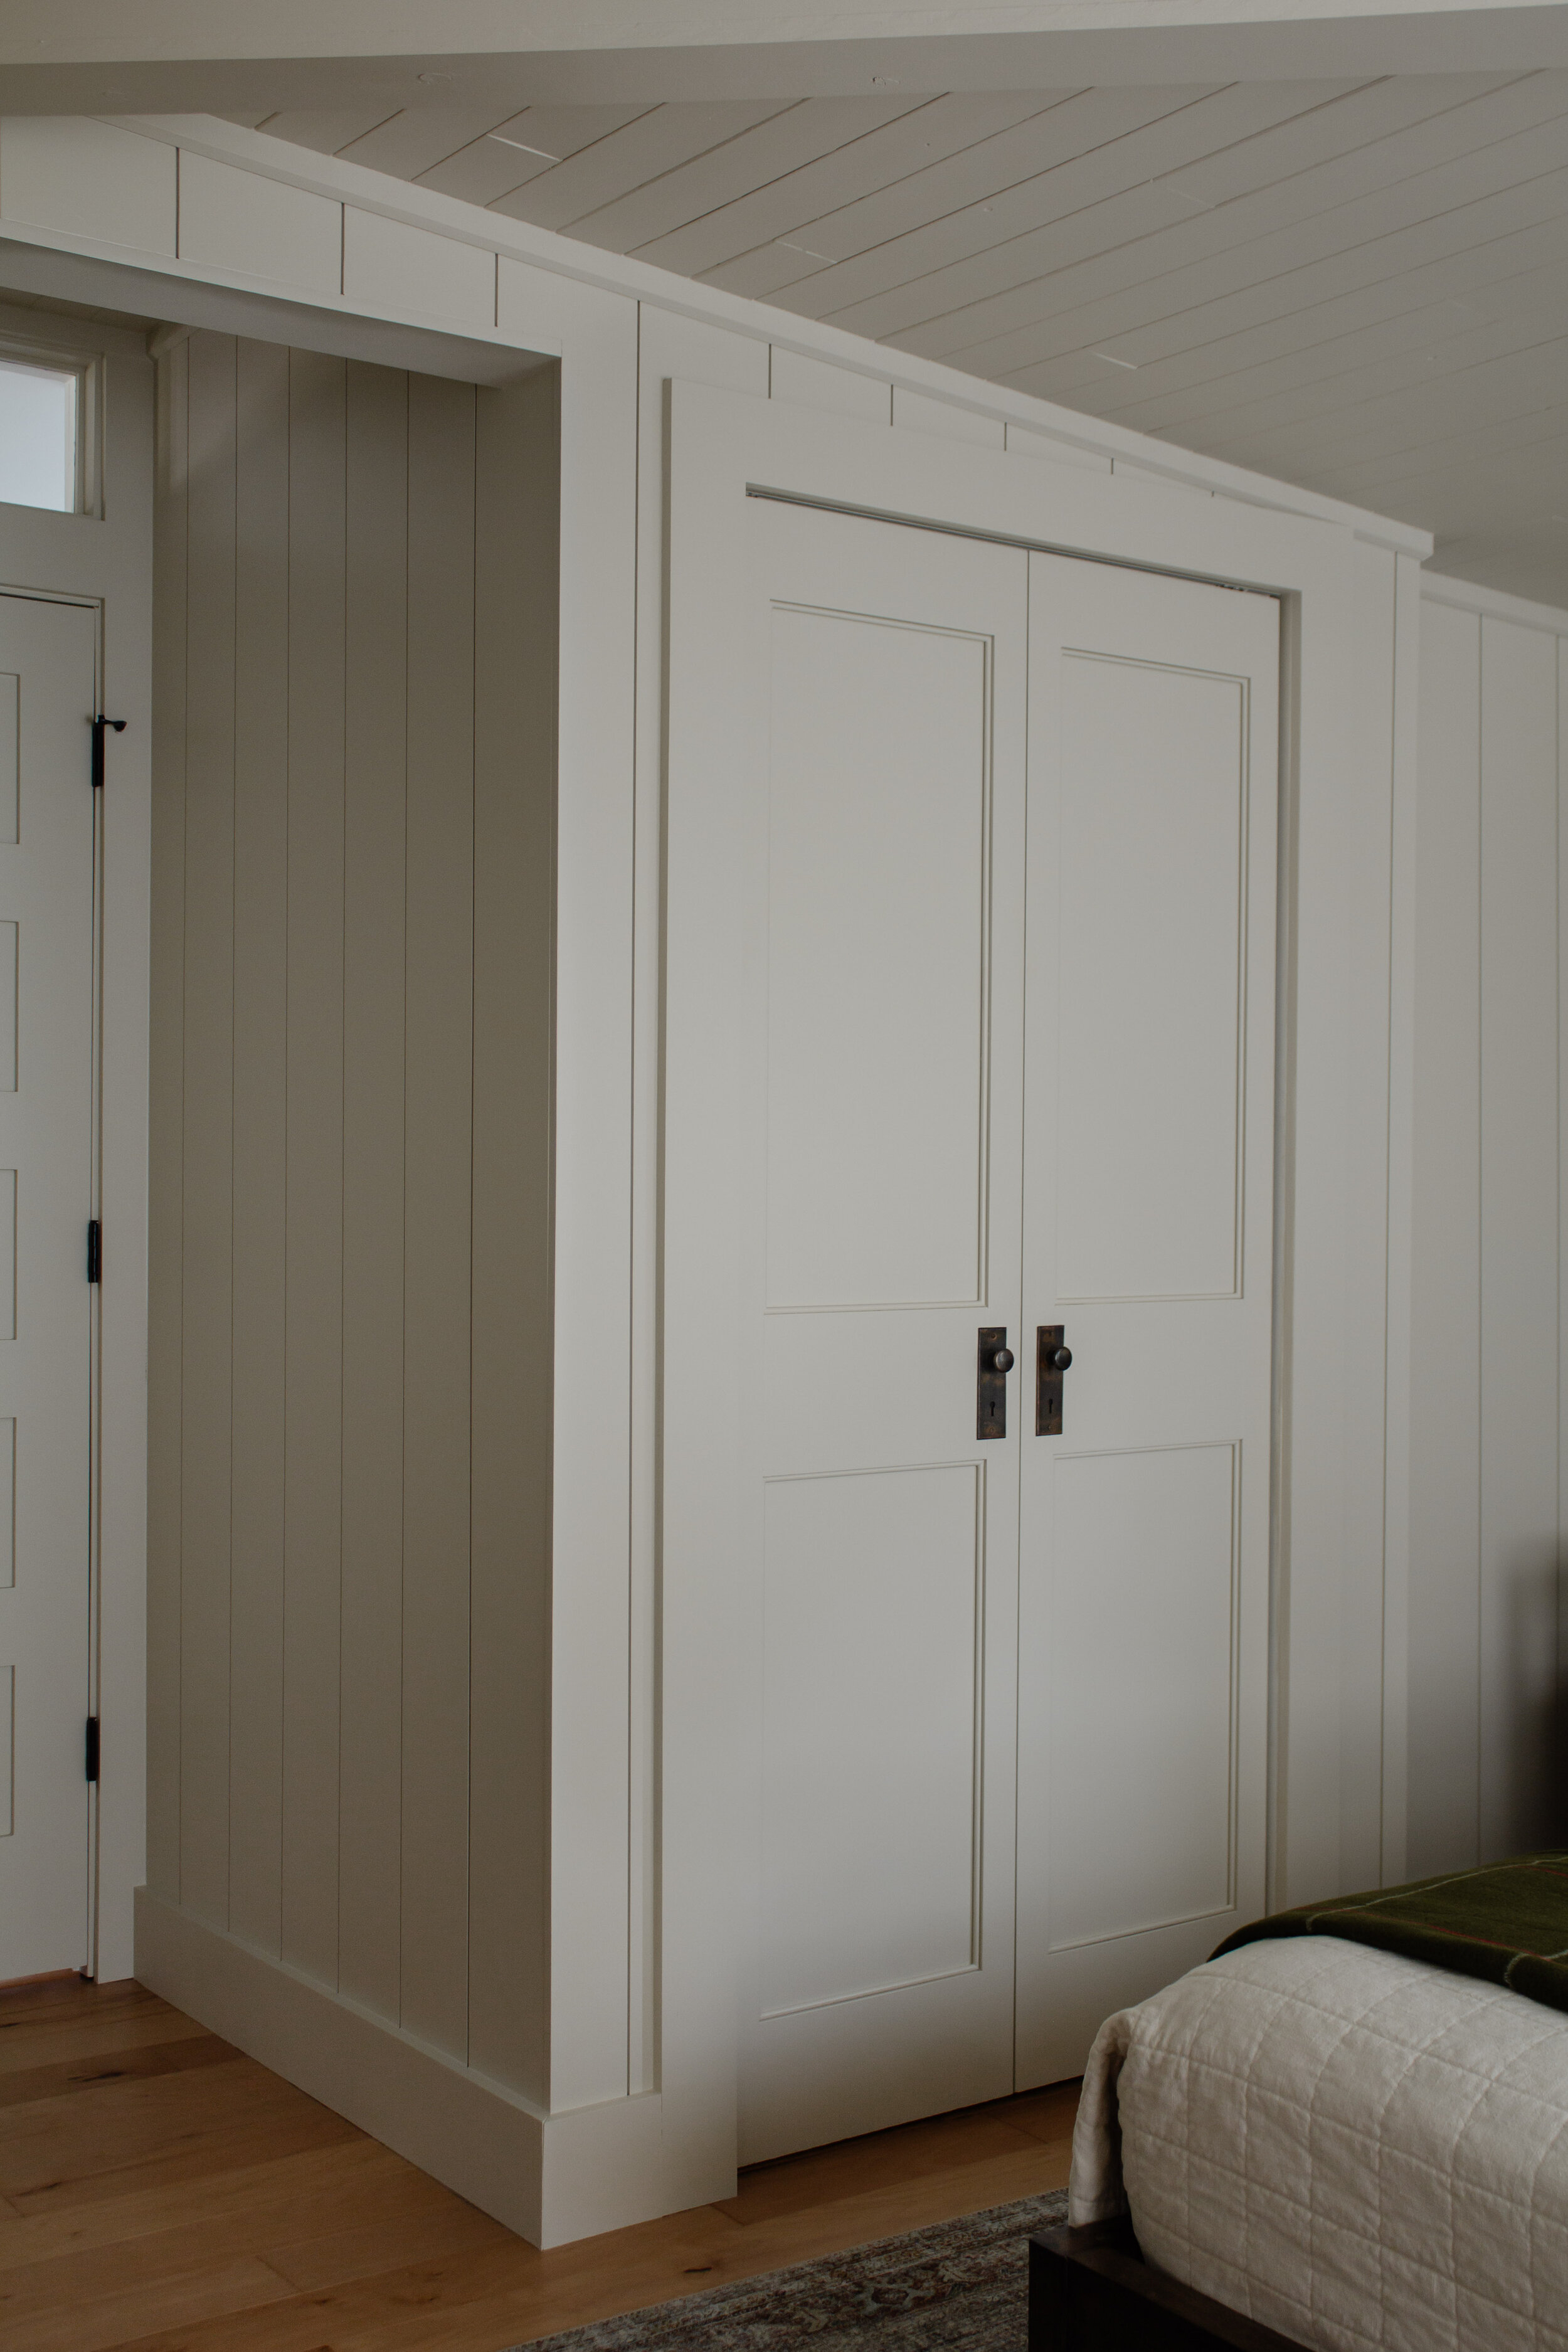
And this summer we completely overhauled our bedroom with a higher ceiling, planked walls, new floors, and yes…a new closet door.
SOURCES:

Our primary bedroom is small, I think you know that by now with all the videos I’ve been sharing on Instagram. So when we were looking at our options for a closet door…as much as I wanted a double door entrance like the stunning custom homes have, I knew we only had practical space for a bifold door.
So my mission became 1) to make a standard bifold door look high end and custom. And 2) to create the illusion of a double door (aka two doors that swing open from the center.)
We purchased this solid core, 1 panel bifold door and it’s a really great price! But after seeing it in the space, and browsing through my Instagram saves for inspiration, I knew it needed to be a 2 panel door. The one panel just wasn’t helping my illusion of making it look like 2 separate doors and 2 panel doors just feel more charming anyways.
Adding a piece of MDF at the height of our knobs was simple enough. We found MDF the same thickness as the border trim and glued them on with a couple brad nails in the corners to hold them in place.
But it still needed a little extra detail to feel like a custom door so I grabbed a bunch of 5/16” poplar dowels and added them along the inside border of all 4 panels. I tried cutting the 45° angles at each corner with my power saw but it was too powerful and just shattered the dowel so I ended up cutting each angle by hand with a hand saw. Since poplar wood is pretty soft, it wasn’t hard to cut through…just took some precision to get my angles perfect.
I wood filled and caulked all the nail holes/seams and primed the pieces I added so I was working with a solid base color.
And then paint! If you scroll back up a few photos, you’ll notice that the white primer on the door was making the walls look peachy so I knew that a white door would not work for this space. I chose to paint the doors the same color as the walls for some uniformity. (The color is custom mixed…click here for the color code.) And I used this sprayer for an incredibly smooth finish.
I like to think of hardware as the jewelry for the door and I found some antique hardware at a local shop in town…this is where the magic really happens! My biggest pet peeve with bifold doors is when there’s just one handle or knob on the door. It’s a dead giveaway that it’s a bifold door so I chose to attach two handles instead. THAT’S the key to making this look like 2 double doors.
I think we can officially say our closet transformations have come to an end and if feels good! Who knew something as simple as adding MDF, dowels, and antique hardware to that boring bifold door would make this big of an impact…and for less than $25!
Stay tuned, a full bedroom reveal is coming up as soon as I get the dresser and decor sorted out!
Leave a Reply Cancel reply
Where behind the scenes, exclusive advice, and candid conversations are sent straight to your inbox every week.


Where did you get the hard wear?
I found them at an antique store!
Hi love this transformation, just wondering how did you adhere the dowels..just glue or with nails?
Thank you! For this one I used nails and in another project I used wood glue and painters tape to hold them in place until the glue dried. So you can do either! I will say, nailing the dowels was a little harder because I had to get the angle of the nail perfect.
The first picture of the bifold doors is not what you used but purchase the one panel bi fold door so will this work with the original doors to get this result, I am thinking not right?
Hi Jeannie, Correct you would need a one or two panel bifold door to recreate this look exactly. But you can still add two knobs to any bifold door which does wonders in my opinion!
This is brilliant! Just discovered your blog and love this project. Do you think it would work on a closet with a wider opening? Or would it start to look too busy with two sets of “doors”?
I think that’d still work great! That’s my plan for our future laundry room closet!
Love it. Where are the handles/hardware from?
Thanks Amber! The knobs and backplates are antique!
This looks absolutely amazing!! I have a fairly wide closet with no doors, and would love to add some just like this :)I notice that most bifold doors have central hinges that show from the outside of the doors when they are closed… Did you do something to hide the hinge, or is a special type of hinge that isn’t visible?Thanks for the inspiration!!
Thank you so much Jaime! The standard bifold door we purchased already had hinges that are only visible from the inside when closed! But to make them even less visible when open, we painted them the same color as our door.
Hi, I love your closet makeover, can you tell me the inside dimensions please.
Hi Ally, our closet is roughly 43" wide by 53" deep!
That would work perfect in my small bedroom with a closet that looks like the same size as yours! Where did you buy the door panels? I wanted to try to avoid shopping at a Home Depot or Lowes because when I read the reviews of whatever I see, even the expensive ones, seems like many complain about the quality. I have tried searching the internet for where I can buy closet doors and seems like only Home Depot or Lowes comes up as a result. Ugh.
Hi Linda, We purchased ours from Menards and are very happy with the quality! I shared a direct link to the doors we purchased in the blog post above!
LOVE this! Question for you – does your bifold door require a track in the floor? Or does it operate just fine with one track above the doors?
Thank you!! The bifold door we purchased only has a track above and works great! There’s one small hook that attaches to the bottom corner to balance the door.
Hey Danica, this is a really really great idea. You are right, the 2 antique hardware pieces in the middle totally rock the illusion and are key. I also wanted to thank you for acknowledging the difficulty in fast design. It must be so hard as a blogger to feel that push to provide rapidly changing content in order to keep viewers’ attention. In an era of fast and convenient solutions, it’s no wonder that we latch on to fast design. The human brain loves the new and novel. Having something fresh and new is fun and exciting no matter what it is: decor, food, fashion etc. We can really get ourselves in trouble financially by frequently needing new or just rushing to fill space because the “undone” feels uncomfortable. I know when I’ve rushed, I’ve not been happy with the outcome. I’ve either had to make returns or worse, eat the cost. Slow design equates to a quality product that helps us stay within our value system. It really helps with designs that we are satisfied with for a very long time. It’s realistic, so I appreciate you for talking about it. It reminds me to be patient and let a room evolve. I don’t know how you translate that in the blog world, but I’ll be happy to watch the process. Thank you!!
I second that! 🙂 And you said it exactly right, "the undone feels uncomfortable" so I know it’ll take time to retrain our brains to get used to it.
wow!! So smart! Looks amazing!
Thank you! Best $25 I ever spent 🙂