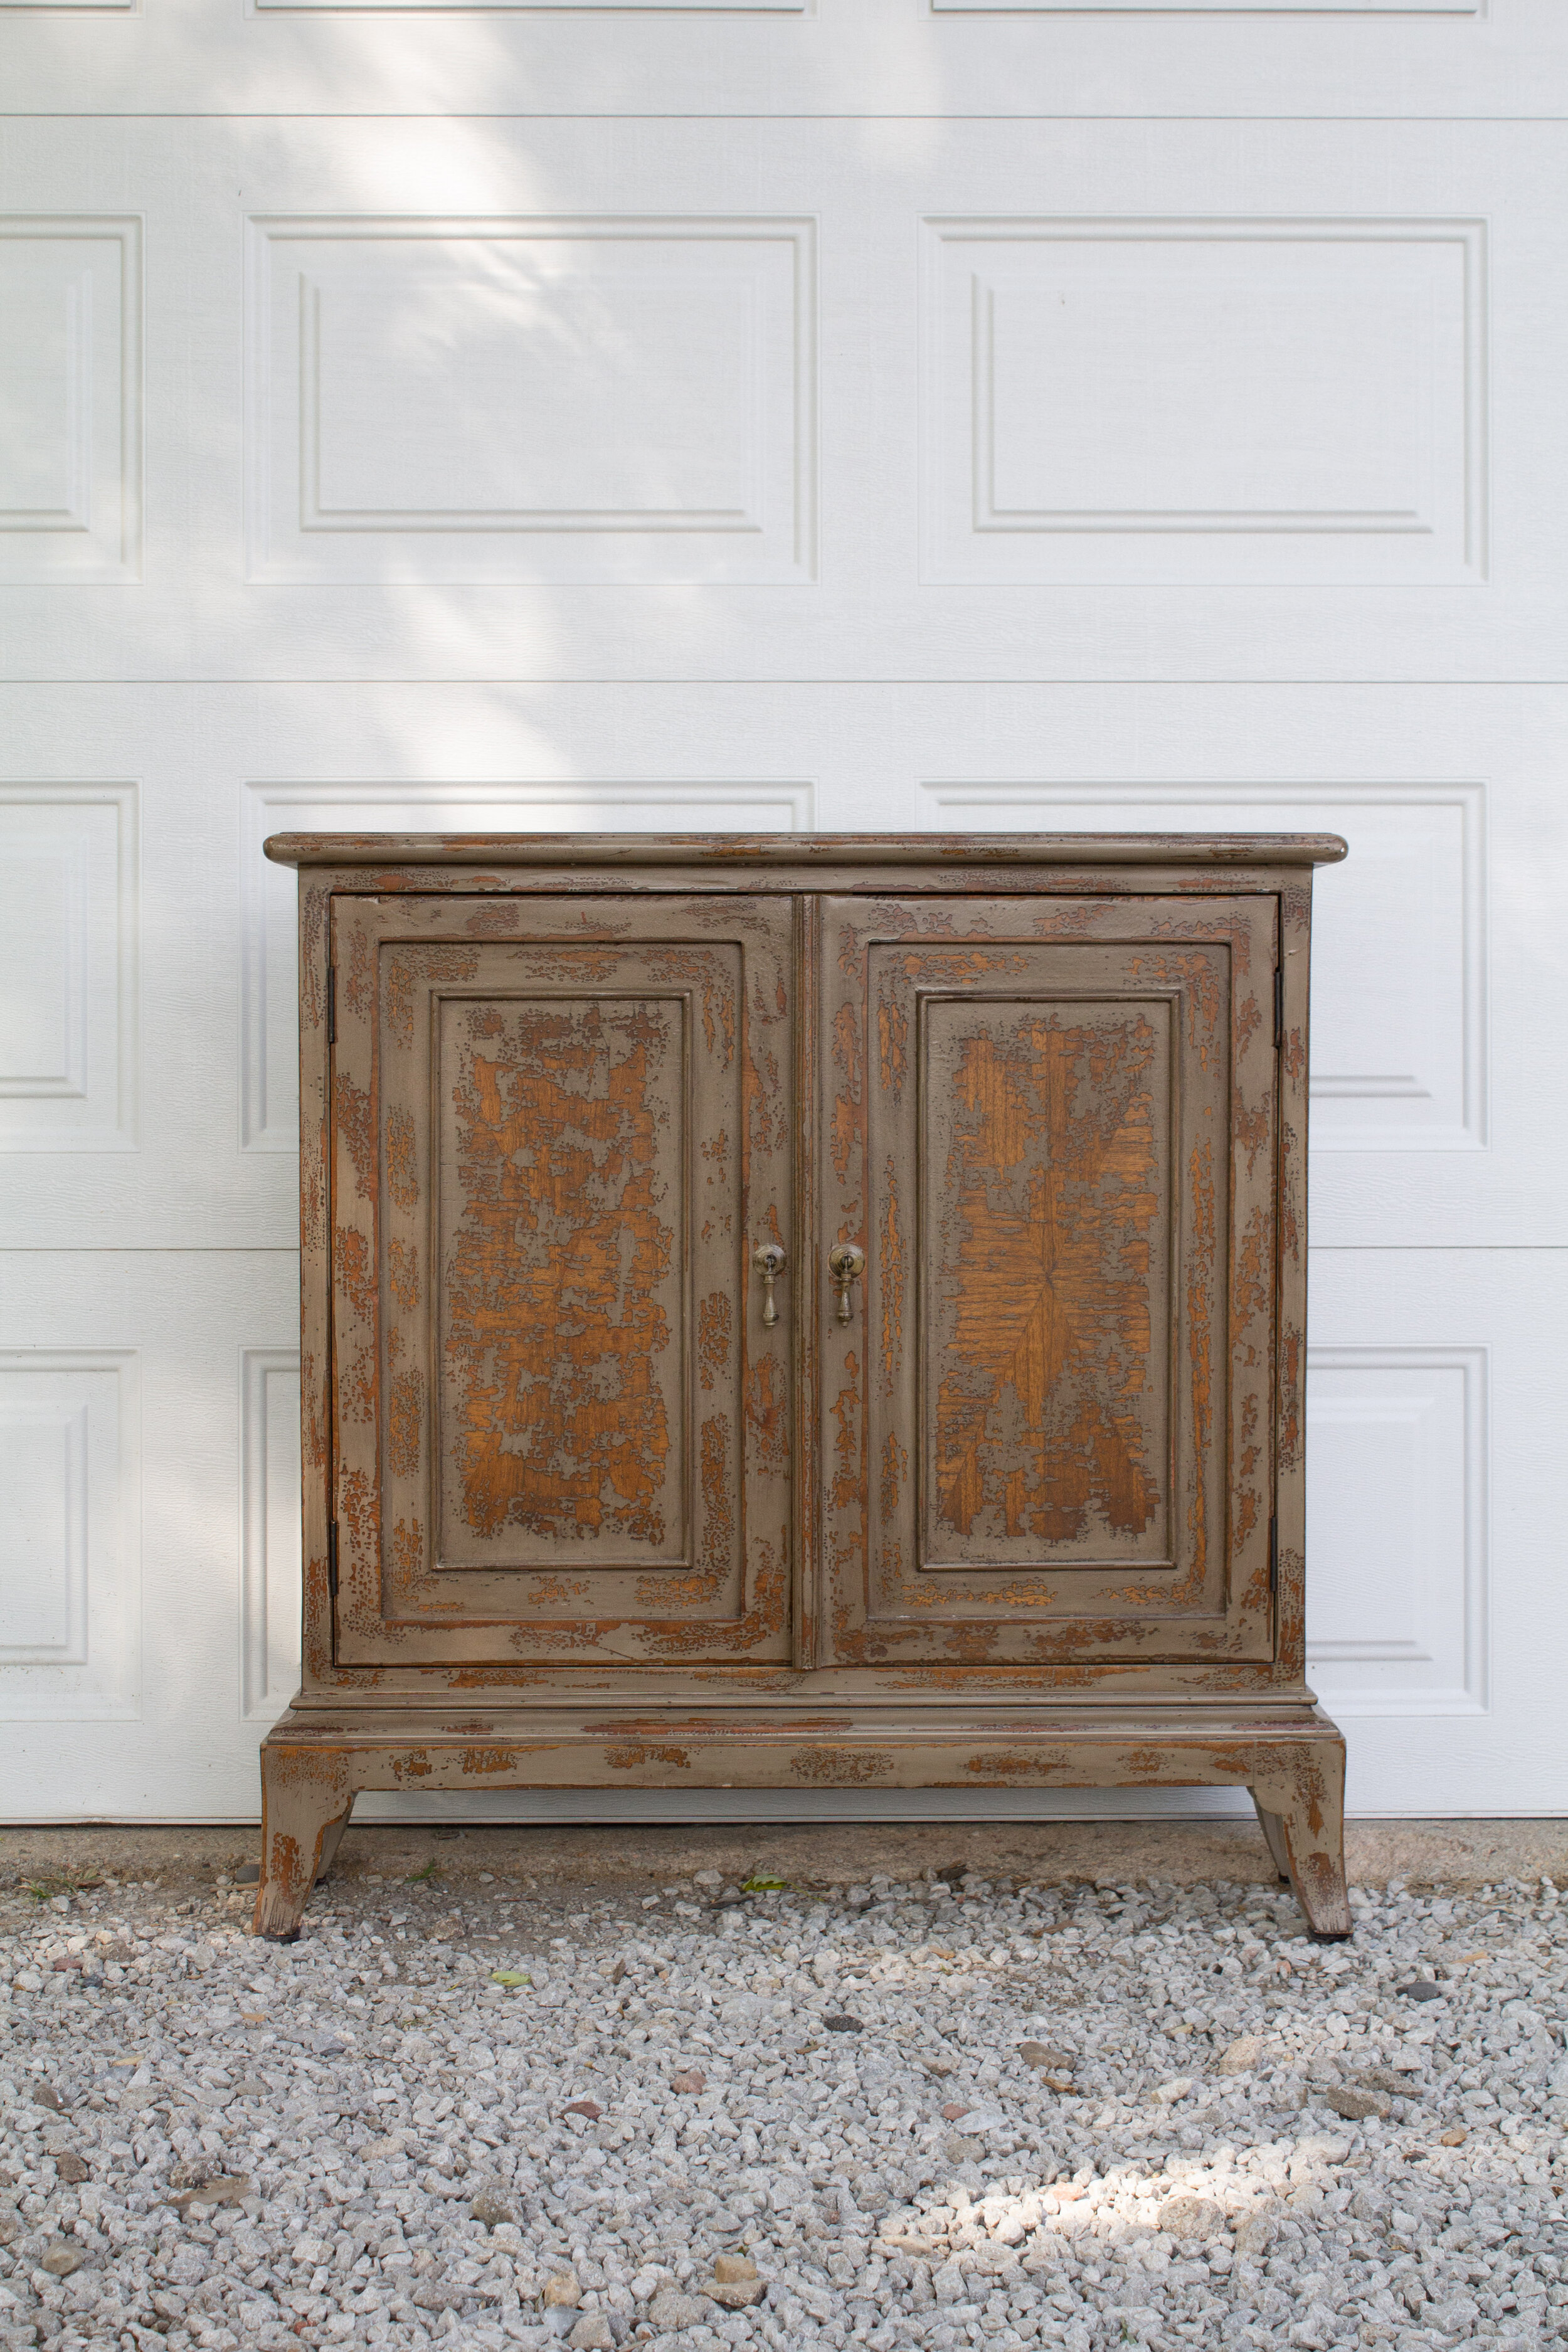
Before
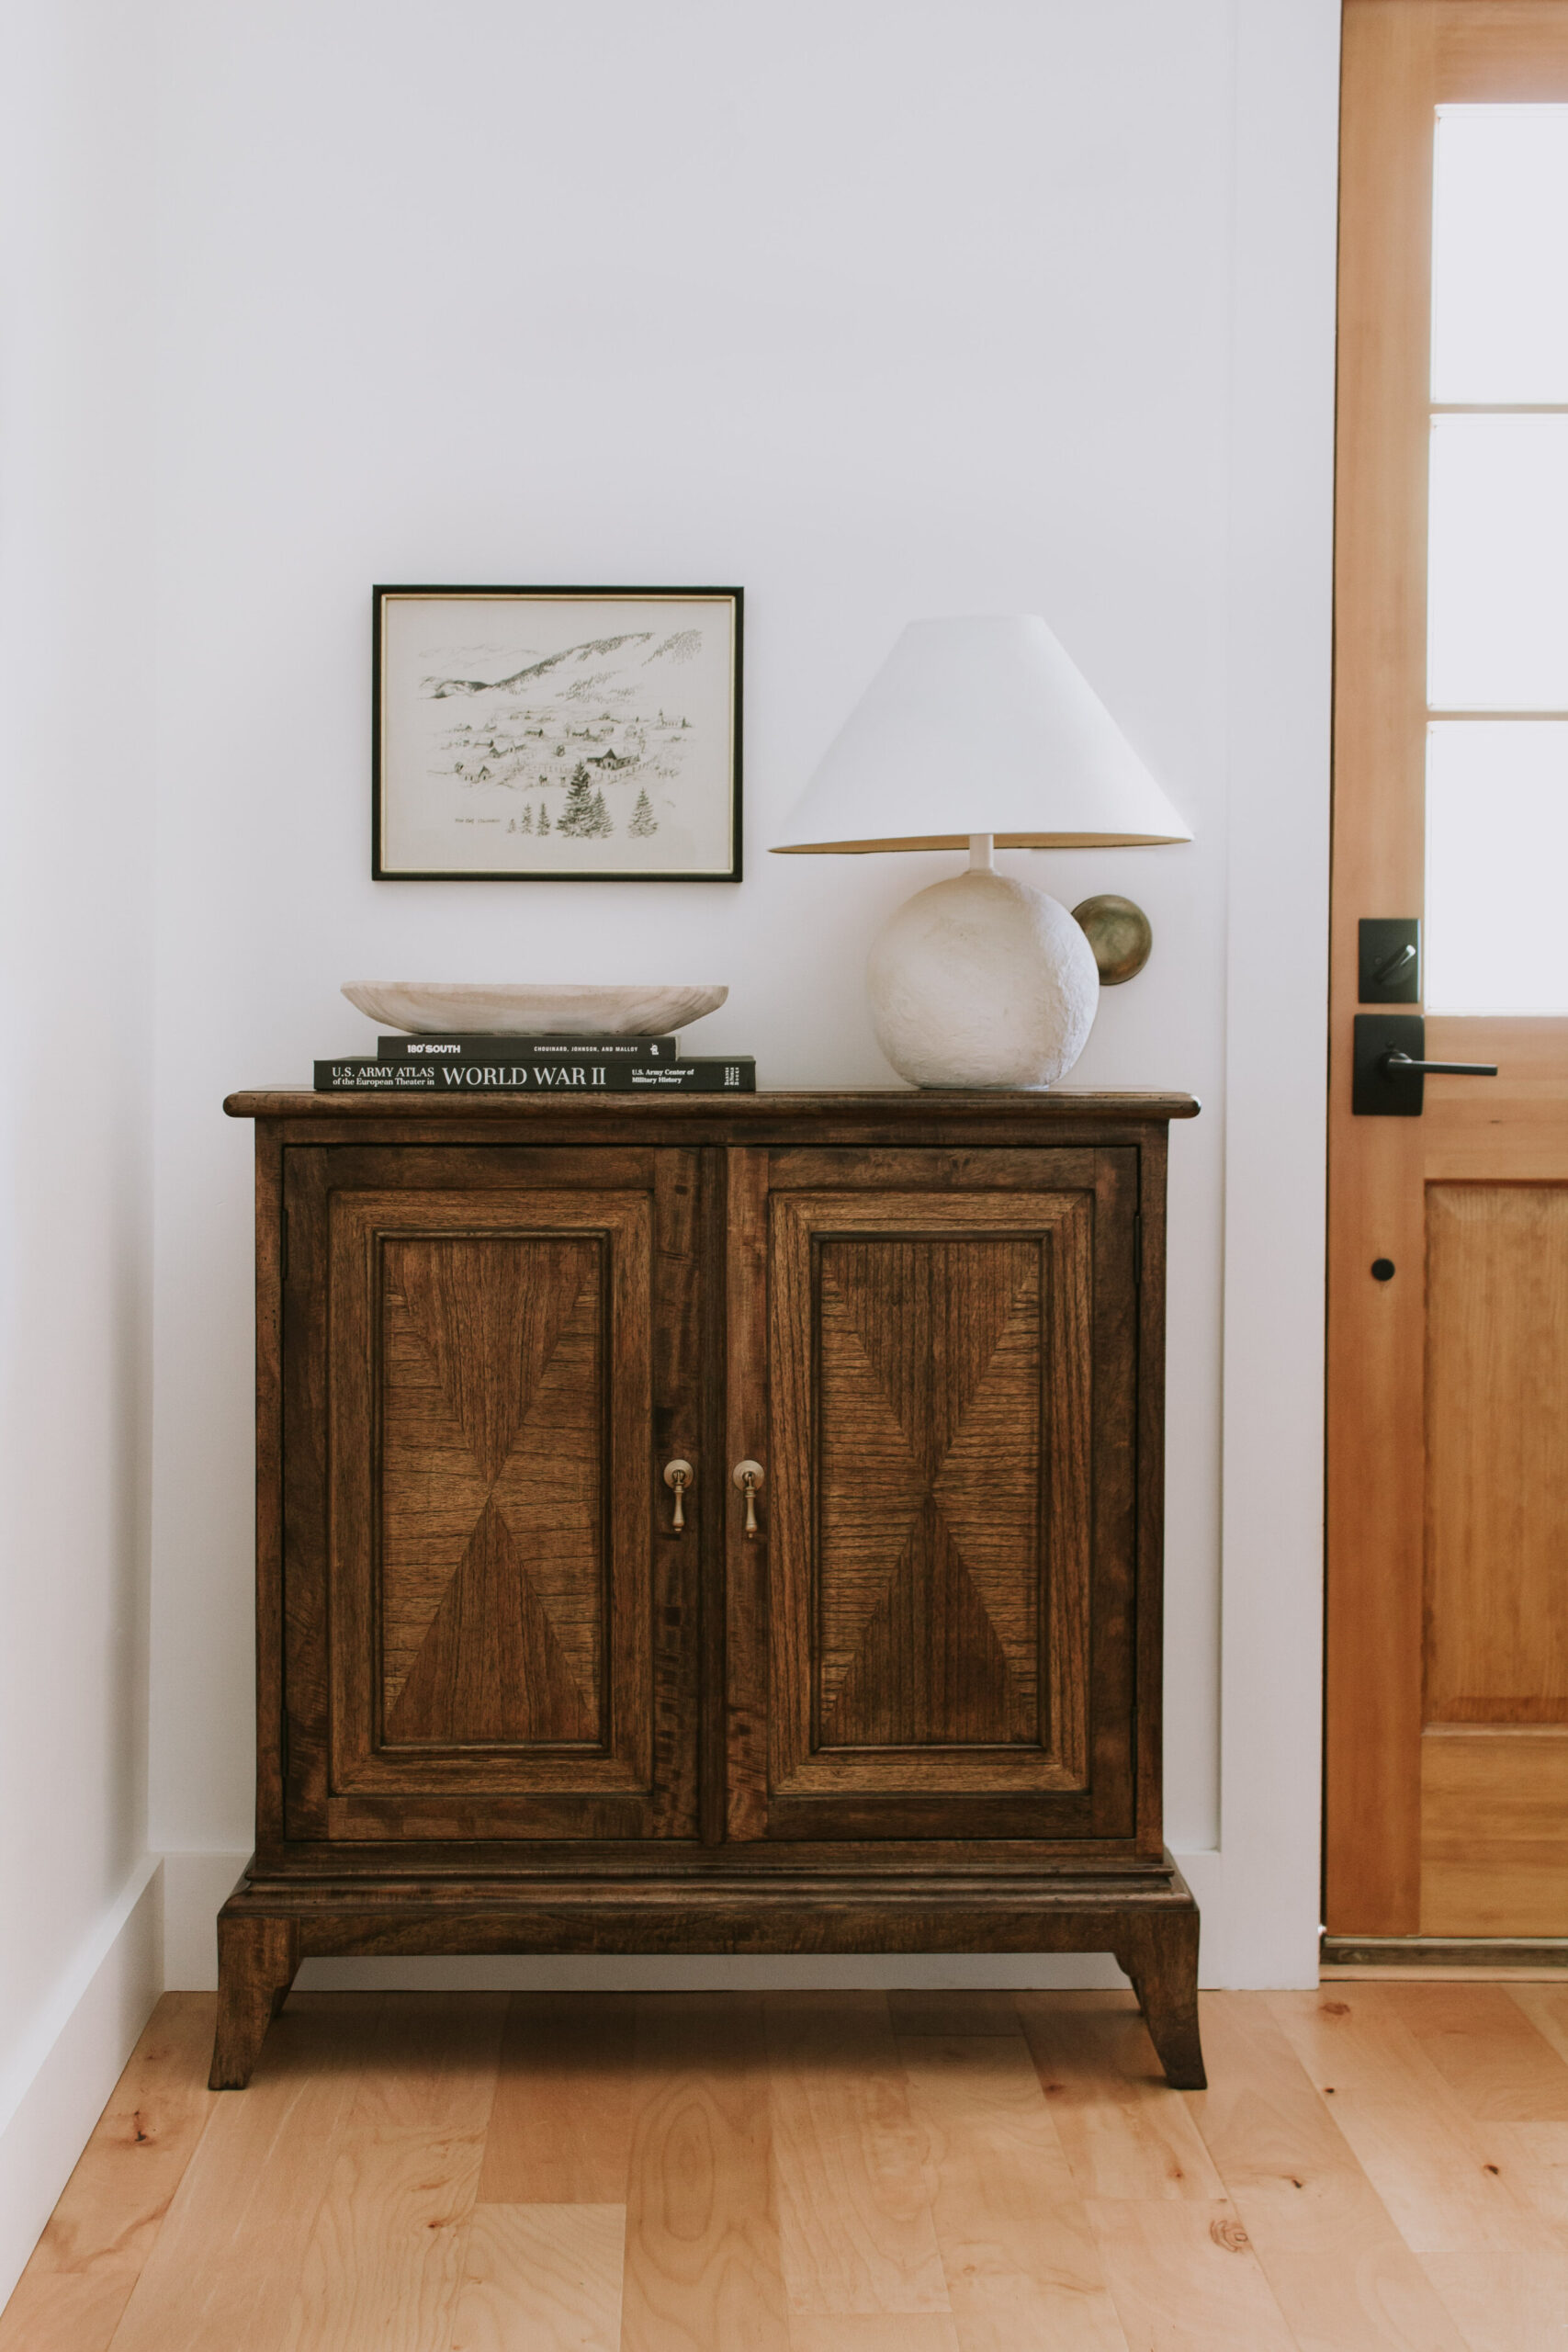
After!
There’s a high level of thrill that I get when I see an old piece of furniture with good bones and the potential to become something great! I’ve been on the hunt for an entry cabinet for months….(since May to be exact) and I finally found the perfect piece on Facebook marketplace in the exact size I needed with the right amount of character!
But that finish….it wasn’t speaking my love language and a dark stained wood that mimics an antique chest is exactly what this cabinet needs.
I’ve been refurbishing furniture for over 6 years and I shared a detailed step by step guide on how I professionally paint furniture several months back. But staining furniture is a different process that has taken time to perfect so today I’m sharing my process, every step I take, and the materials I use to refinish and stain furniture.
STEP 1 – REMOVE ALL HARDWARE, DOORS + DRAWERS
Disassemble the piece. Take off all the doors or drawers and unscrew all the hardware.
STEP 2 – SAND
If you’re working with an old piece of furniture, most likely you’re dealing with layers of old paint, stain, varnish, or a combination of all three. When restaining old furniture, it’s necessary to sand the furniture down to bare wood. Any leftover paint, stain, or varnish will show through and affect the stain you apply.
Using a power sander, I sand the furniture with 80 grit sandpaper until the top layers are gone and all that’s left is bare wood. Once the layers are gone, I go over the furniture again with 220 grit sandpaper to give it a smooth finish.
If you’re working with fresh wood, (like a newly built piece of furniture that hasn’t been finished) I suggest sanding it with a power sander and 220 grit sandpaper. (Unless of course the wood is really rough. In that case start with 80 grit sandpaper and finish with 220 grit.)
SIDE NOTES:
Laminate furniture cannot be sanded or restained! Since it’s not real wood, your best option for refinishing laminate furniture is by painting it. Read more on that here.
Veneer furniture is difficult to sand since you’re working with such a thin layer of real wood. New veneer can be sanded lightly with a fine grit sanding sponge. Old veneer (with paint, stain, or varnish on top) can be sanded with a power sander and 220 grit sandpaper, but you have to be really careful not to sand through the veneer layer entirely.
STEP 3 – APPLY WOOD CONDITIONER (OPTIONAL)
Once the wood is sanded smooth, you can apply a wood conditioner. The purpose of wood conditioner is to help your stain apply more evenly on the wood. Without conditioner, some wood species may soak up stain more where the grains aren’t as tight and as a result the wood can look blotchy.
Most often a wood conditioner is helpful. The only caveat is that the conditioner may darken the wood so if you’re going for a light, natural stain, you may need to skip the conditioner.
I usually recommend testing the wood conditioner in an inconspicuous spot to test the effects of it. Additionally, you can test the stain color without wood conditioner to see if it appears blotchy.
STEP 3 – STAIN
When staining, I usually stick to my favorite brand – Minwax. They are a trusted brand with a wide variety of colors! I love the colors Puritan Pine, Provincial, and Dark Walnut. (I chose Dark Walnut for my entry cabinet.)
To apply the stain, I use the sleeve of an old t-shirt and a pair of latex gloves. I wipe it on in the direction of the grain moving swiftly to ensure that the stain doesn’t soak into one spot for too long. Then after a few minutes I wipe over it again with a clean rag to get rid of any excess stain. Repeat until the furniture piece is complete!
Allow the stain to dry for 4-6 hours before you apply a second coat of stain or a top coat.
SIDE NOTE:
Staining is optional. If you want a more natural look, skip staining and move on to step 4.
STEP 4 – APPLY A TOP COAT
In order to ensure the longevity of your furniture, it’s necessary to apply a top coat. Unfinished stain can fade from sunlight, show water spots, and weather faster from everyday use. There are plenty of top coat options but these are the products that I use most frequently. (Note: I used Polycrylic on my entry cabinet)
Polycrylic – Polycrylic can be used on both painted and stained furniture and is best for pieces with medium-heavy use. It has a hard top coat, provides excellent protection, and dries completely clear (unlike Polyurethane which has a slight amber tint). It also comes in a matte finish for a nearly unnoticeable sheen.
To apply this product, I use a foam brush. This product dries pretty quickly so it’s important to move quickly. You shouldn’t over-brush or touch up areas that have already started to dry. Brush on the product in the direction of the grain and allow it to dry for 2 hours. Give it a light sanding with a fine grit sanding sponge and wipe it clean with a damp cloth. 3 coats are recommended and a light sanding in between each coat is necessary. After the final coat, allow it to cure for 48 hours.
Minwax Paste Finishing Wax – I turn to this wax when I want an ultra matte, soft luster finish and a quick application. This can also be applied on painted and stained furniture. It’s best for furniture with light-medium use (although I’ve used it on a dresser with daily use and haven’t had any issues yet.) Its’ main benefit is the quick application. Only one coat is necessary and depending on the size of the project, it can be applied in less than an hour. It comes in both a natural and dark color.
Working in sections, I wipe on a thin layer of wax with an old t-shirt. Once the wax has dried for about 10-15 minutes, I then buff it off in circular motions with a clean t-shirt.
Minwax Polyurethane – When I want a slight amber tint to my wood, I use Minwax Polyurethane. It’s a hard, oil based top coat that protects and seals the wood. Of all the top coats, I find this sealer to be very durable, however it does slightly alter the color of the wood so testing a spot is recommended. It comes in satin which has a beautiful dull sheen.
To apply this product, I use a foam brush. I work swiftly and in sections to ensure that I’m not over-brushing any areas that have started to dry. Allow it to dry for 4-6 hours and then lightly sand it with a fine grit sanding sponge. Wipe it clean with a damp cloth and apply a second coat. A minimum of 2 coats is recommended. If a third coat is necessary, sand, wipe, and re-apply. After your final coat, allow it to dry for 48 hours before normal use.
Wipe on Polyurethane – Wipe on Polyurethane is similar to the product above except that it can be applied with a rag as opposed to a foam brush. It doesn’t have as thick of a finish, but it is adequate for furniture with light use. If I use Polyurethane, I tend to use the brush on product opposed to the wipe on version.
To apply this product, apply a liberal amount to a clean t-shirt or pour it directly onto the wood. Wipe it on in the direction of the grain. Allow it to dry for 2-3 hours and lightly sand it with a fine grit sanding sponge. Wipe it clean with a damp cloth and apply a second coat. If a third coat is necessary, sand and wipe on another coat. After the final coat, wait 48 before normal use.
Helmsman Indoor/Outdoor Spar Urethane – When working with wood that will be outside, I use Helmsman Indoor/Outdoor Spar Urethane. It has the slightest sheen and dries completely clear. It also has UV blockers that reduce the graying or fading effect from the sun and a seal that protects the wood from water and moisture. This product is ideal for front doors, covered outdoor furniture, and bathroom cabinetry.
To apply this product, I use a foam brush. I work swiftly and in sections to ensure that I’m not over-brushing any areas that have started to dry. Allow it to dry for 2 hours and then lightly sand it with a fine grit sanding sponge. Wipe it clean with a damp cloth and apply a second coat. 4 coats are recommended for outdoor applications and a light sanding in between each coat is necessary. After your final coat, allow it to dry for 48 hours before normal use.
That’s all! I absolutely love the rich wood tones in this furniture and I love even more that it feels like an antique cabinet that’s been in the family for years.
For more refinishing tips, check out my complete guide to painting furniture.
Leave a Reply Cancel reply
Where behind the scenes, exclusive advice, and candid conversations are sent straight to your inbox every week.


You are such a great resource, Danica. Thank you for this thorough post!
So kind of you to say, thank you!! 🙂
I really appreciated it was very helpful
I am not sure if you are still in business as this website is a few years old. I appreciated your information on staining furniture and had one Question, will my piece of furniture that has woodgrain in a parquet like inlay look bad if I do not stain in each direction of the wood grain? It seems like an almost impossible task to go with the grain on this Particular piece -I appreciate your advice.
Hi Eileen! I don’t have experience staining parquet floors or furniture, but I don’t suspect you’d have much of an issue applying stain against the grain.
Hi! Nice work!Where did you get that World War II book?
Thank you Pam! Here’s a link to the book – https://rstyle.me/+q9hpM01PrK93n96HzoPsXQ
Beautiful!! The decor is perfect! Is this print in a shop?
Thank you! That artwork is a thrifted find!
This looks awesome!! I’m on the hunt for something similar. What search words did you use if you don’t mind me asking!
Thank you! I believe just "entry cabinet"
I prefer stripping furniture first, before sanding. For a piece that has veneer, if I wish to keep the wood finish, and want a fresh finish, I use Homer Formby’s refinisher, which is basically a lacquer thinner. Using fine steel wool, it removes the shellac finish, which is what most old furniture has, but does not remove all f the stain. From there I stain and finish. If the finish is in pretty good shape, cleaning, then waxing with high quality paste wax like Briwax gives a beautiful finish. I use clear Briwax paste wax as a top coat on painted finishes. It gives it a lovely glow.