
So the range hood in your kitchen is bringing the vibe down? As was ours! If you have a range hood that you’re eager to cover with something a little more bespoke, this simple DIY range hood cover might just be the solution! In today’s tutorial, I’ll walk you through how to build a beautiful, budget-friendly cover that adds custom charm to your kitchen.


This post contains affiliate links.
A couple of weeks ago I revealed our no-demo kitchen makeover! It was a quick, somewhat temporary fix that addressed some functional and cosmetic needs to tie us over until we can do a proper historic kitchen renovation in the future.
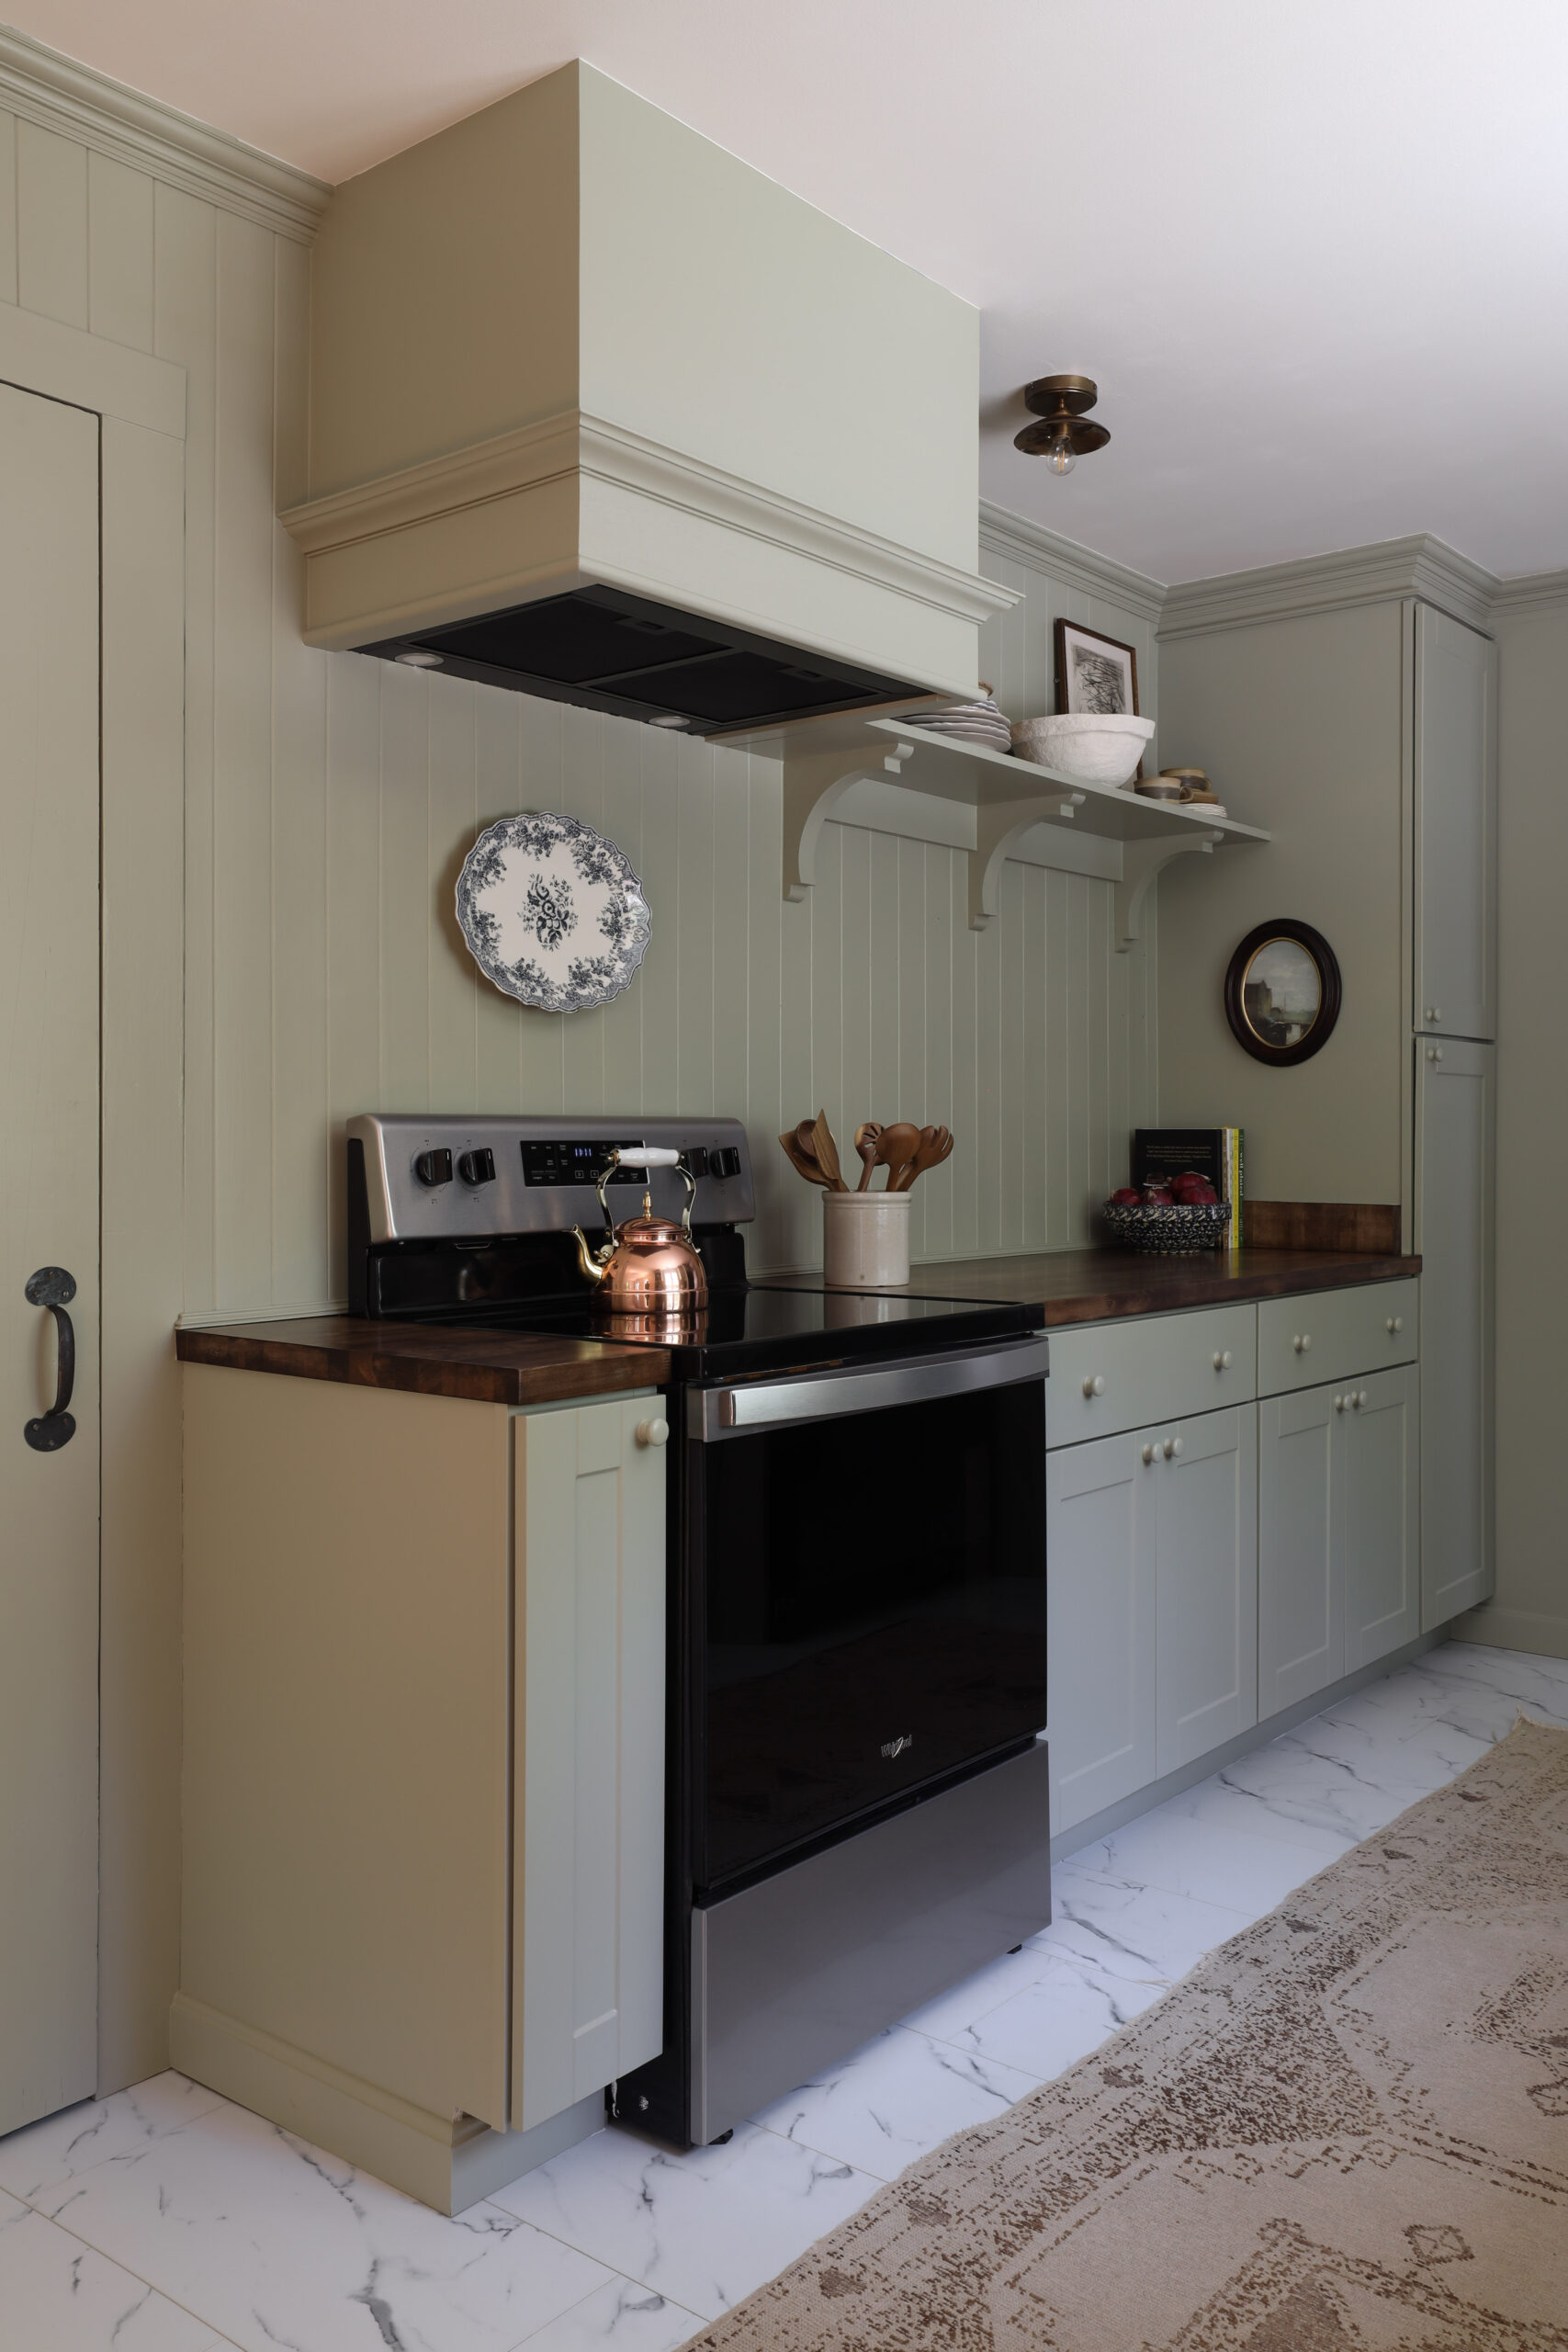
One of the cosmetic fixes we addressed was the range hood. While the existing hood functioned perfectly fine, it was not my style. To reduce the industrial feel that it brought to the space, Chris built a cover that fits over the existing hood.
If you find yourself in a similar scenario, here’s how Chris built our range hood cover.
How To Build A Range Hood Cover

1. BUILD THE FRAME
Using 2″x2″ strips of wood, Chris built the frame for the cover. You can either build the frame off-site and install it as one unit, or you can assemble it piece by piece on-site. We chose the on-site method.
Chris screwed the back strips to the studs in the wall and the ceiling strips to the joists in the ceiling. Then he screwed the bottom, front, and cross board together at each intersection. The end result is simply two squares with a board across the front connecting them.
Drilling pilot holes and using thin screws reduces wood splitting. The frame is about 3/8″ shorter in height than the hood to account for adding trim later. It’s also 1 3/4″ deeper than the hood so we can fit our fingers in to push the buttons on the front.

2. COVER THE FRAME WITH PLYWOOD
We chose 1/4″ plywood for the frame cover. A smooth, cabinet quality plywood finish is necessary. Start by scribing the plywood along the wall and ceiling to ensure a snug fit. For the front corners, cut a mitered edge to avoid raw exposed edges.
Nail the plywood to the frame using 1″ brad nails and a brad nailer.

3. (OPTIONAL) DRILL HOLES FOR VENTILATION
Depending on your range hood, it may vent out through the roof or it may vent out the sides. If it vents out the sides, you’ll want to drill a few holes on each side of the cover to allow for ventilation. You can choose any pattern for the holes, but a diamond pattern would be my personal preference.
We did not drill holes in our cover, but I provided a photo for reference.


4. ADD TRIM TO THE BASE
To hide the raw edge on the bottom of the plywood, Chris added 3/4″ thick x 2 1/4″ wide trim with a full bullnose edge. He mitered the front corners for a seamless look and nailed it to the frame.
To leave enough space for our hands to reach in and push the buttons, Chris cut out about 1″ on the front trim piece – as shown in the second photo.

5. ADD CROWN
From here you can style it as you please. I chose to copy the gorgeous range hoods by deVOL by wrapping it with crown moulding.
Chris installed the crown about 4 3/4″ up from the bottom of the bullnose trim and attached it with our brad nail gun. I also glued on a small dowel below the crown for a bonus bit of detail.

6. CAULK, WOOD FILL, & PAINT THE RANGE HOOD COVER
Tidy up the corners with wood filler and fill in the holes. Let the wood filler dry and give it a good sanding with a 220 grit sanding sponge. Caulk the seams where the cover meets the wall and ceiling.
Then it just needs primer and paint! I did one coat of Zinsser primer, one coat of Farrow & Ball’s primer, and a coat of the final color – French Gray by Farrow & Ball.
And that’s it! It’s such a simple, inexpensive, and beautiful solution that completely transforms the feel of the kitchen! If you have any questions about the process, feel free to ask me in the comments below.

Leave a Reply
Where behind the scenes, exclusive advice, and candid conversations are sent straight to your inbox every week.
The Inside Scoop
DO YOU WANT

Such a stylish and easy range hood upgrade—love it!
Thank you! We love how it turned out!
I love how this turned out and would love to do the same but my stove is on my island so the hood is floating, do you think I could still do something like this?
If you can safely secure the frame to the ceiling joists, I don’t see why not!