
Last year, I found a headboard on Facebook Marketplace for $50. The shape was great, the size was perfect, but the dull gray fabric needed a refresh. After a year of testing fabrics, I finally committed to one and reupholstered the headboard! It was a simple weekend project made even sweeter by my favorite upholstery hack that ended up saving me hundreds of dollars. So, if you find yourself wanting to reupholster a headboard, today I’m sharing exactly how I reupholstered mine, the tools I used, and my favorite money-saving upholstery hack.

This post contains affiliate links.
My Favorite Upholstery Hack
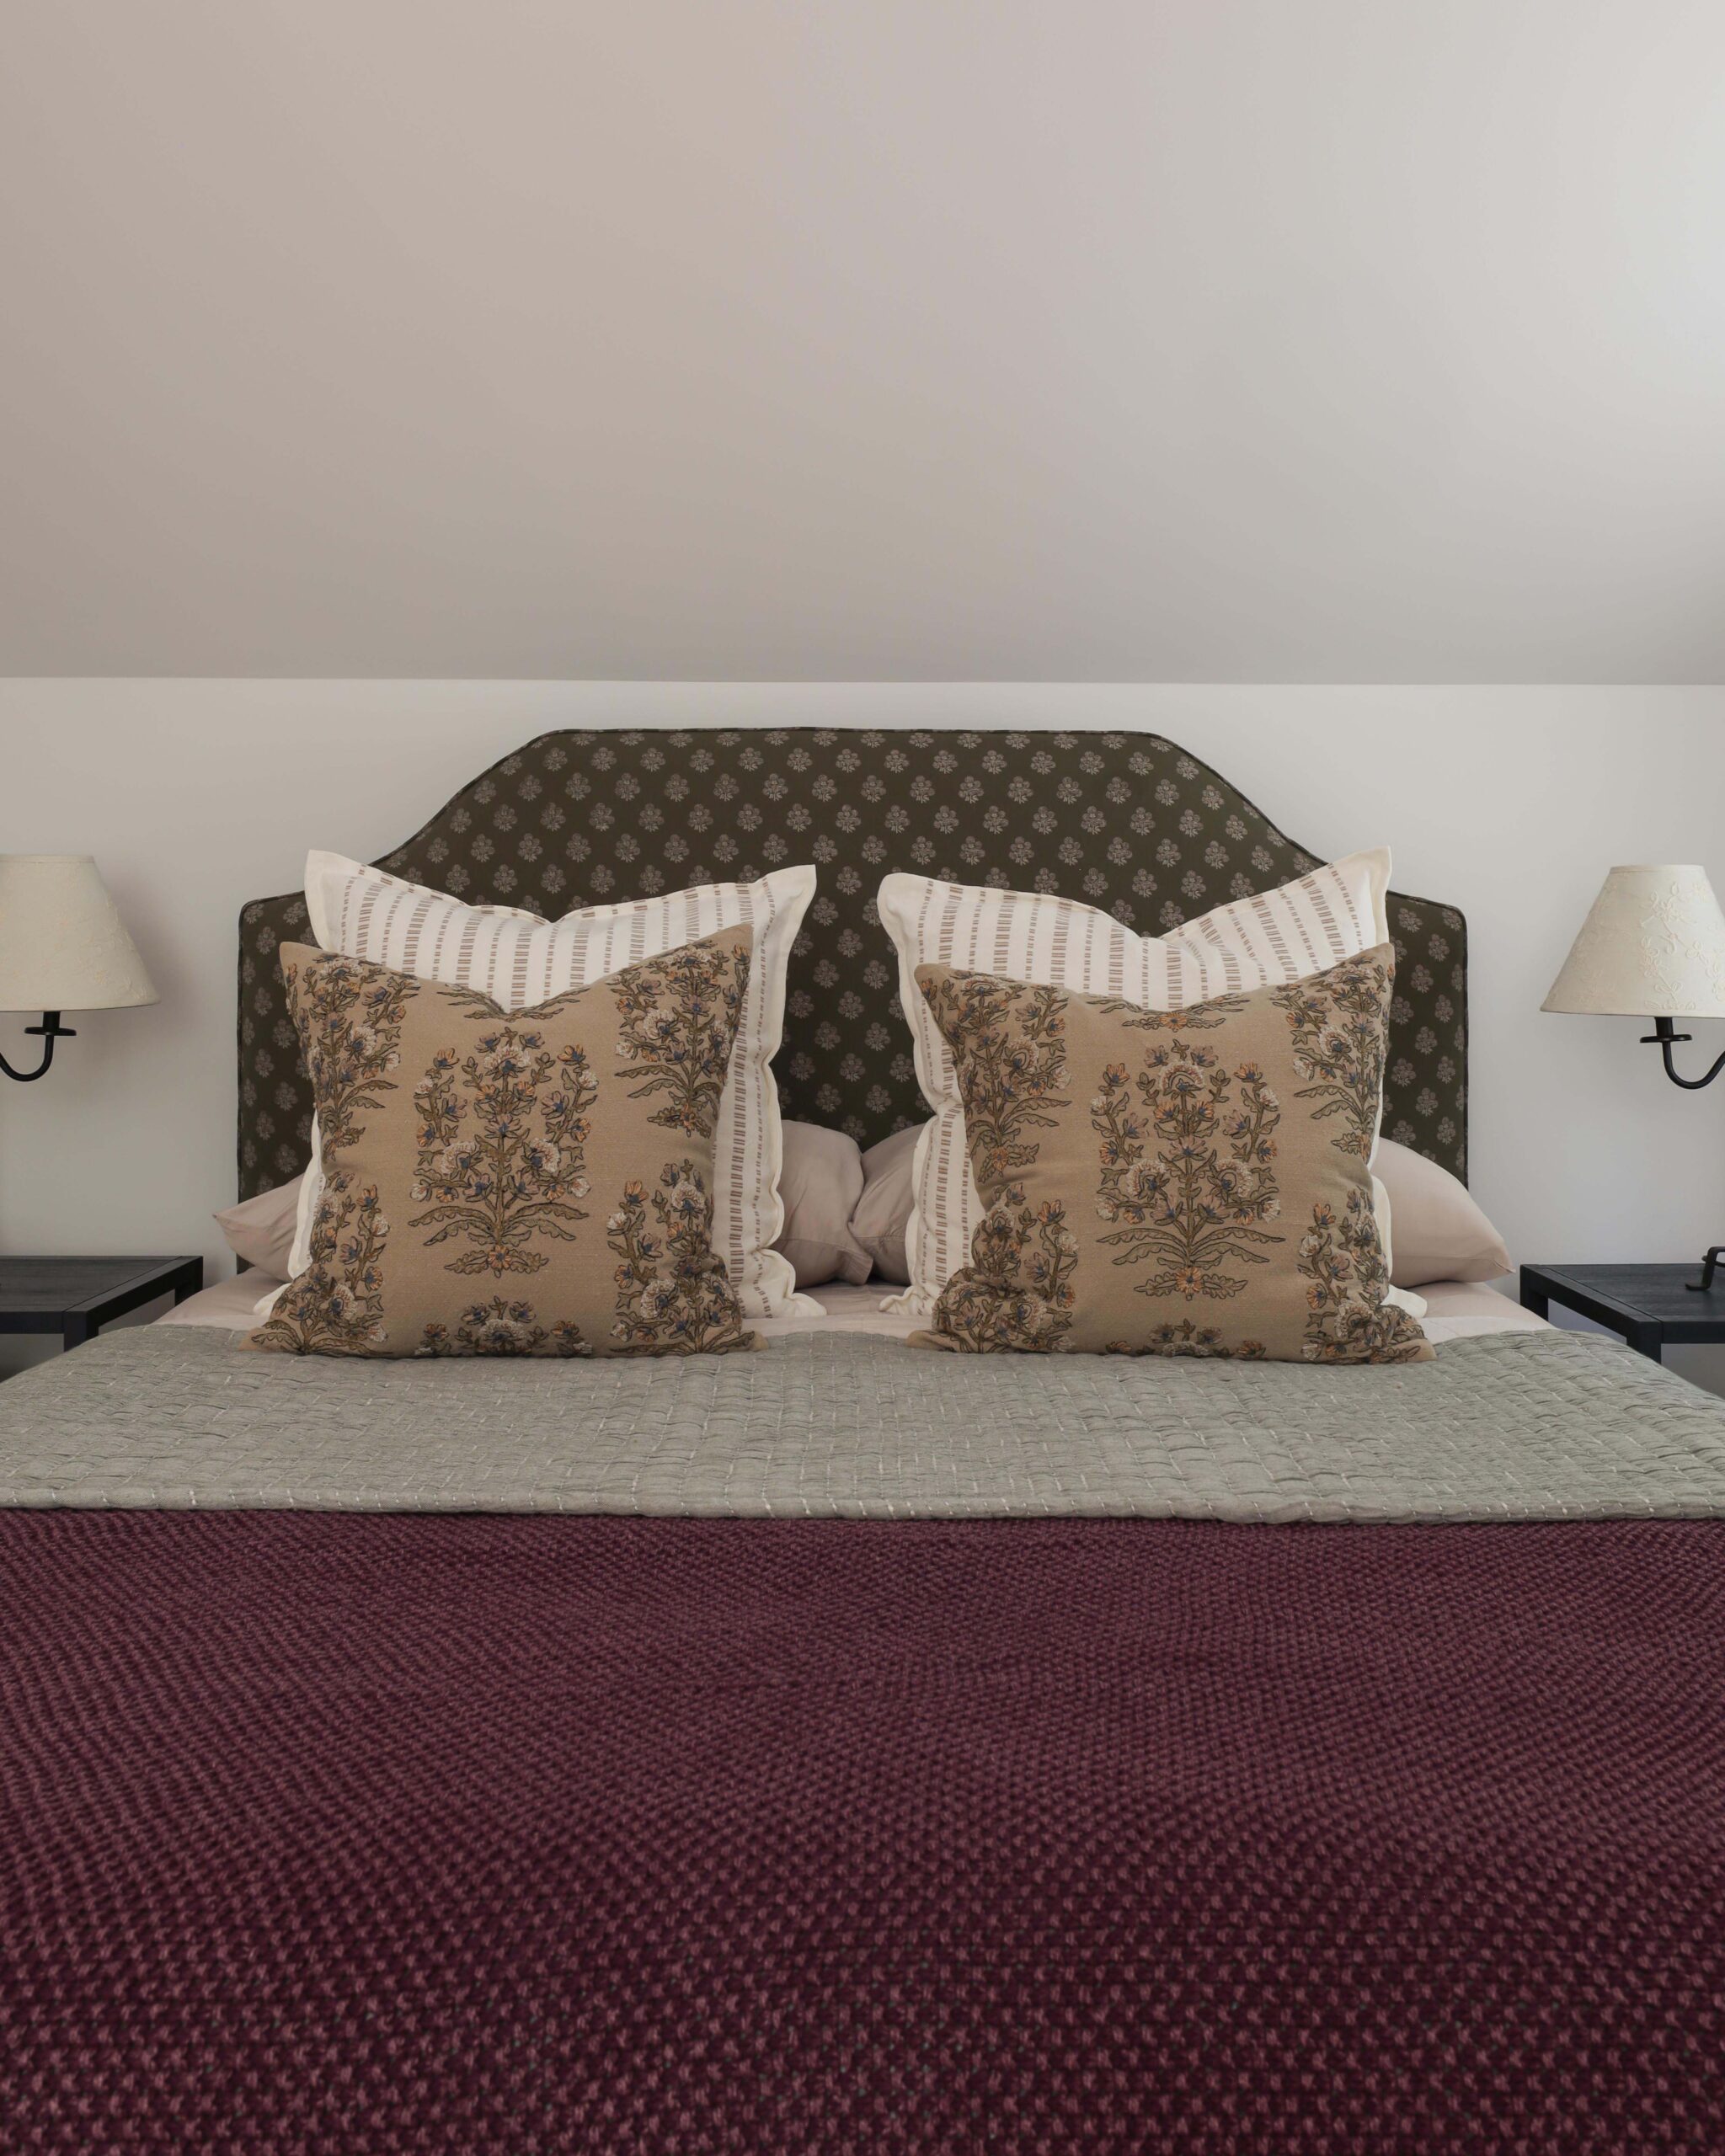
I reupholstered my headboard with…wait for it…a shower curtain! Truth is, I ordered nearly 50 fabric samples from textile brands I admire to find the perfect fabric, but I couldn’t seem to commit. Then, in an act of desperation, I started searching for tablecloths and shower curtains. Wouldn’t you know it, I found an olive green block print shower curtain from Magnolia (it’s currently sold out, sorry!) and I ordered 4 panels on the spot – 2 for the headboard and 2 for a bed skirt.
By using a shower curtain, I saved myself hundreds of dollars AND the fabric was wide enough for a queen headboard so I didn’t need to sew two panels together. It’s a great little upholstery hack! As mentioned, my exact shower curtain is sold out, but I’m sharing the other shower curtains and tablecloths I found and loved in my search. (I was *this* close to buying this tablecloth!)
Shower Curtains & Tablecloths For Your Next Upholstery Project
SCROLL RIGHT TO VIEW THE FULL LIST →
How To Reupholster A Headboard
I have to give credit where credit is due. I learned everything I know about upholstering a headboard from Pucci Upholstery. Lara, the owner of Pucci Upholstery, makes custom headboards in the UK and is so gracious to share her process online. While I’m sharing a brief overview of my steps here today, I highly recommend checking out her work and her process.
If you’re a visual learner, I also shared my reuholstery project in video format here! Watch and enjoy.
Supplies Needed:
- Fabric – I needed two 72″ x 72″ shower curtains for my queen headboard
- Stapler – A manual staple gun will do, but a pneumatic staple gun would be best
- 9/16″ Staples (these are for manual staple guns)
- Flathead screwdriver
- Needle Nose Pliers
- Scissors
- Cord
- Tack Strip
- Sewing Machine – A piping or zipper foot is helpful

1. Remove Existing Fabric
Most headboards utilize staples to hold the fabric in place. A flathead screwdriver and a needle nose pliers do a good job of removing the staples.
If possible, keep the existing batting and cambric dust cover fabric to reuse.

2. Lay Out New Fabric & Staple It In Place
Depending on the size of your headboard and the orientation of your fabric, you may need to sew two panels side by side. (You can watch how Lara does that here.) My fabric happened to be wide enough to cover the whole queen headboard.
After draping the fabric over the headboard and positioning it, I began stapling it in place. The key to stapling the fabric is to work in small sections, rotating from one side of the headboard to the opposite side to ensure the fabric is pulled tight. Starting at the top of the headboard, I stapled a few. Then, I moved to the bottom of the headboard, pulled the fabric tight, and stapled a few more. Then, I moved to the side of the headboard, pulled it tight, stapled a few, and switched to the opposite side. Continue this until all 4 sides are stapled.
Once complete, cut off the excess fabric.

3. Sew The Piping
When making piping, it’s best to cut the fabric on the bias. This allows the fabric to stretch around the curves of the headboard.
I cut my fabric 1 ½” wide, folded it over the existing cord that was previously on the headboard, and sewed it. I used a zipper foot for my piping and adjusted my needle position as close to the cord as possible.

4. Staple the piping on
Every inch or so, I stapled the piping along the border of the headboard.

5. Staple The Edge Fabric On
This step is a little trickier. Cut a long strip of fabric that spans the full edge of the headboard. Line up your pattern. With the fabric upside down and inside out, staple the fabric in place, just under the piping.

6. Staple Back Tack On
With the edge fabric draped on top of your headboard, staple a strip of tack strip along the edge of your headboard, just under the piping. You’ll want quite a few staples to hold the tack strip in place. This is done so that…

7. Fold The Edge Fabric Down
When you fold the edge fabric back down over the tack strip, you get a clean, crisp edge without exposing any staples.

8. Staple The Fabric Onto The Back
Flip the headboard upside down and begin stapling the fabric to the back. Remember to pull the fabric tight, ensuring there aren’t any ripples.
Along curves, you may find it easier to pull the fabric tight if you cut several slits in the fabric. Once it’s all stapled in place, cut off the excess fabric.

9. Staple The Cambric Dust Cover On
I reused the existing cambric dust cover that was previously on the back of the headboard. Folding the edges neatly, I stapled it back into place.

10. Admire Your Work
That’s it! In the end, you should have a neat and tidy headboard with a professional feel, thanks to piping and a pretty new fabric!


Leave a Reply
Where behind the scenes, exclusive advice, and candid conversations are sent straight to your inbox every week.
The Inside Scoop
DO YOU WANT

I found a well loved mid century chair in my alley and that required me to dissemble it and rebuild it completely. It was a true label of love! I had to install new springs, replace the straw that was used as a cushion and somehow make it look good and functional. I love that you do so many upholstery projects. Anyone can do it, it just takes a little patience.
That’s incredible! And so wonderful that you were able to give the chair a second life!