

Last week I revealed our primary bedroom and if you haven’t seen that yet, check out that post first…I insist! 🙂 One of my favorite additions to the room is the tongue and groove wood planks that we installed on the ceiling. It’s the perfect textural layer that the room needed. Today I’m sharing an installation tutorial and answering all your FAQ about our wood plank ceiling.
This post contains affiliate links.
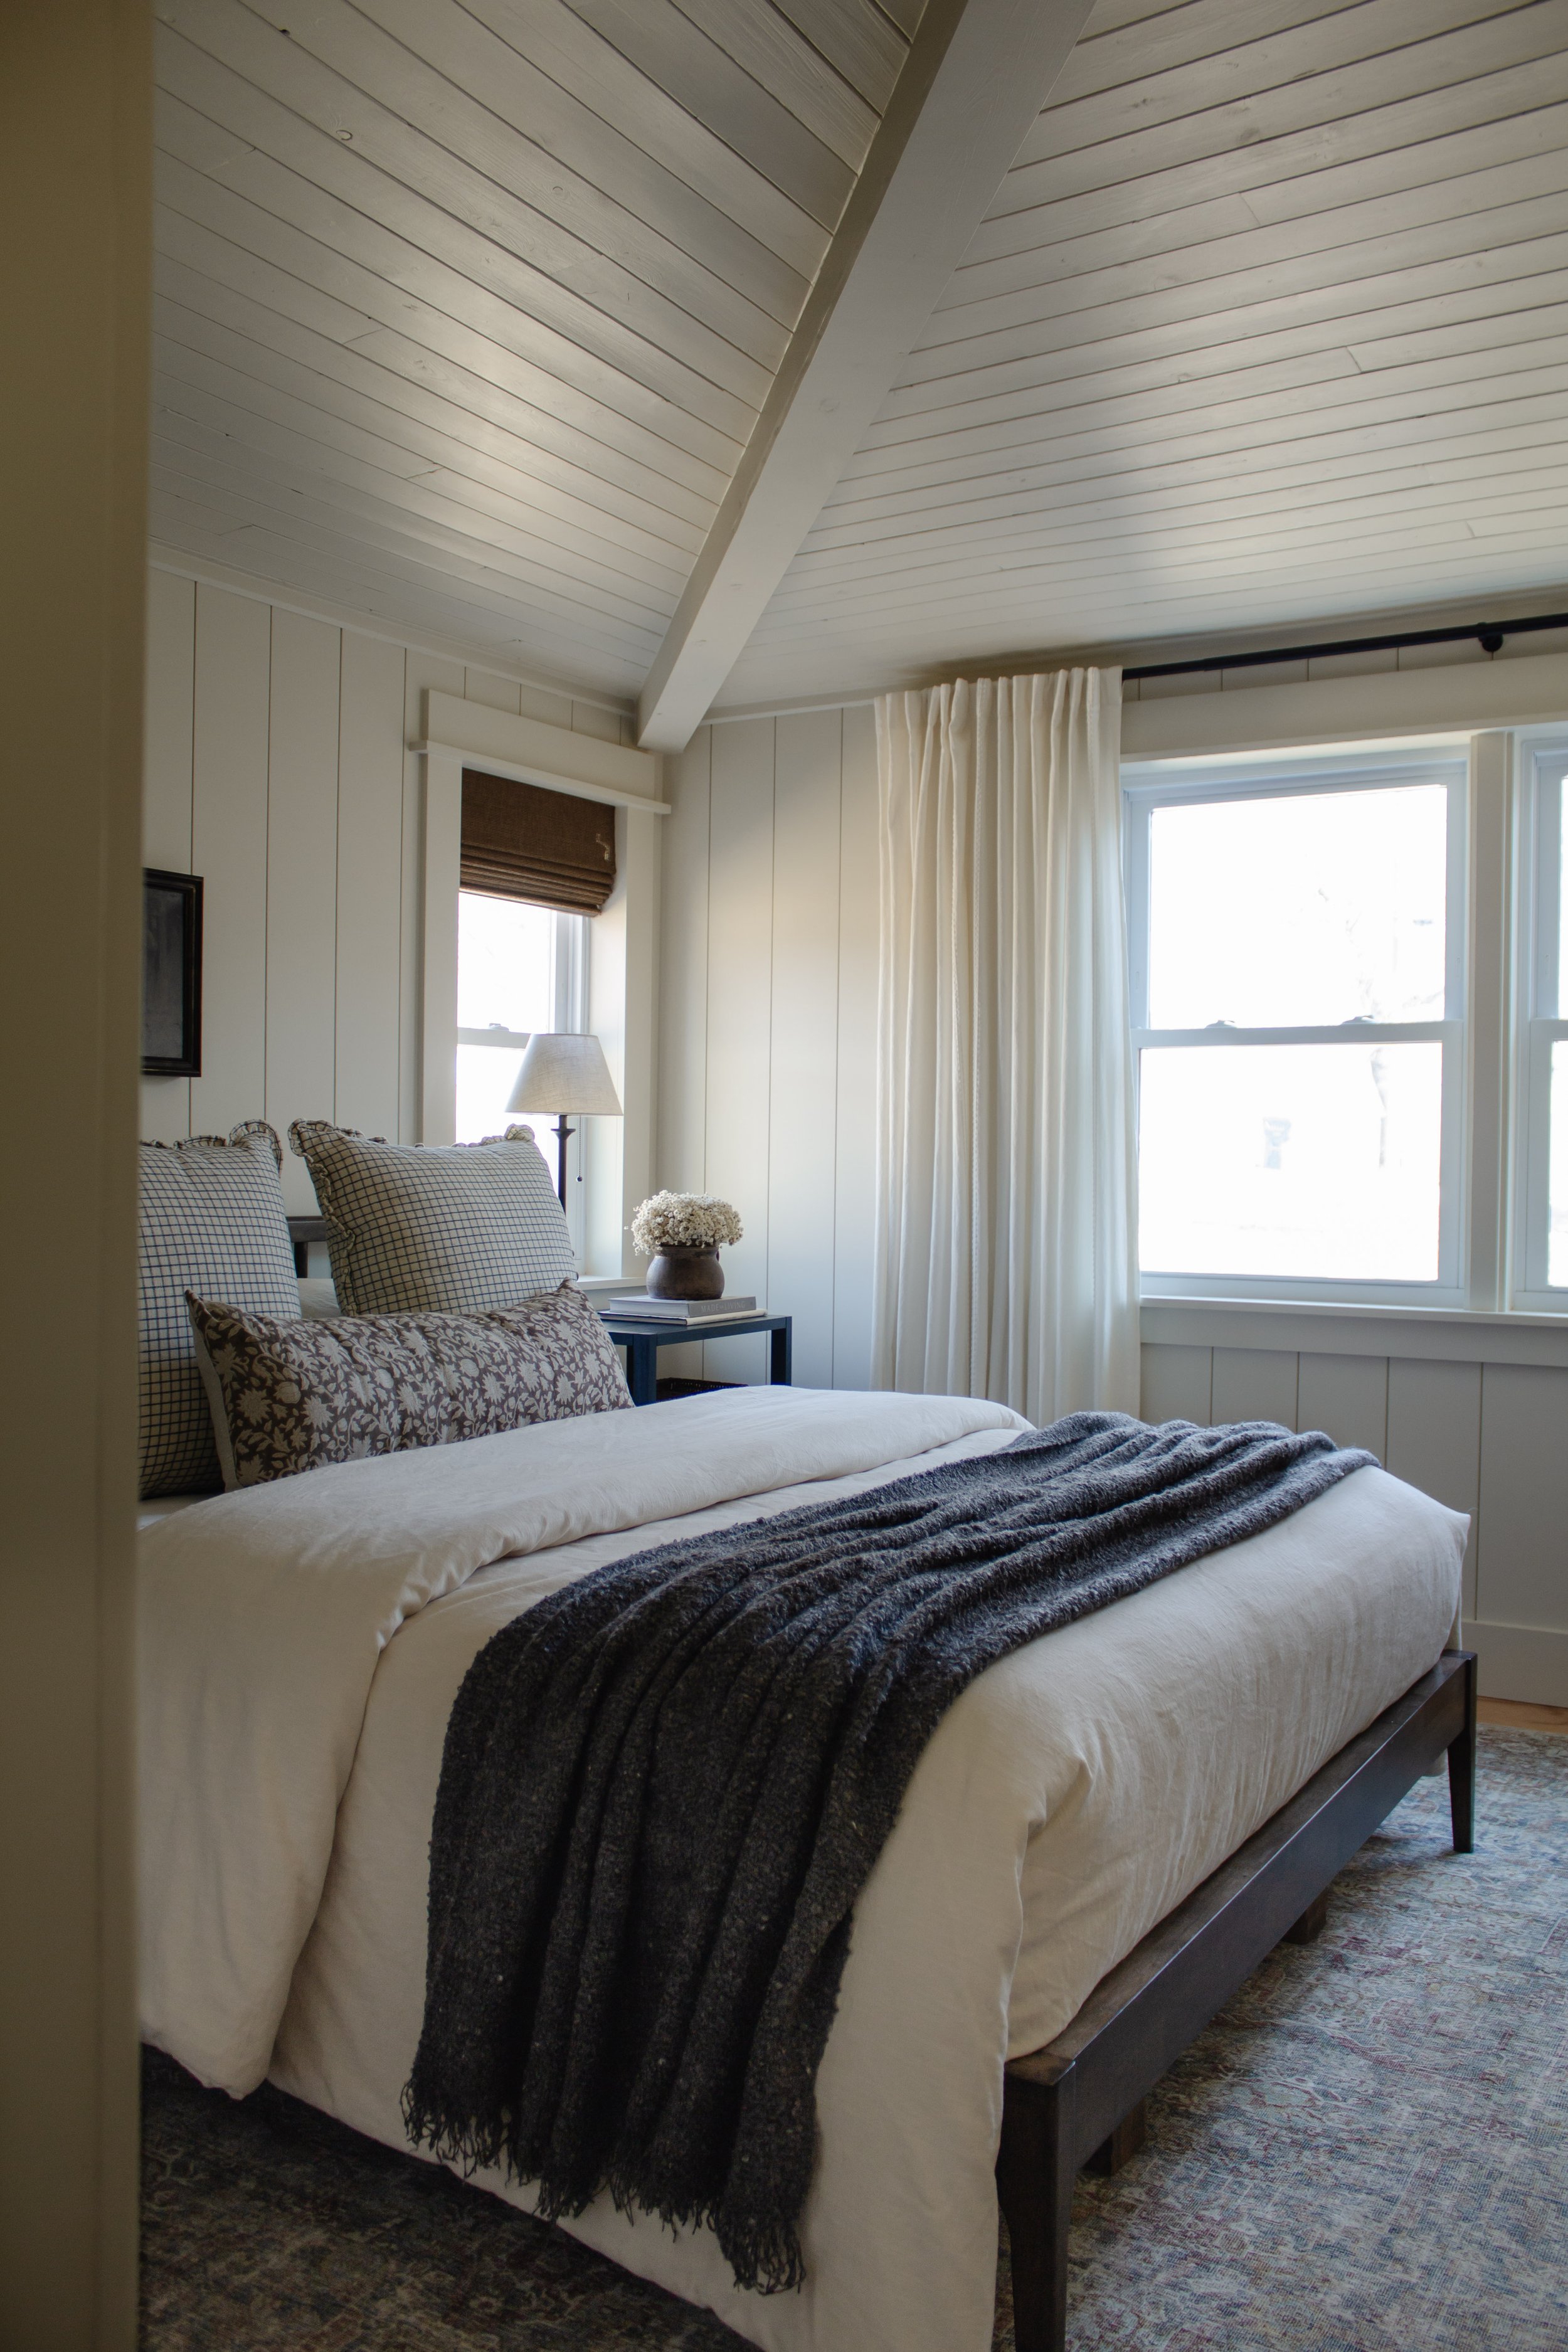
Comforter | Throw Blanket | Lumbar Pillow | Windowpane Pillows | Rug | Curtains | Curtain Rod | Roman Shades | Nightstand | Lamp | Lamp Shade | Made For Living Book | Star Flowers | Bed Frame (no longer sold)
I feel like I’ve explained our complicated bedroom situation 1,000 times and if you’ve been here since the beginning, I know you’re tired of me explaining the low ceiling dilemma. But bear with me one more time for those that are new! The ceiling in our bedroom was low….6’5” to be exact. It’s a flat roof addition that always looked like an afterthought. 5 years after living in this house, Chris discovered that we could raise the bedroom ceiling ever so slightly by following the slope of the roof. It wouldn’t be much, but an extra 8-12” of headspace felt like we found a solution to the problem. And that kickstarted the bedroom renovation!
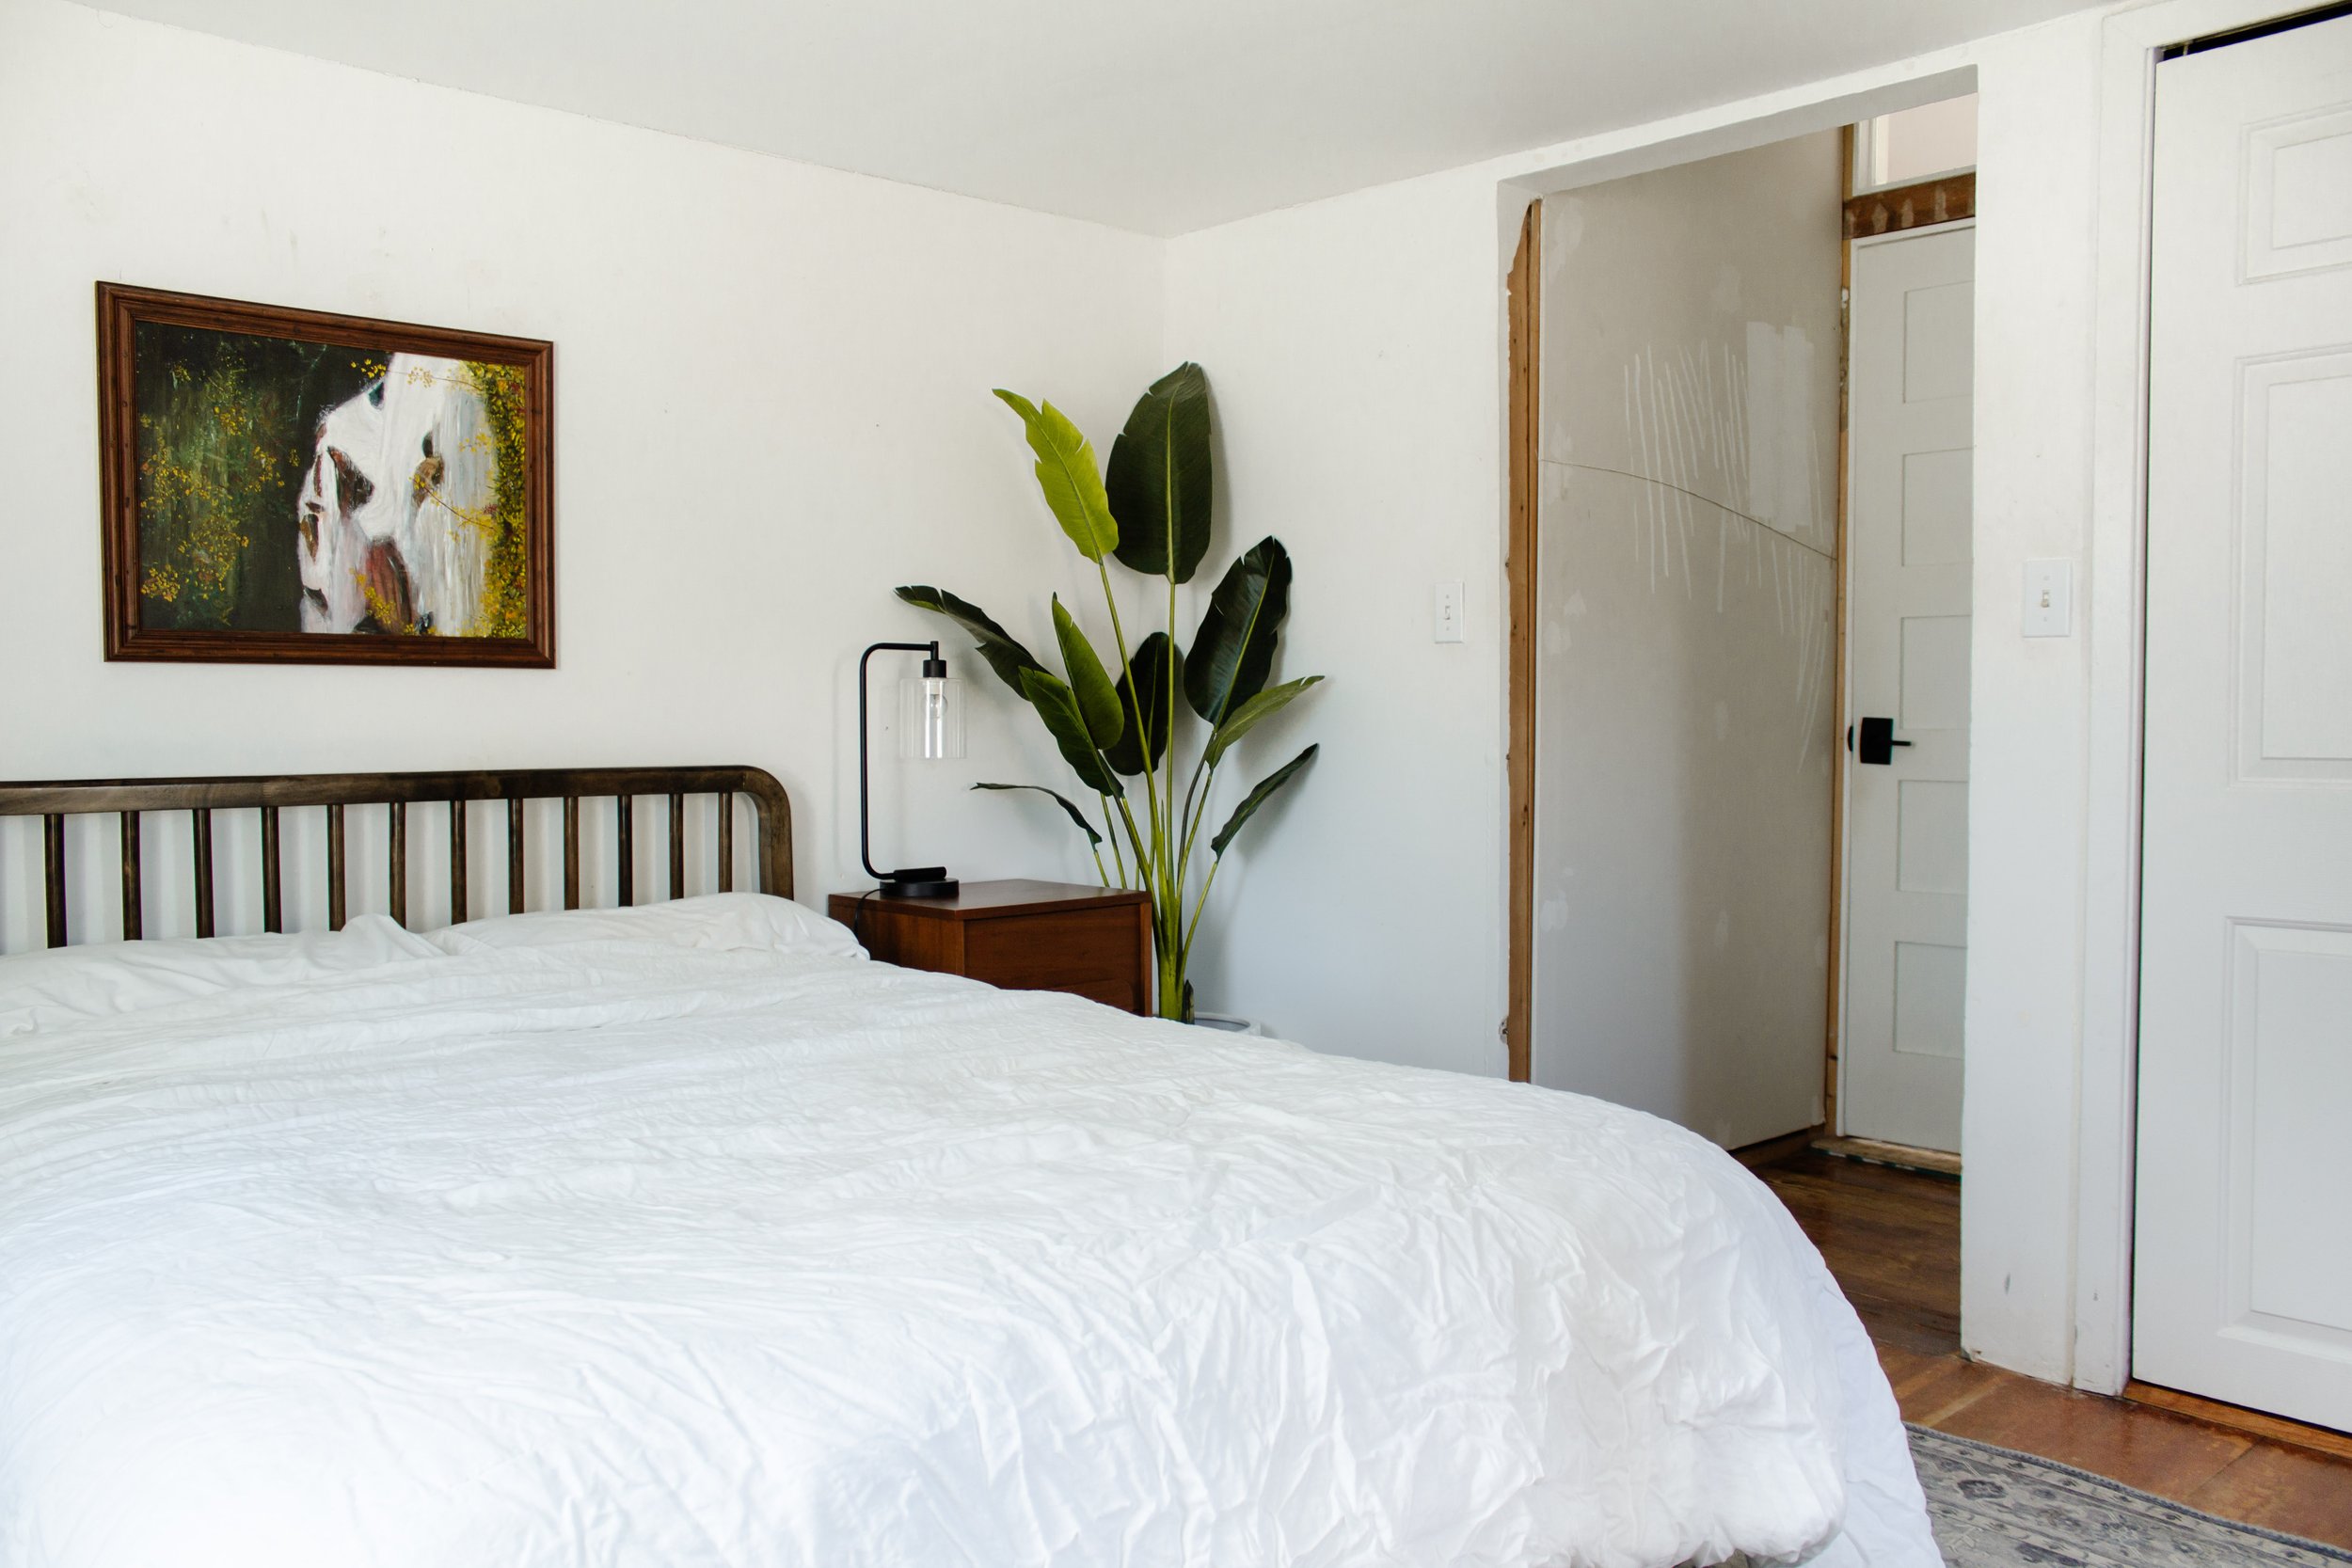
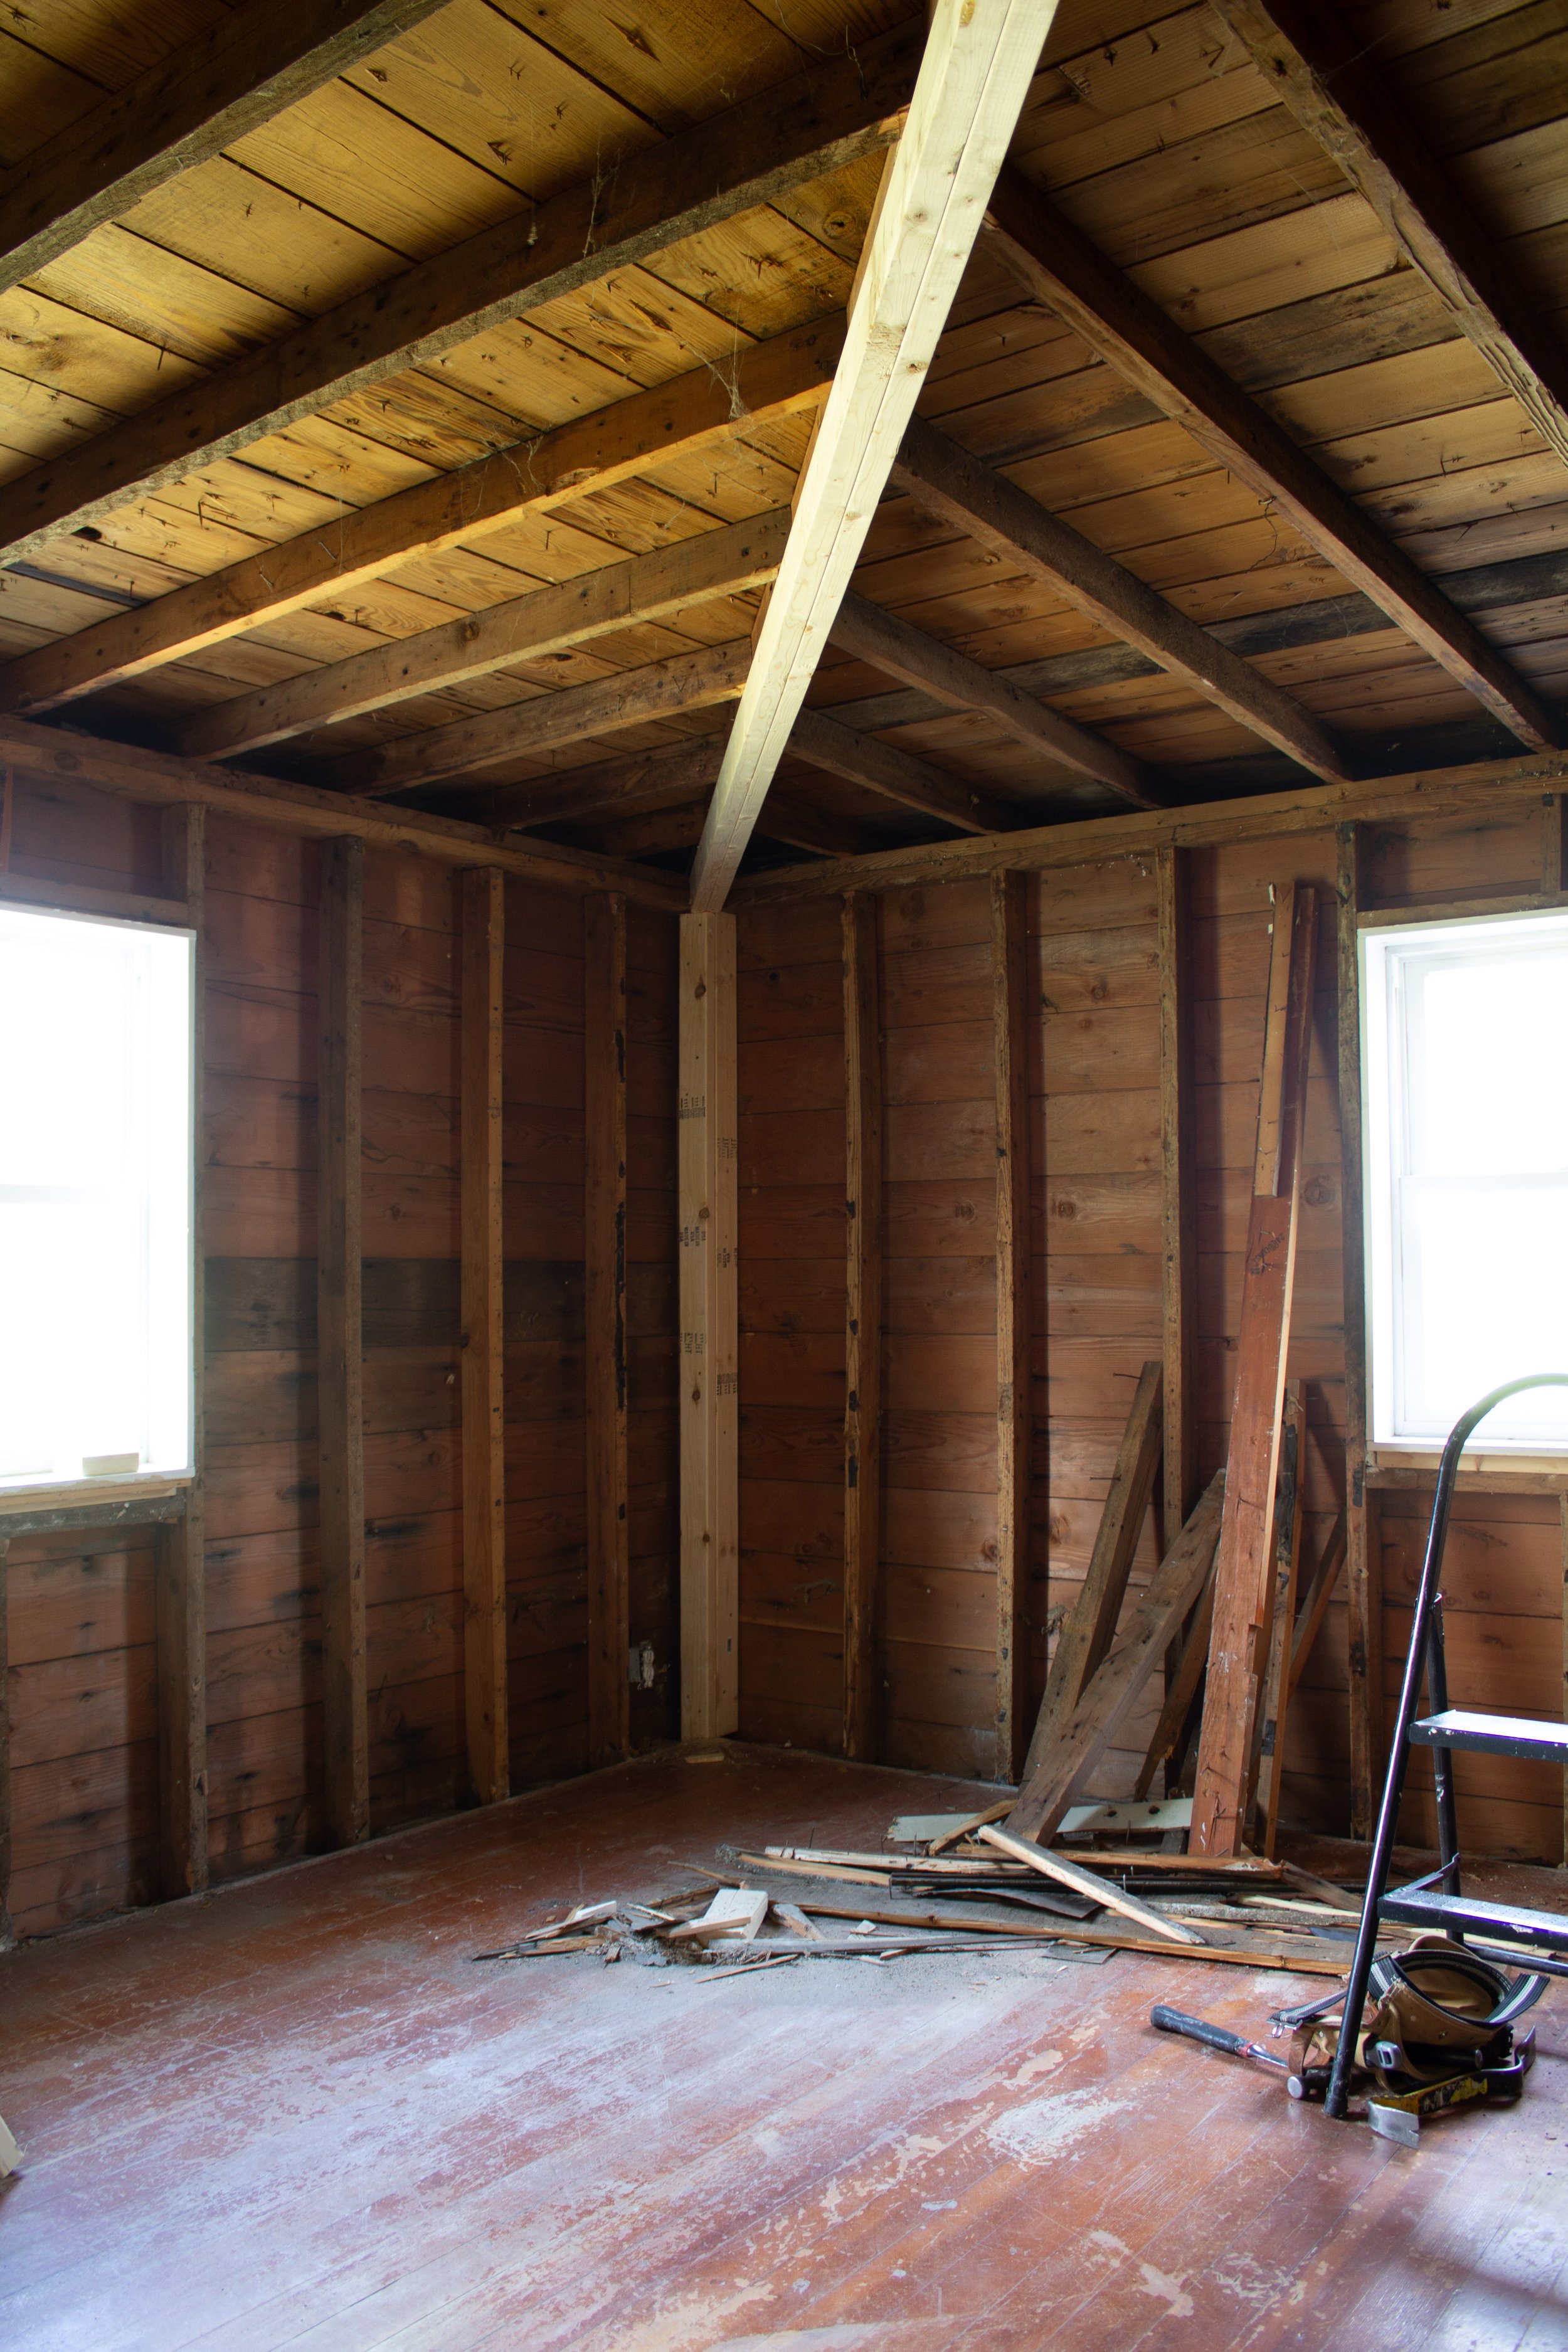
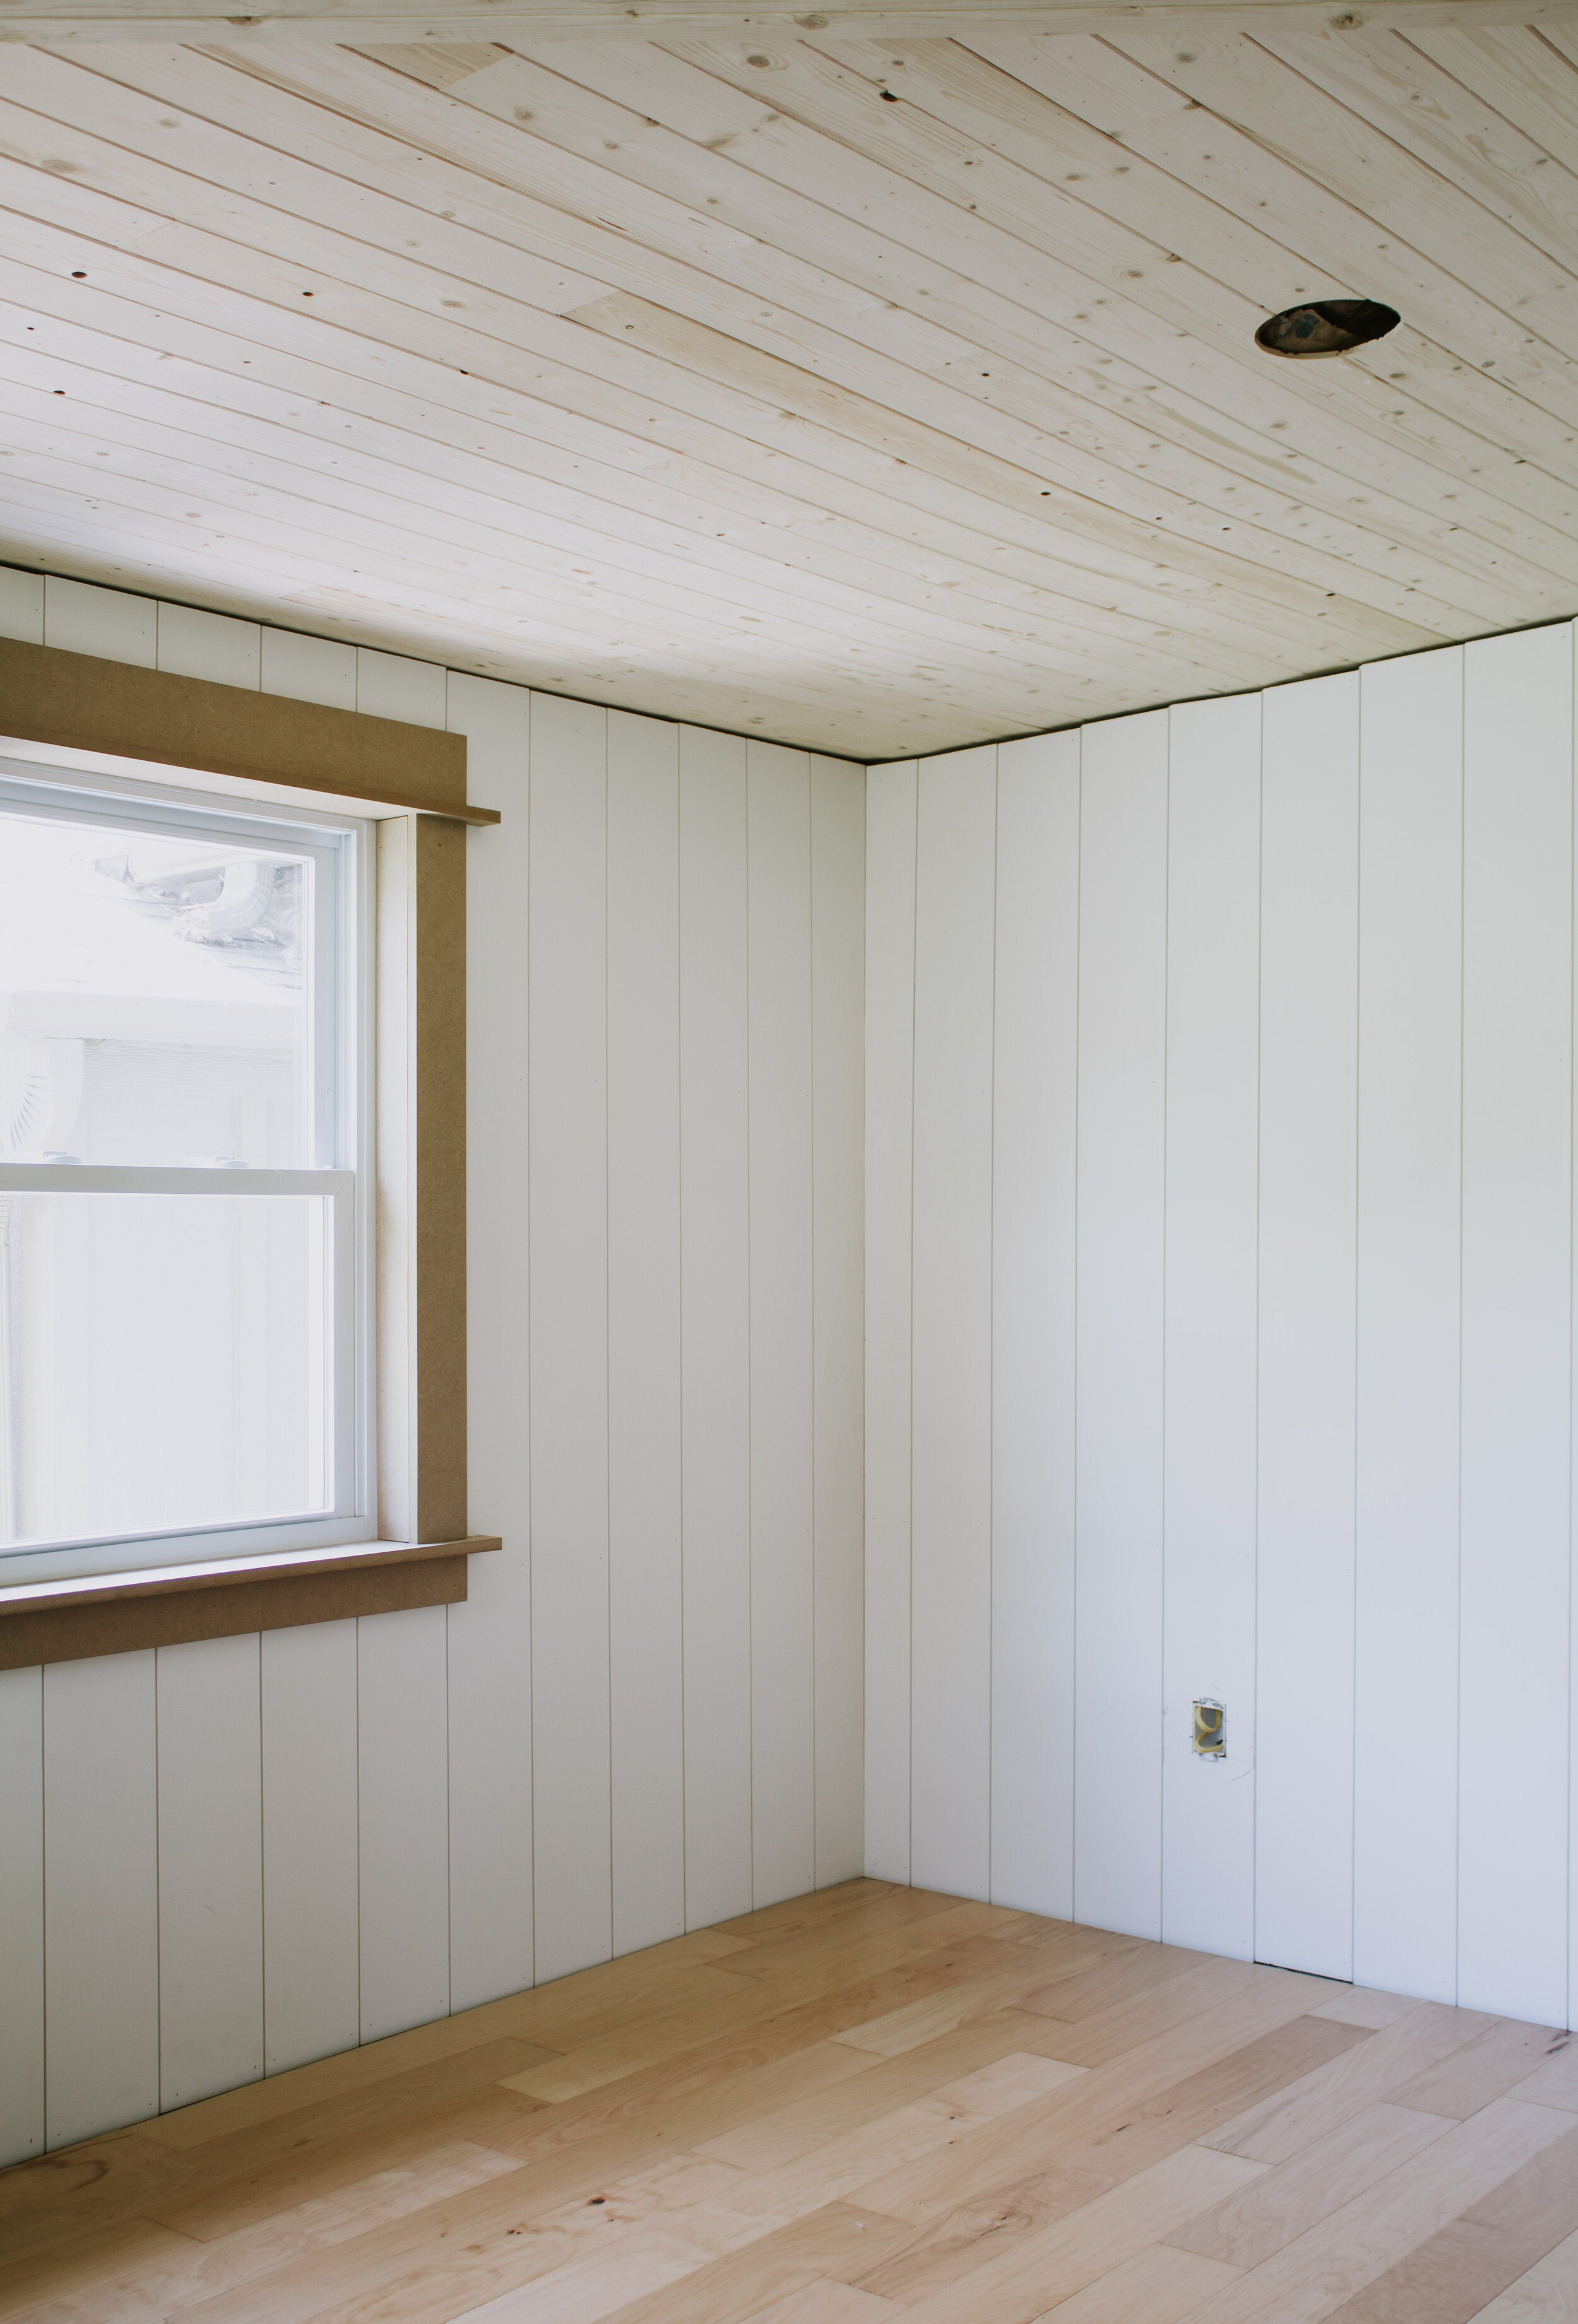
Before
My first decision was to incorporate wood planks on the ceiling. That was my non-negotiable for this quirky room remodel.
After ripping off the ceiling drywall, we discovered that the roof line wasn’t as simple as we hoped it would be. It’s a hip roof which means that there are two different slopes instead of one and the slopes meet in the middle of the room at a diagonal. We pivoted our plan, added a beam down the diagonal line where to slopes meet, and followed both slopes of the roof with wood planks. So that explains the V formation.
With the low pitched hip roof, we couldn’t add a ton of weight to the ceiling which eliminated my first 3 wood plank options – beadboard planks, car siding, and flat edge pine. All three were too thick and would add too much weight to our roof. 4×8 panels weren’t an option either because I didn’t want to see the seams. We went back to the drawing board and after a lot of research I stumbled upon the exact product we needed – 1/4” thick tongue and groove pine planks. (UPDATE: the original product we used is no longer available, but these cedar boards are nearly identical.) These are super lightweight, super thin, and interlock! When we had such little wiggle room with the materials we could use, I felt so fortunate to find something that checked all our needs.
We installed them over the next few days and I have a lot of thoughts about this product.
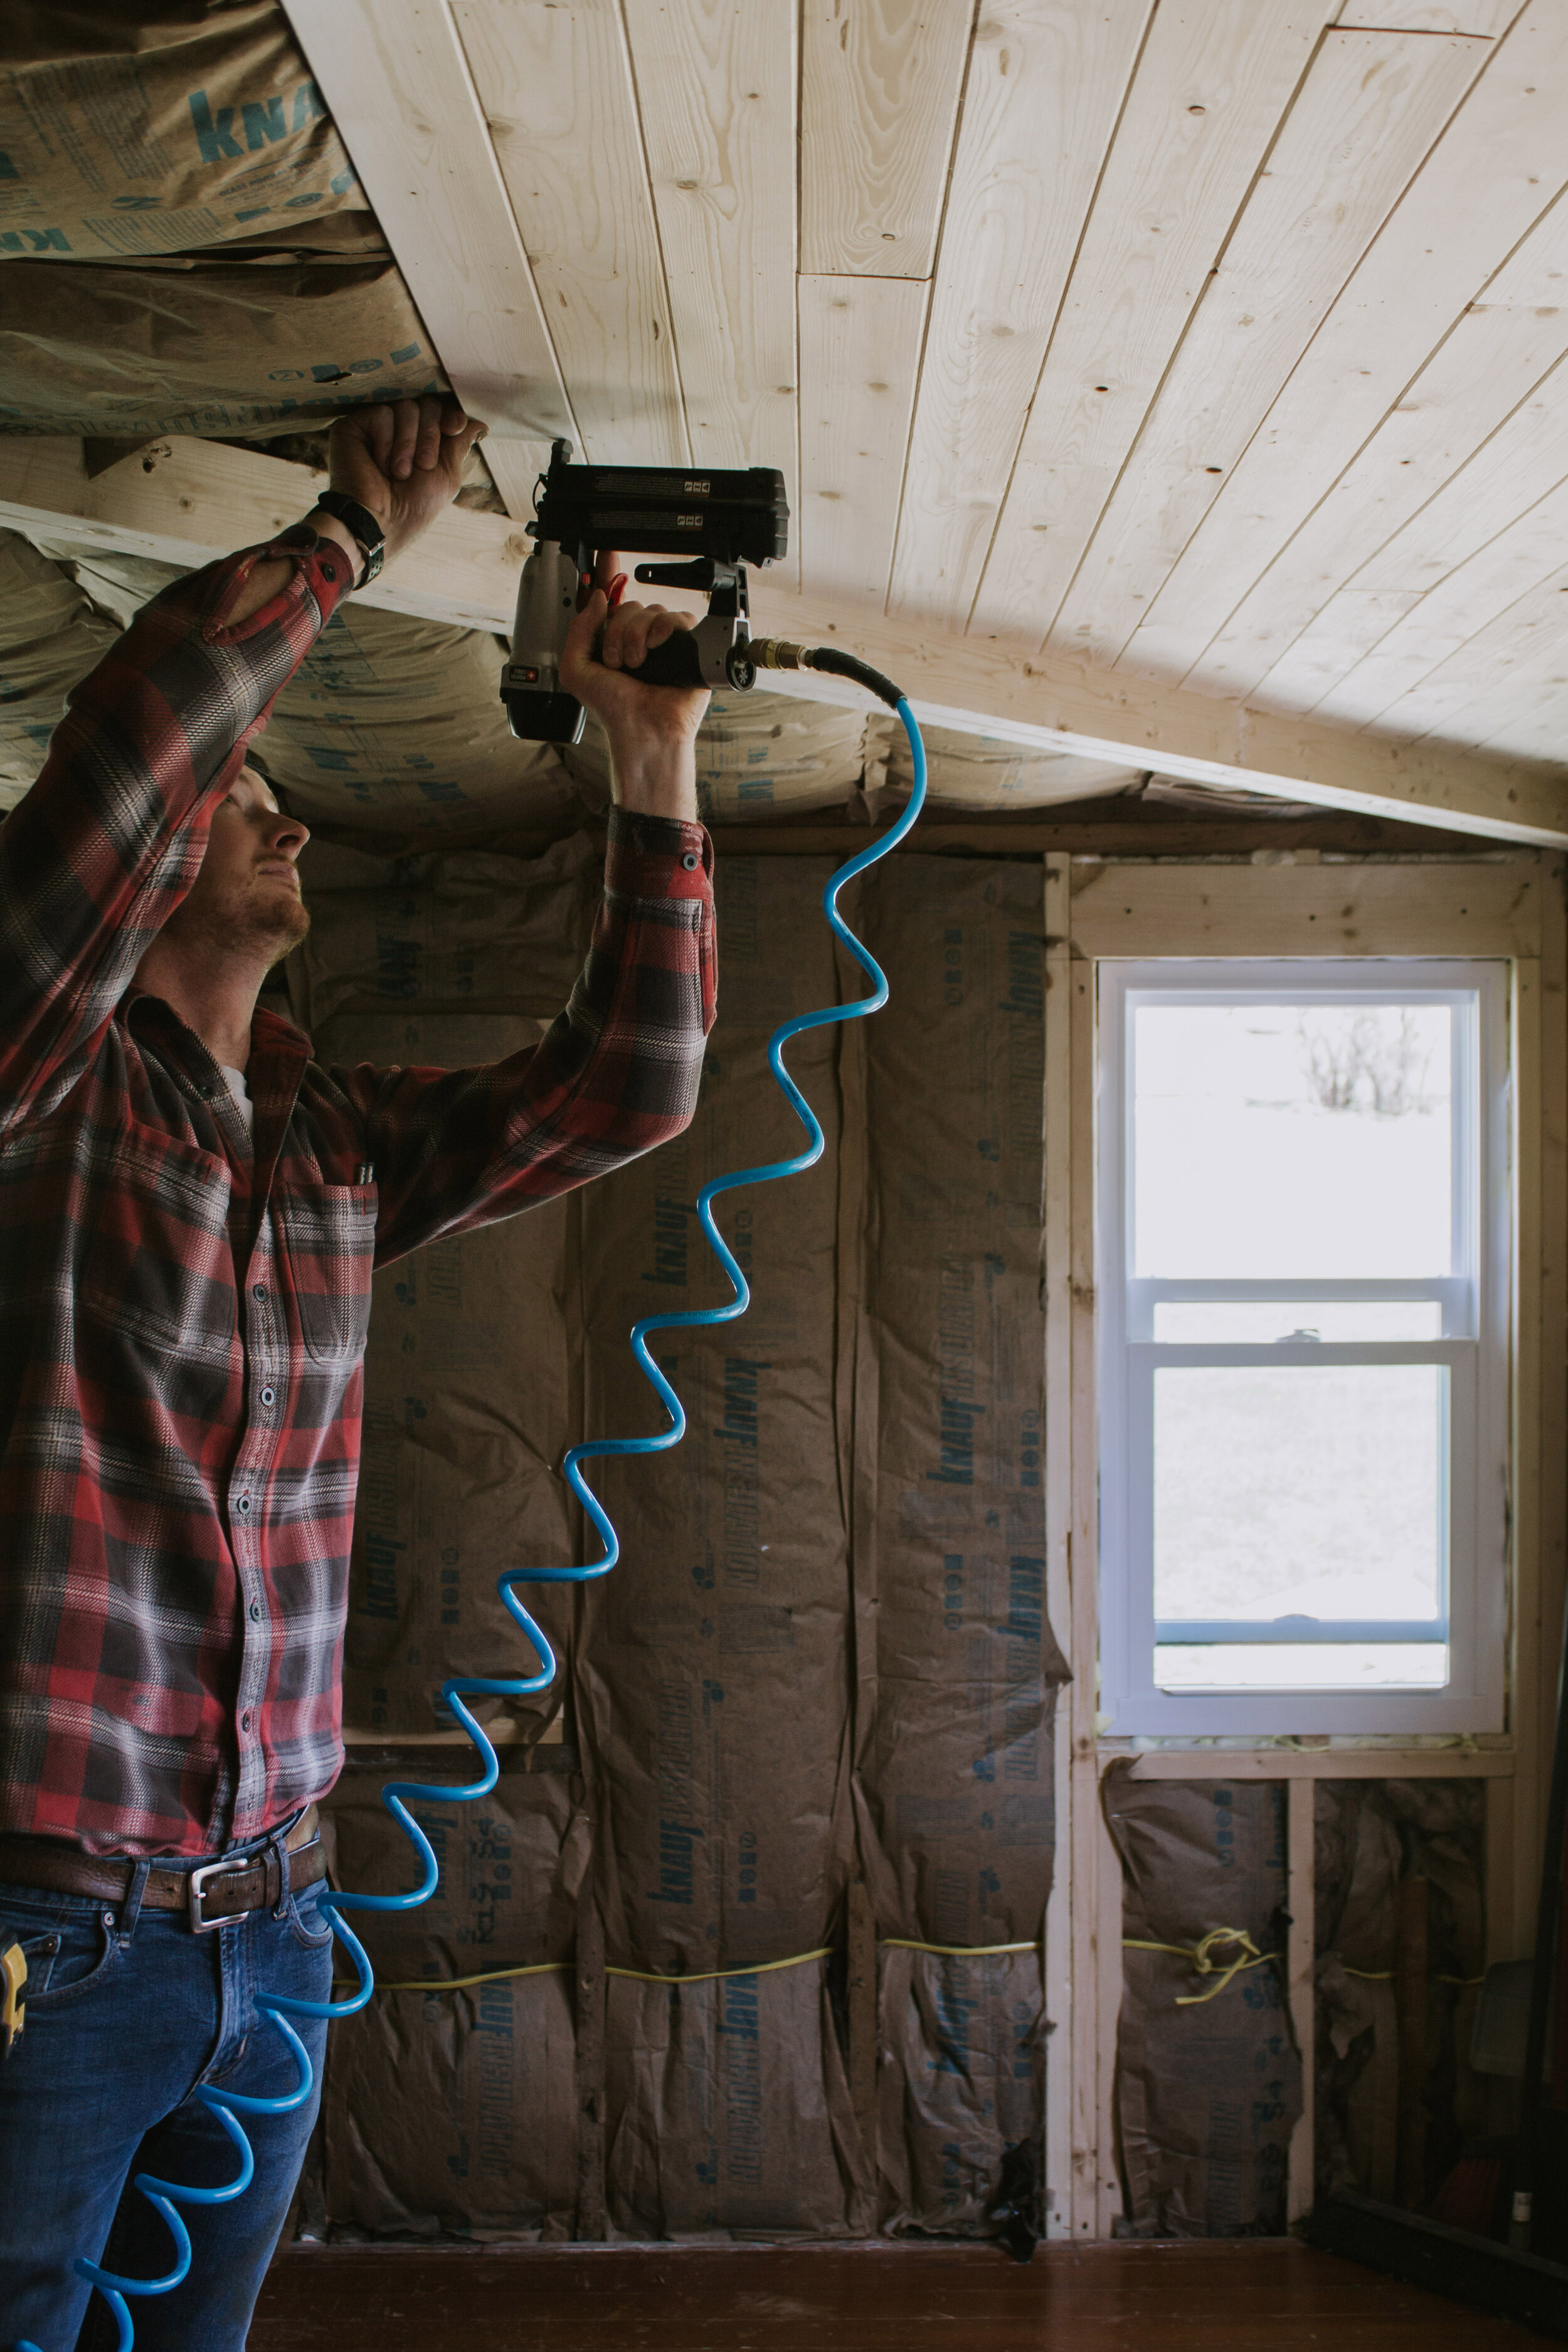
HOW TO INSTALL A WOOD PLANK CEILING
In terms of installation, it was fairly straight forward. We installed the boards directly to the rafters to save head space and this way we could see where the rafters were at for nailing. We started in one corner of the room and worked our way over creating staggered seams as we went. (I’d recommend using glue if you can’t nail to the rafters.) We left a 1/4” gap on all sides of the ceiling for expansion and we used our brad nailer and 1” brad nails which held perfectly.
PROS & CONS
The planks come in packs of 6 and as several product reviews said, some packs will have damaged wood. Thankfully Lowe‘s had no problem accepting a return for the damaged boards!
The wood is really thin – only 1/4 inch thick – so that in itself has some pros and cons. PROS: it’s lightweight to hold overhead, it doesn’t add a lot of weight to the roof, and it’s really thin so if space is a concern, these are the solution. CONS: It took some finagling to interlock the longer boards and if we weren’t careful, the tongues or grooves would get damaged or bent. If you were installing this product in your entire home, a thicker wood with a wider tongue and groove connection would make installation MUCH easier and faster.
SOMETHING TO KEEP IN MIND
We ripped out all the existing drywall and like I mentioned above, we installed the planks directly to the rafters which was really nice having something sturdy (other than drywall) to nail to. These won’t budge easily! One thing I wish we would’ve taken note of before installing was whether the rafters were all level. We noticed (after installing half the room) that one rafter sat slightly lower than the others making the wood dip ever so slightly in that spot. In the end, it’s not noticeable and in our scenario, this room is supposed to look old and original so I don’t mind a little imperfection. But since this wood is so thin and bendable, that’s something to keep in mind.
WEIGHT
In terms of weight, it is exactly what we needed. Incredibly lightweight…lighter than drywall even. We don’t have any concern that this wood will add strain to our roof and because of that, it was an easy decision for us to choose this product.
PRICE
This is the best part….these cost $22 for a pack of six 8ft boards. (UPDATE: A pack of 6 now costs $26.98.) I searched for weeks and I couldn’t find anything remotely close to that price! At the time of this project, the cost of this wood was even less so we were able to install our entire ceiling for a little over $100, and that my friends was quite possibly my best money saving find yet! But even with the price increase now, they’re still a great deal compared to the alternatives!
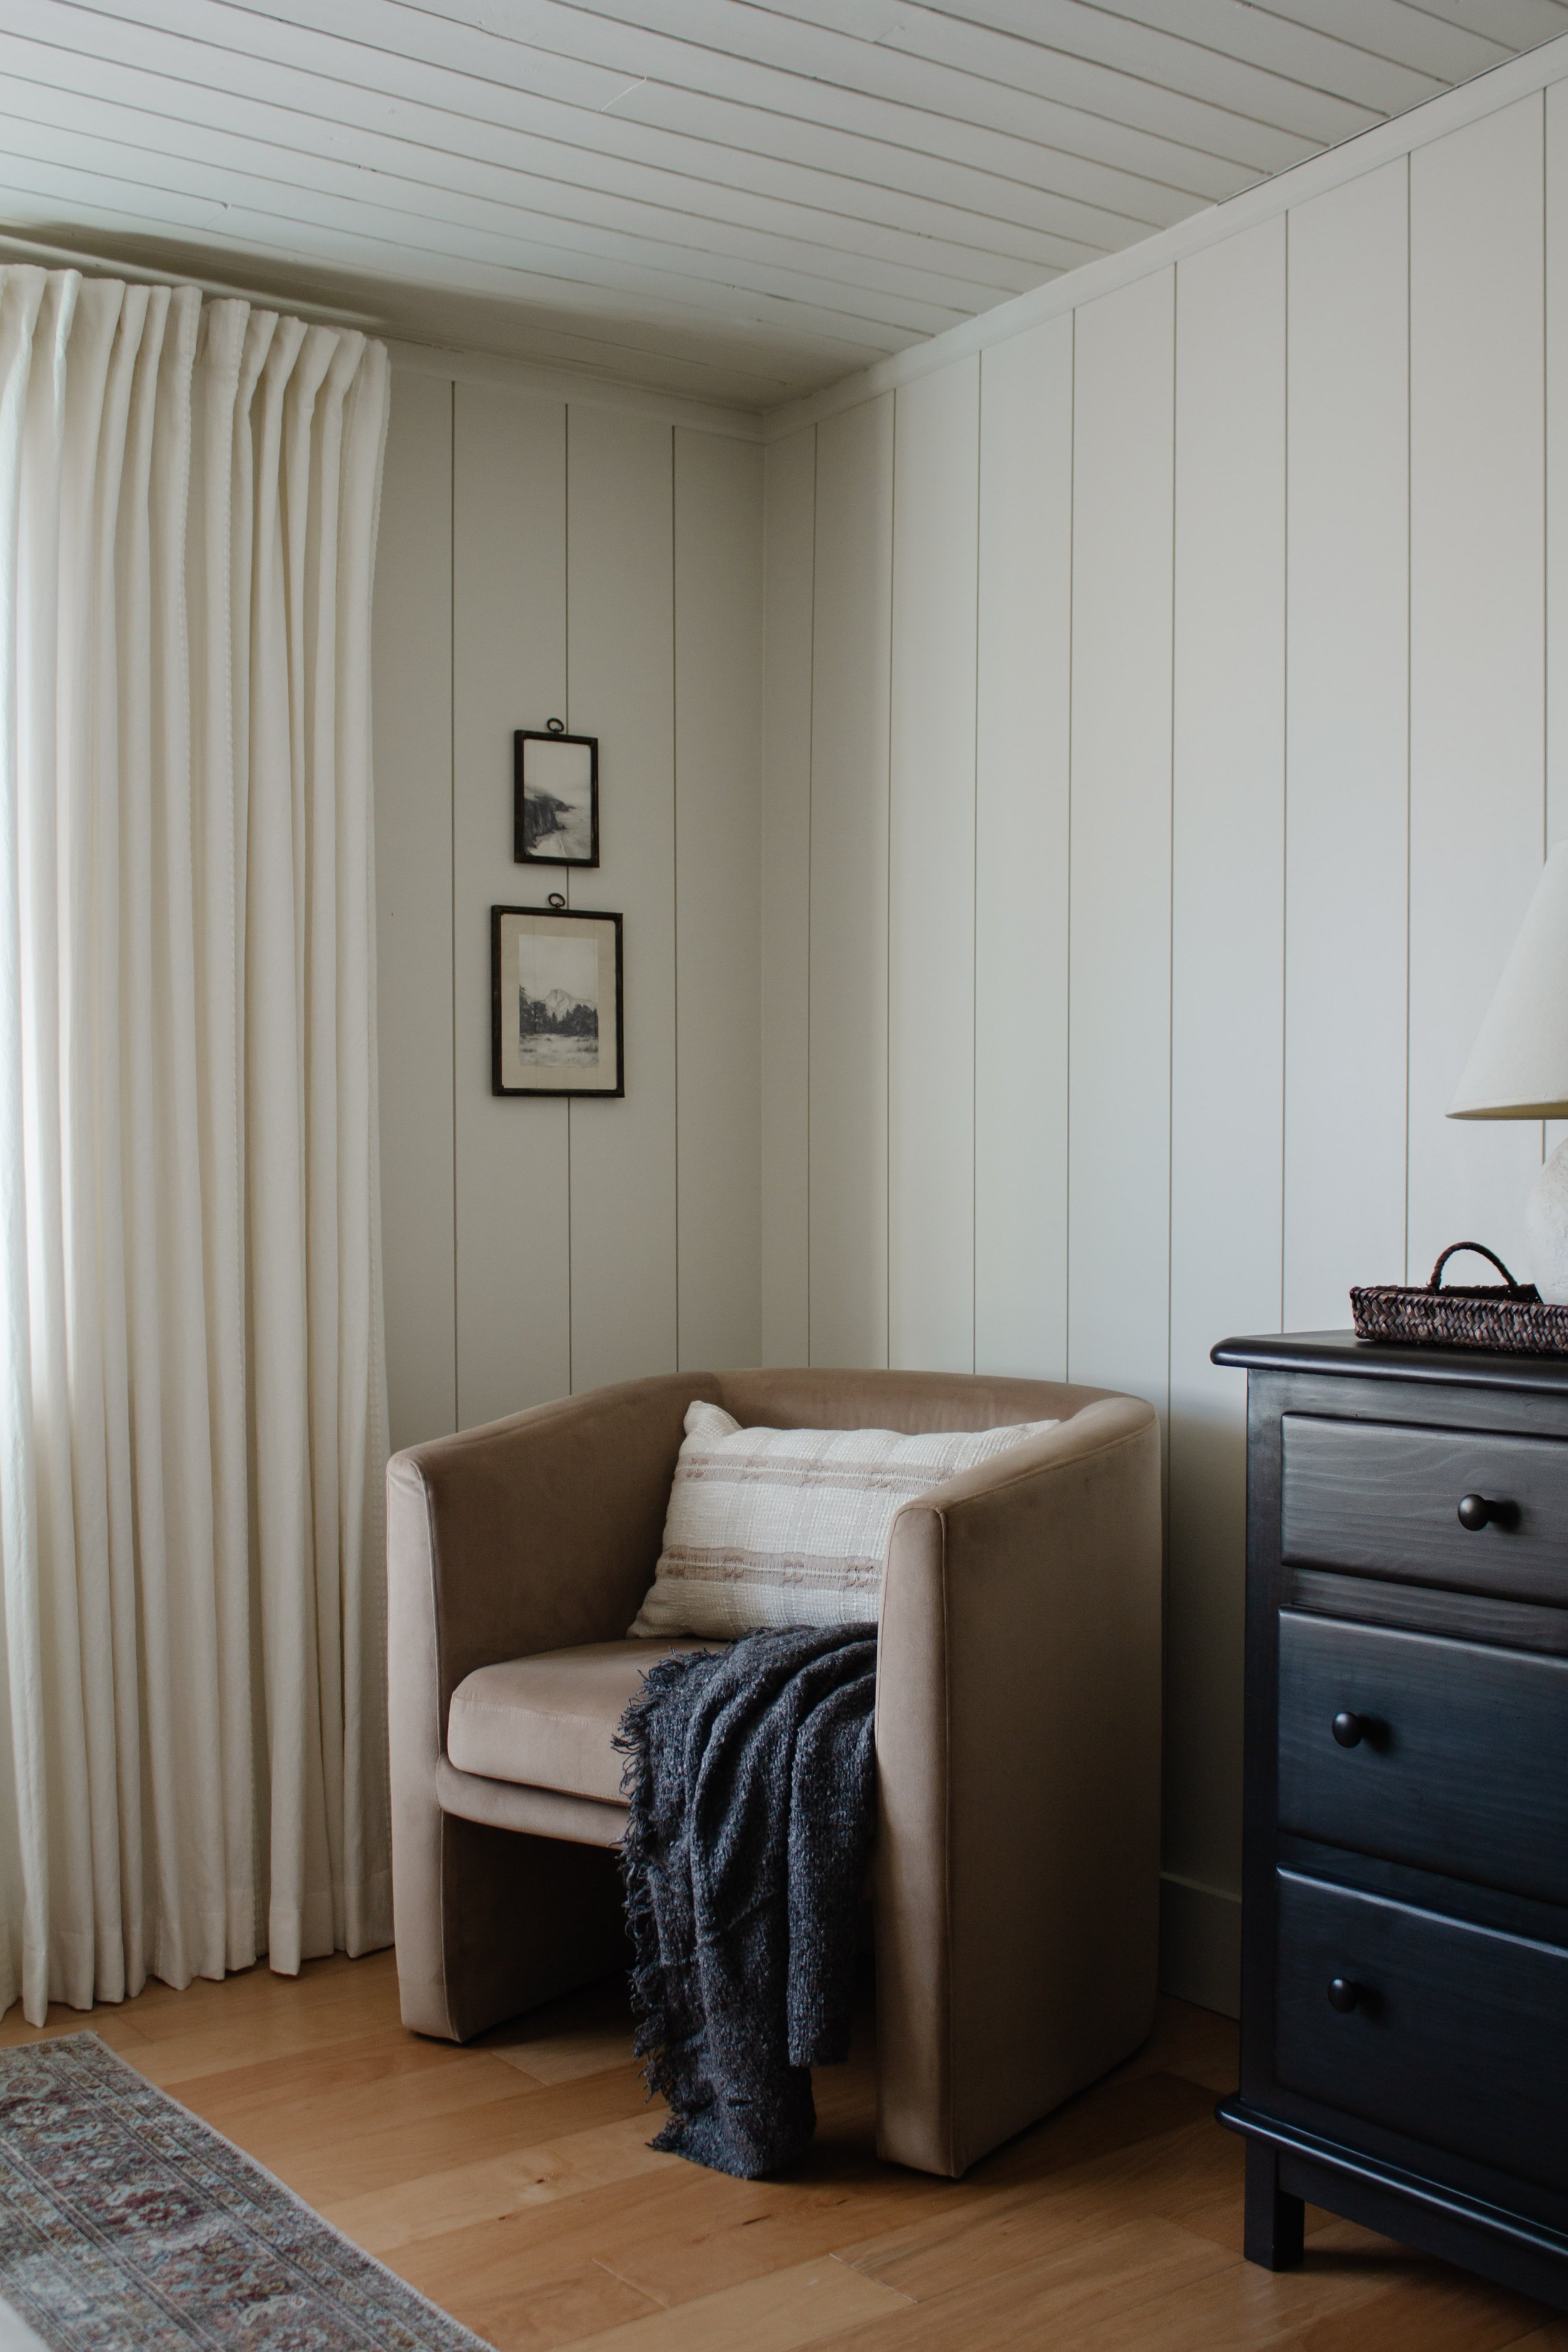
PAINTING
We decided to paint our ceiling. I LOVE the look of an old wood ceiling (or floor) that’s been painted a light color. It feels clean but still highlights the character of the wood with exposed cracks and nail holes. We did fill in the nail holes we made from our brad nailer with wood filler because I didn’t want to see any nail patterns, but most other imperfections were left untouched on purpose. We primed the ceiling first with Zinsser Primer and then painted the ceiling the same color as our walls – a custom mix we formulated with Home Depot. We used my favorite paint sprayer to paint the whole room – walls, window trim, baseboards, ceiling, and beam all one color. The finish of the enamel paint is dreamy!
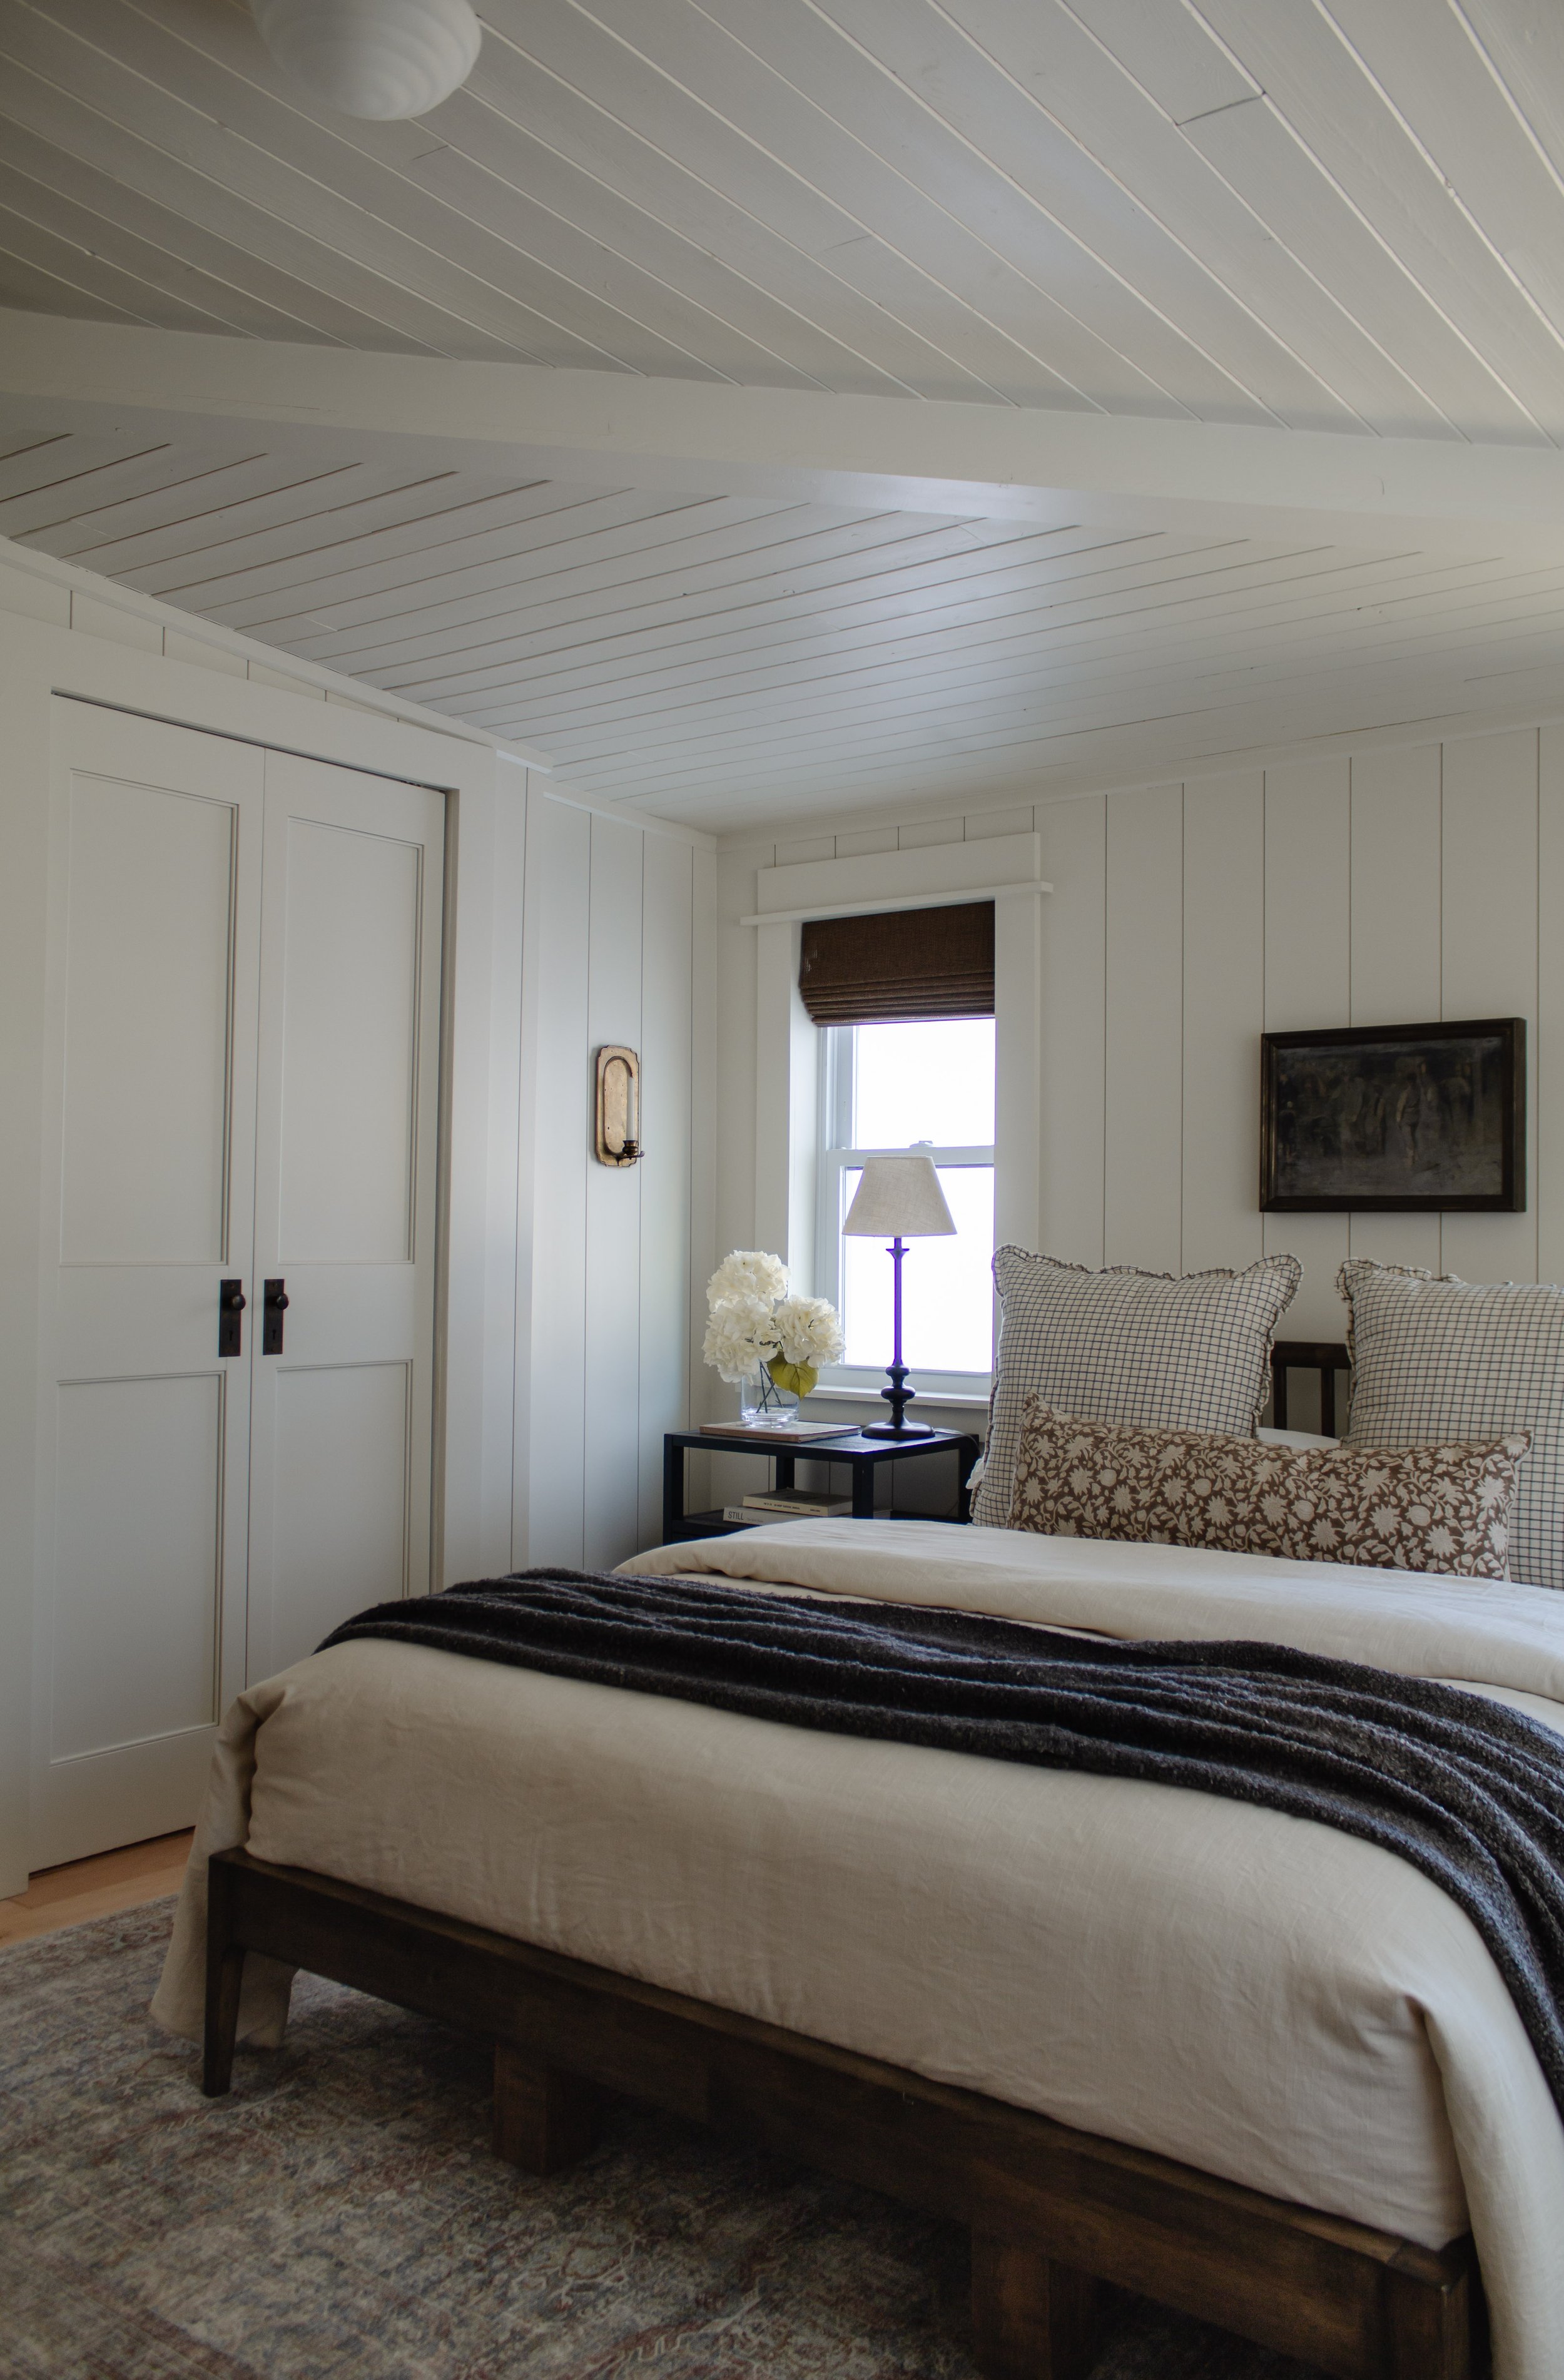
Comforter | Throw Blanket | Lumbar Pillow | Windowpane Pillows | Artwork | Rug | Roman Shades | Nightstand | Lamp | Lamp Shade | Hydrangeas | Candle Sconce (vintage) | Bed Frame (no longer sold)
And that’s how we installed our ceiling planks! If you have any questions I didn’t answer above, put them in the comments below and I’ll answer them as best I can!
And in case I haven’t convinced you yet to look at our full bedroom reveal, head to this post.
Shop The Look
BEDROOM SOURCES & LINKS

Leave a Reply


Where behind the scenes, exclusive advice, and candid conversations are sent straight to your inbox every week.
The Inside Scoop
DO YOU WANT

This ceiling turned out amazing!!! By the way I thought the boards are made from pvc or plastic, they are actual wood…nice
I love the design. Many homeowners use that today, and they look fabulous.