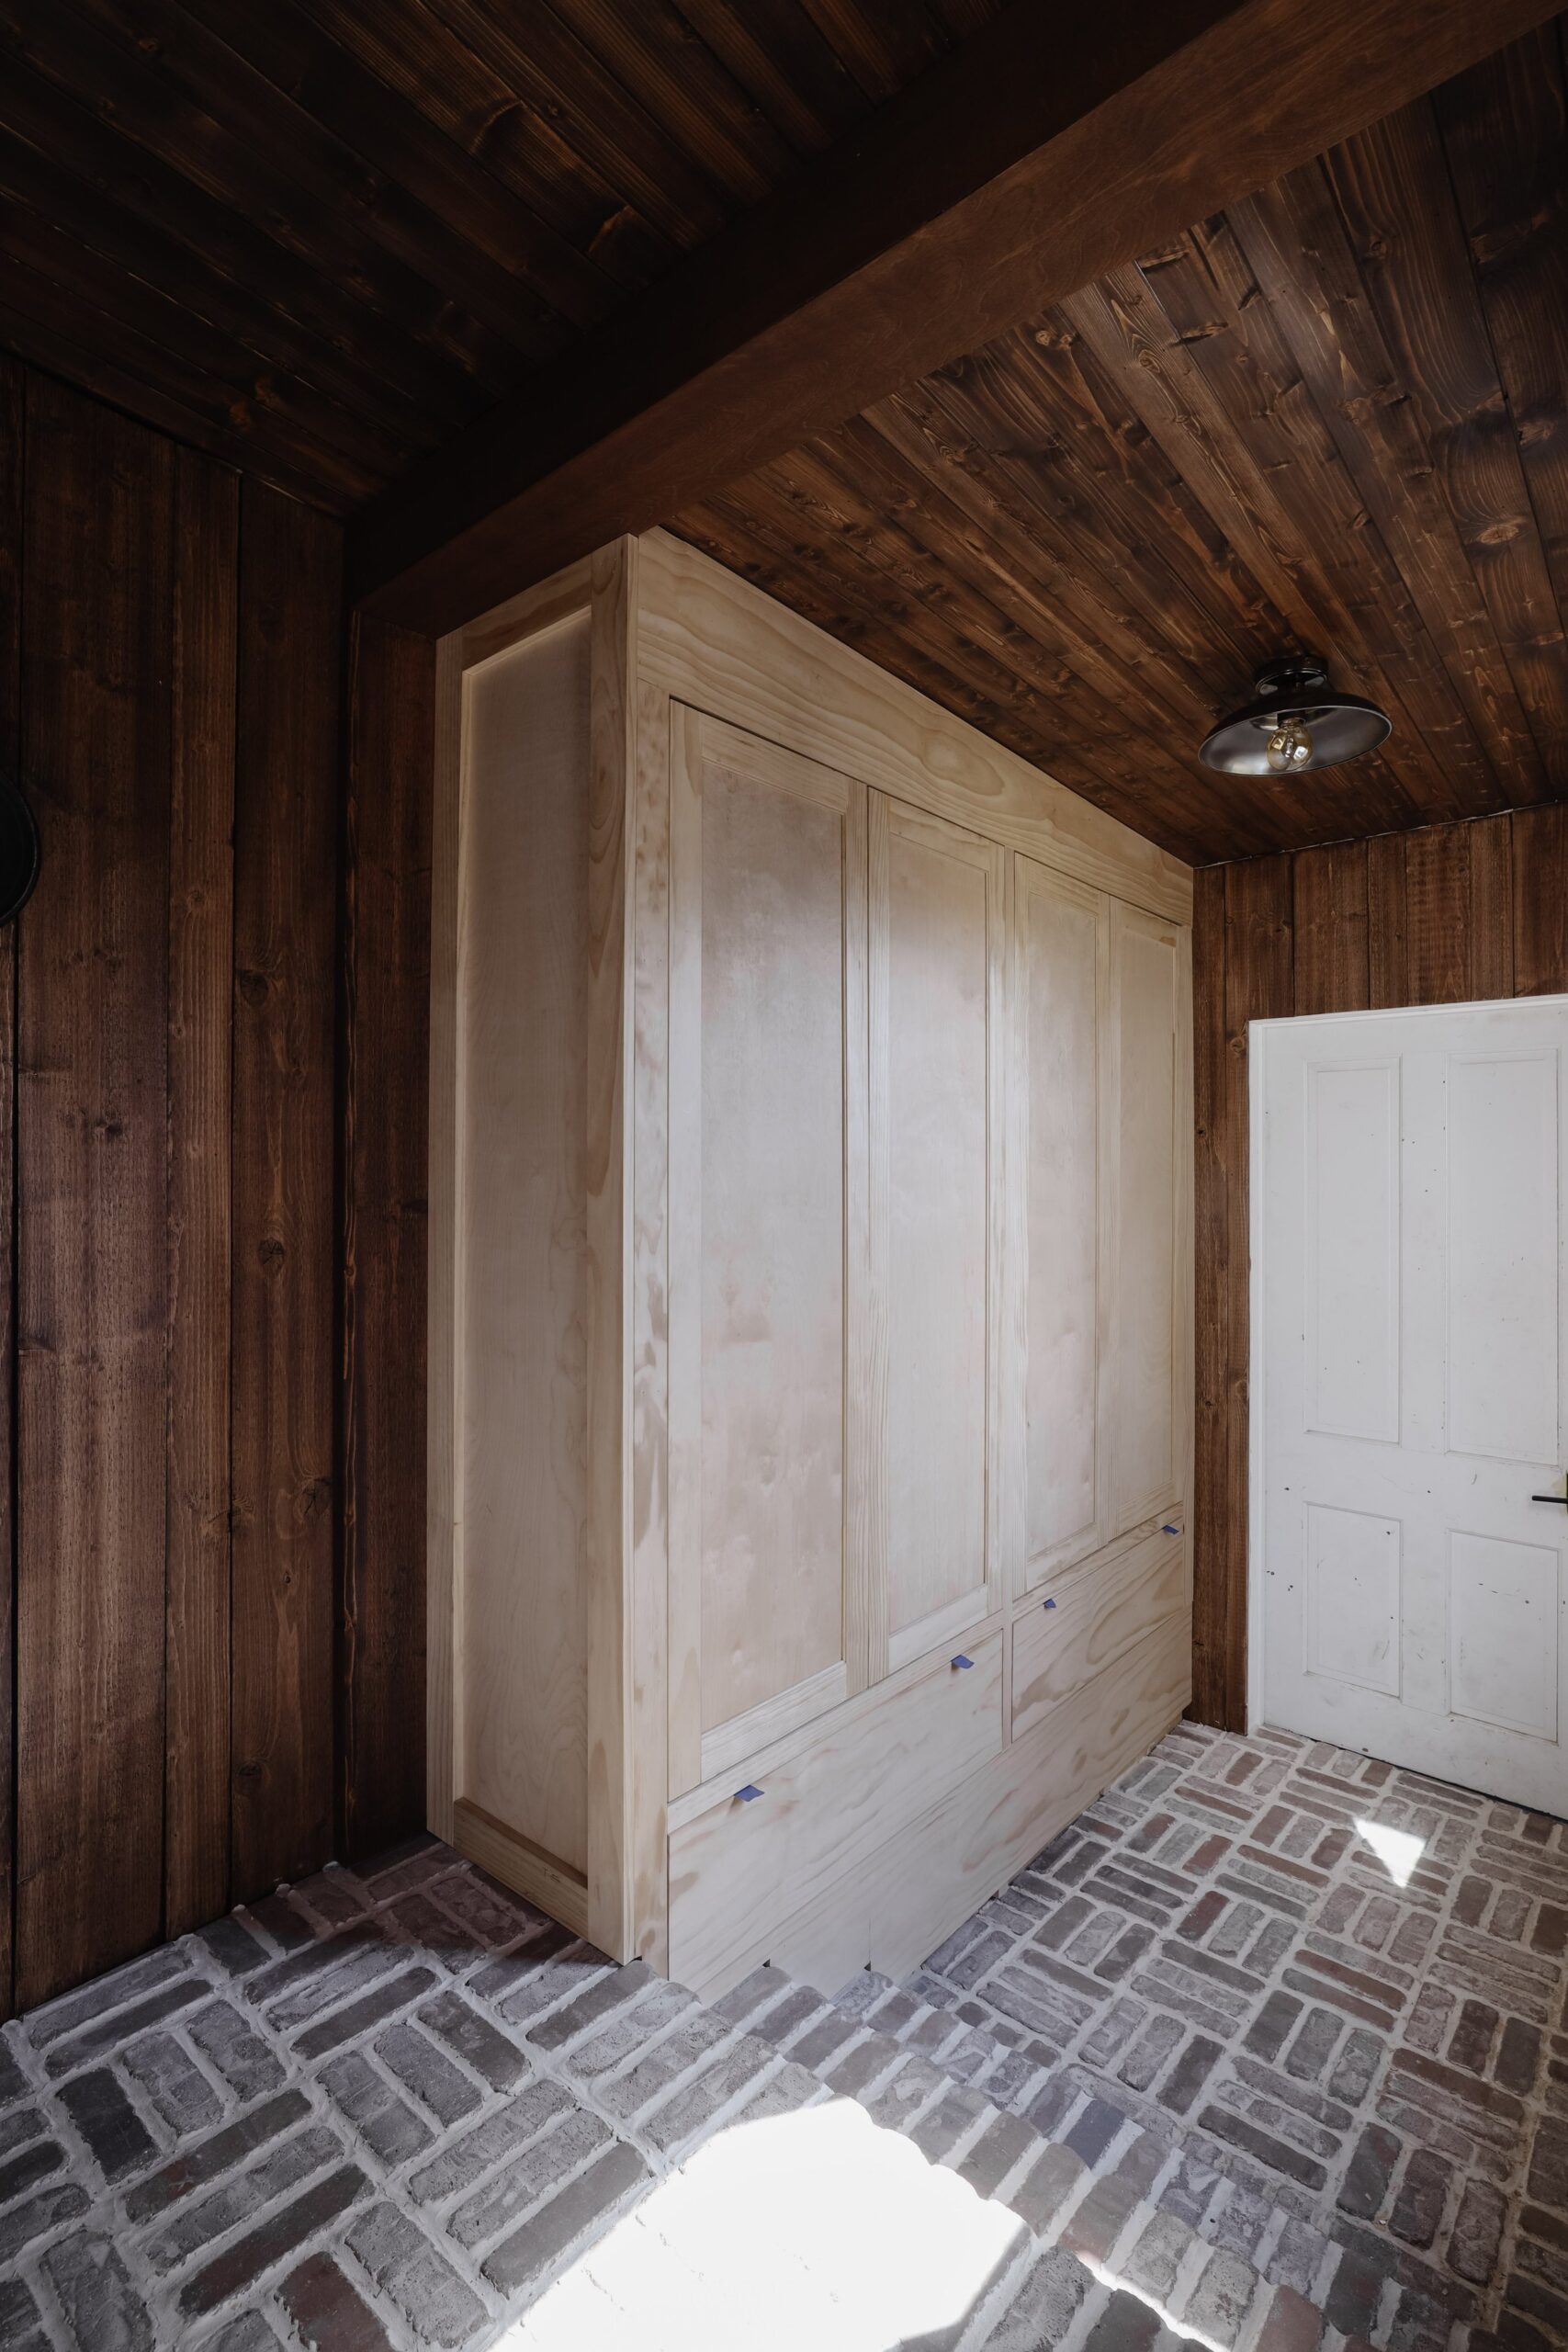
When I step back and look at this cabinet, I can’t help but be amazed that this started with just two Ikea Pax frames stacked side by side. I had a vision for a custom built-in cabinet that looked more like furniture than a mudroom closet. We don’t have a ton of storage space in our home so creating a space for coats, cleaning supplies, extra linens, etc was important to us. I wanted to avoid the mudroom locker look or the open cabinetry hook look – they can look cluttered and messy quickly so I knew I wanted everything tucked behind doors….tall majestic shaker doors to be exact.
This was our first experience building cabinet doors from scratch and we approached this project with cautious optimism. In summary, we’re so happy with the outcome given the circumstances we dealt with. (More on that later)
To make the doors, we followed a Youtube tutorial from Training Hands Academy and it’s excellent! Very clear instructions for both beginners and experienced woodworkers. I suggest starting with that tutorial and then coming back here because I have a few additional notes from our experience.
STEP 1: CUT THE STILES & RAILS
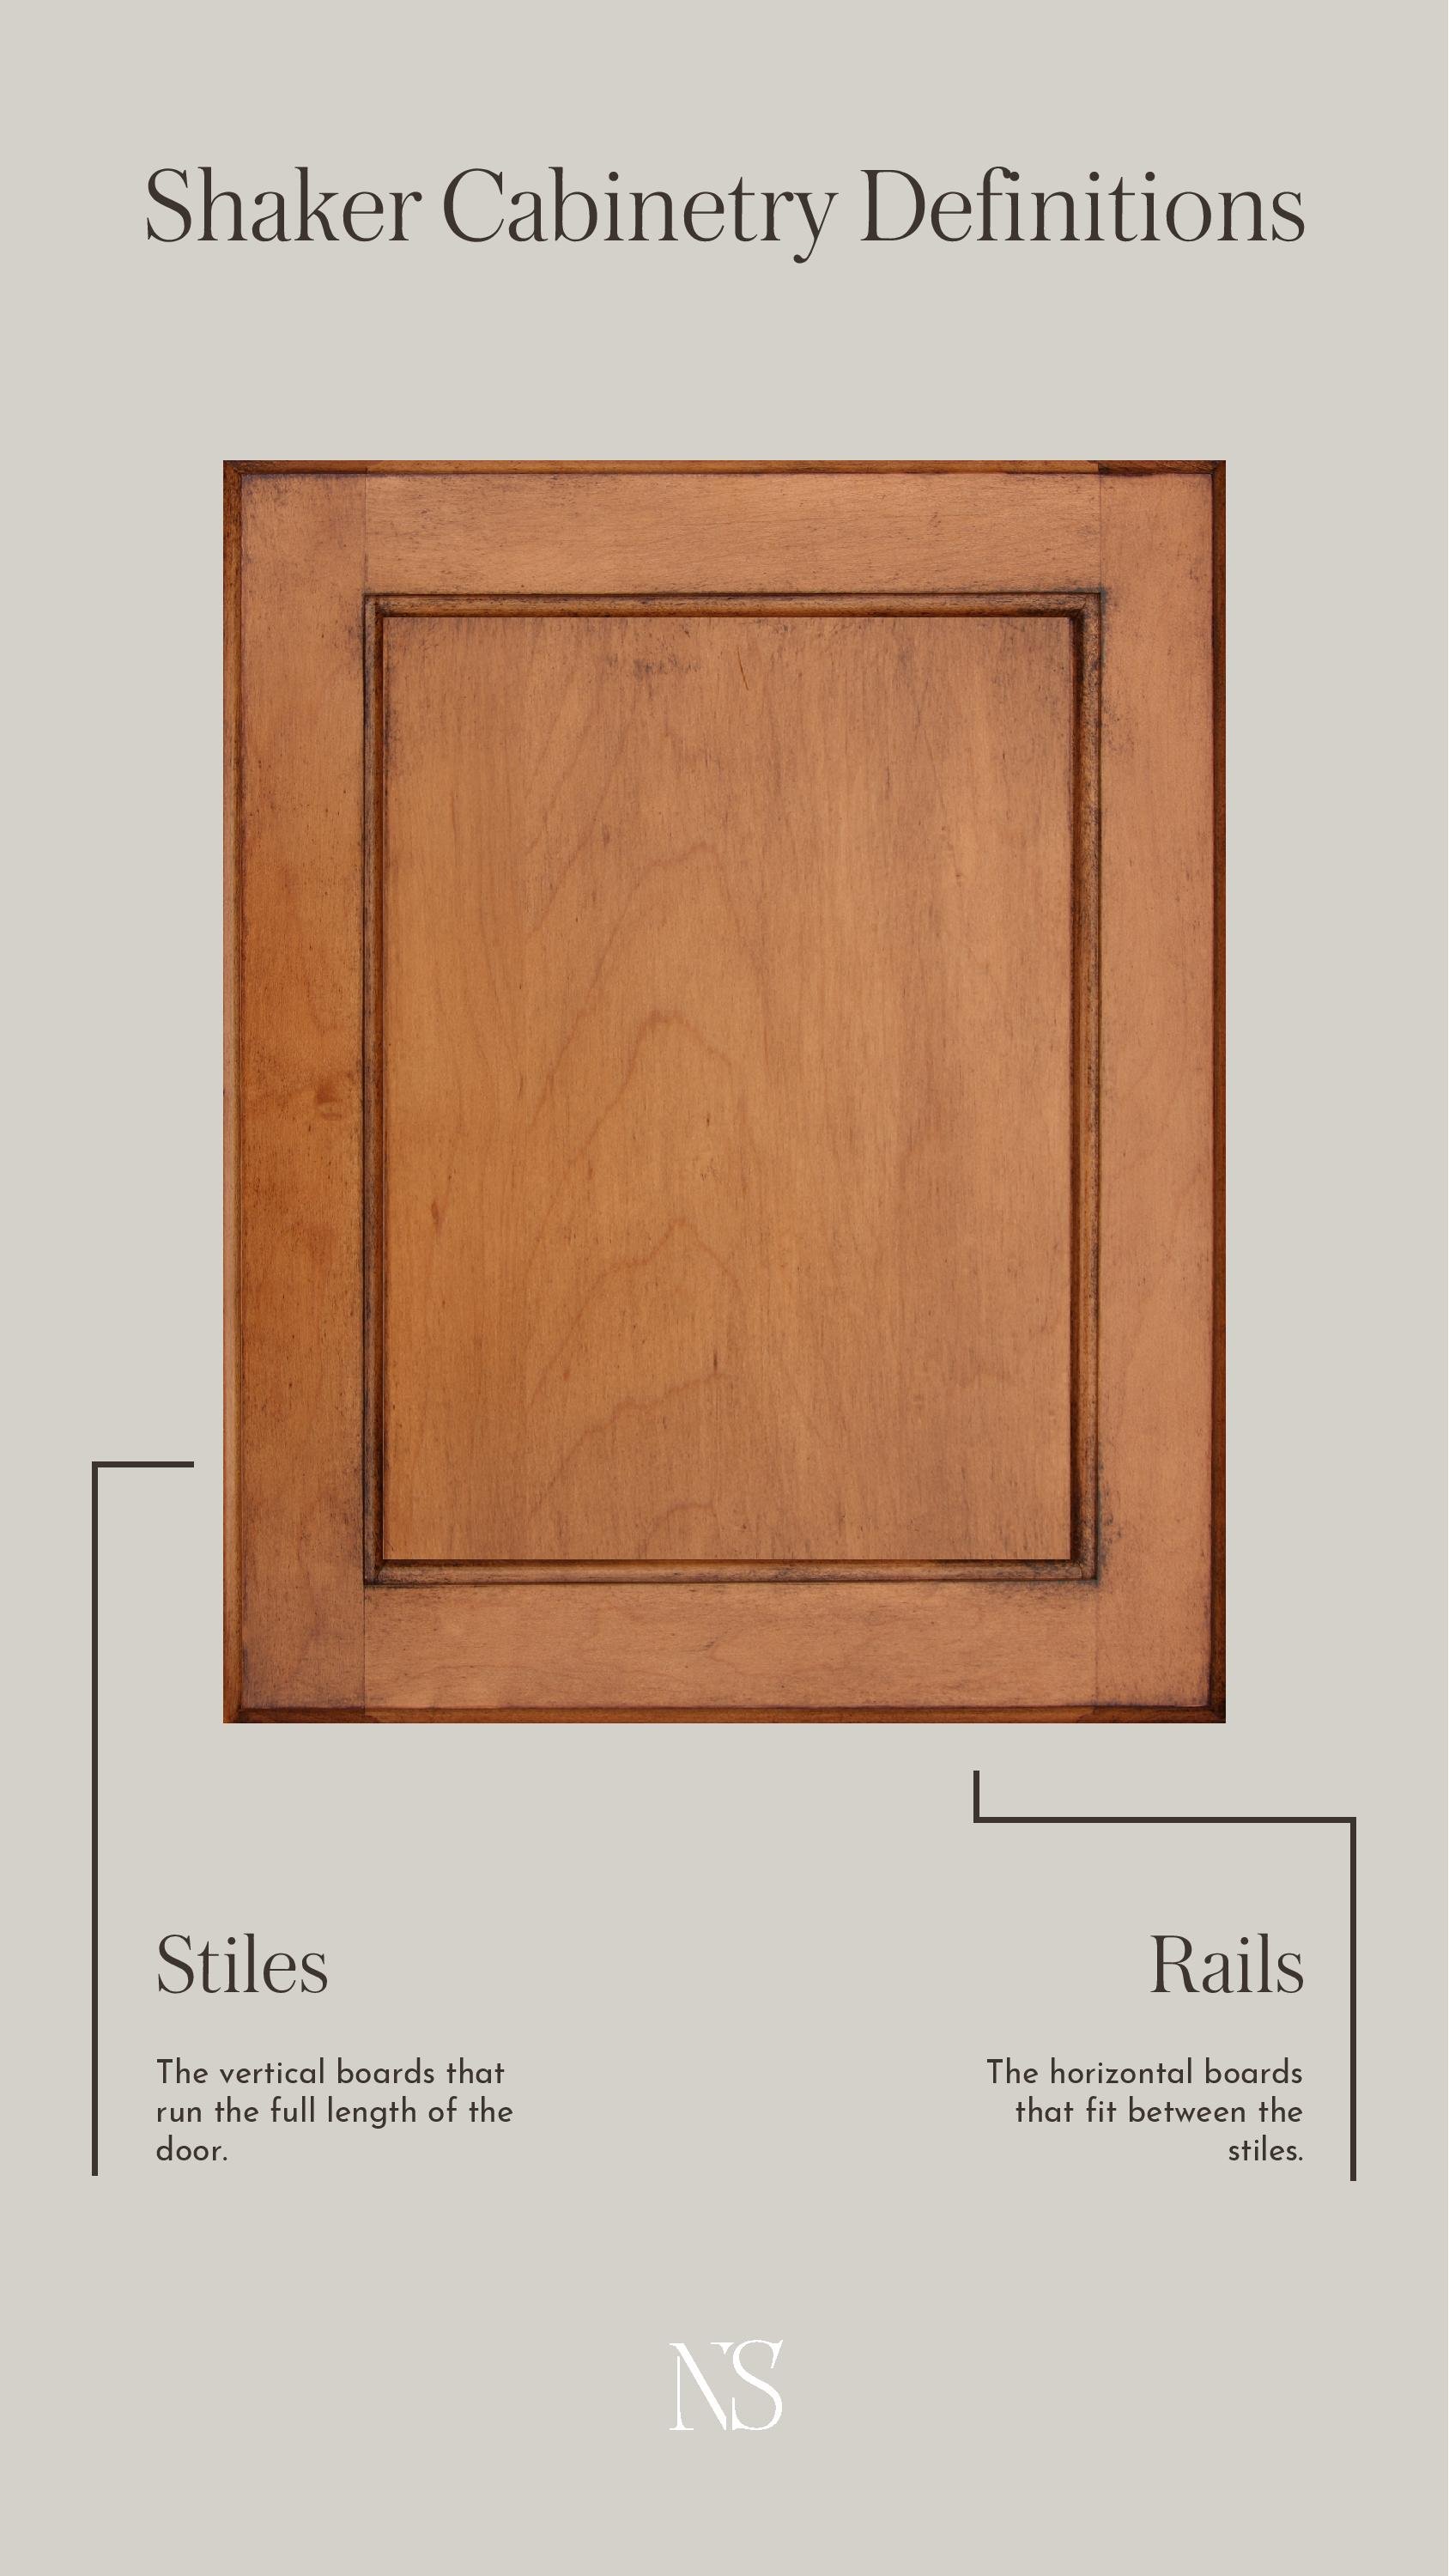
The stiles (vertical boards) run the full length of the door. The rails (horizontal boards) fit between the stiles. We chose to use 1 x 2 1/2” wide pine boards which is within the standard range for shaker door borders.
First determine the length of both the stiles and rails –
For inset cabinetry like mine, measure the opening height of your cabinet frame and subtract 1/4” (which accounts for an 1/8” gap on the top and bottom.). This is the length you should cut 2 boards for your stiles. If your cabinet doors overlay instead of inset, cut your boards at the exact height you want your doors to be.
For the rails, there’s a little more math involved since they sit between the stiles. For inset cabinet doors:
Measure the opening cabinet width
— 1/4” (an 1/8” gap on both sides)
— 5” (the width of 2 stile boards)
+ 3/4” (the length of two tenons)
________
This total is the length at which you need to cut 2 boards that will be the rails.
You should now have 2 stiles and 2 rails.
SOMETHING TO NOTE:
Be sure to check that the boards are perfectly straight. We realized a little too late in the process that our stiles were bowed out ever so slightly creating an issue once it came time to fit the doors in the cabinet.
STEP 2: CUT A GROOVE IN EVERY BOARD
Next you need to create a groove for the center panel to sit in. For the center panel, we used 1/4” plywood so we cut a 1/4” groove.
Set your table saw blade at 3/8” high, place your board on end against the fence, and adjust the fence so the blade is centered on the board. Run all 4 boards through the table saw.
Adjust the fence ever so slightly away from the blade to create a wider channel and run a board through. Flip it front to back, and run it through again. This is a cool trick I learned from Training Hands Academy and his video demonstrates it well. By running the board through, flipping it end to end, and running it through again, you’re automatically centering the groove within the board.
Once you’ve run all 4 boards through, continue to adjust the fence ever so slightly and run the boards through until the groove fits snug around the plywood panel.
P.S. Doing a test piece first to find the right fence placement/groove width may be beneficial.
STEP 3: CUT THE TENONS
Next, cut tenons in the two rail boards. First lower the saw blade, just below the groove. Draw a line on the wood 3/8” in from the edge of the board and set up your table saw so the edge of the blade lines up with the line. Run the board through the table saw, flip it over, and run it through again. You can now run the board through repeatedly until the tenon is fully cut.
Flip the board to do both ends and repeat on the second rail as well.
Once finished, test to see if the tenon fits snug into the groove of the stile.
STEP 4: CUT THE CENTER PANEL
To determine the size of the center panel, dry fit the stile and rails together. Measure the inside length of the rail board and add 1/4”. Then measure the inside length of the stile and add 1/4”. These two measurements are the size in which to cut the center plywood.
We used 1/4” sanded plywood as our center panel.
SOMETHING TO NOTE:
You may want to consider MDF instead of plywood. We found that with tall doors, the plywood was really wavy and difficult to fit into the groove. Because MDF doesn’t warp, it should be easier to assemble.
STEP 5: GLUE & ASSEMBLE THE DOOR
We chose to dry fit everything to ensure it all worked before we started gluing it together. If all is good, add glue to the tenons, slide the panel in place, and add the last stile.
Before the glue dries, double check that the door is square. You don’t want a lopsided door! Training Hands Academy shows a cool trick – measure diagonally from corner to corner and if the two measurements are within 1/16”, you’re good to go!
STEP 6: CLAMP
We clamped the ends in place and let them dry for 12 hours.
There may be some excess glue that you’ll need to sand off once the glue is dry. Then you can add your hinges next. We chose to use soft close inset hinges. After that you can sand, stain or paint and hang your doors!
SOMETHING TO NOTE:
I took it a step further and added 3/16″ dowels along the border for a more custom look. To do so, I cut the dowel ends with a hand saw at a 45° angle and glued them down along the border. To hold them in place while the glue dried, I taped them down with painters tape every 6″ or so.
SUPPLIES LIST
WOOD NEEDED:
-
1 x 2 1/2” pine boards
-
1/4” sanded plywood or MDF
MATERIALS NEEDED:

If you’re curious how we built the custom drawers for this cabinet, you can see a full tutorial here.
Where behind the scenes, exclusive advice, and candid conversations are sent straight to your inbox every week.
