This post contains affiliate links.


We tackled our exterior renovation in phases. Phase 1 involved re-siding the house and repainting the concrete porch floor. Phase 2 involved installing cedar shingle siding on the back of our home. And phase 3 (the phase we’re currently on) is a complete porch renovation.
As mentioned above, I painted the concrete porch floor (which was previously teal) during phase 1 as a temporary solution until we were able to tackle the porch as a whole. The paint didn’t last long. Despite using concrete paint and primer, the paint didn’t stand a chance against dirty shoe prints and our pup’s muddy paws and sharp claws. But that’s ok, I always planned on covering it with brick. And this fall, we finally installed brick on our concrete porch floor!

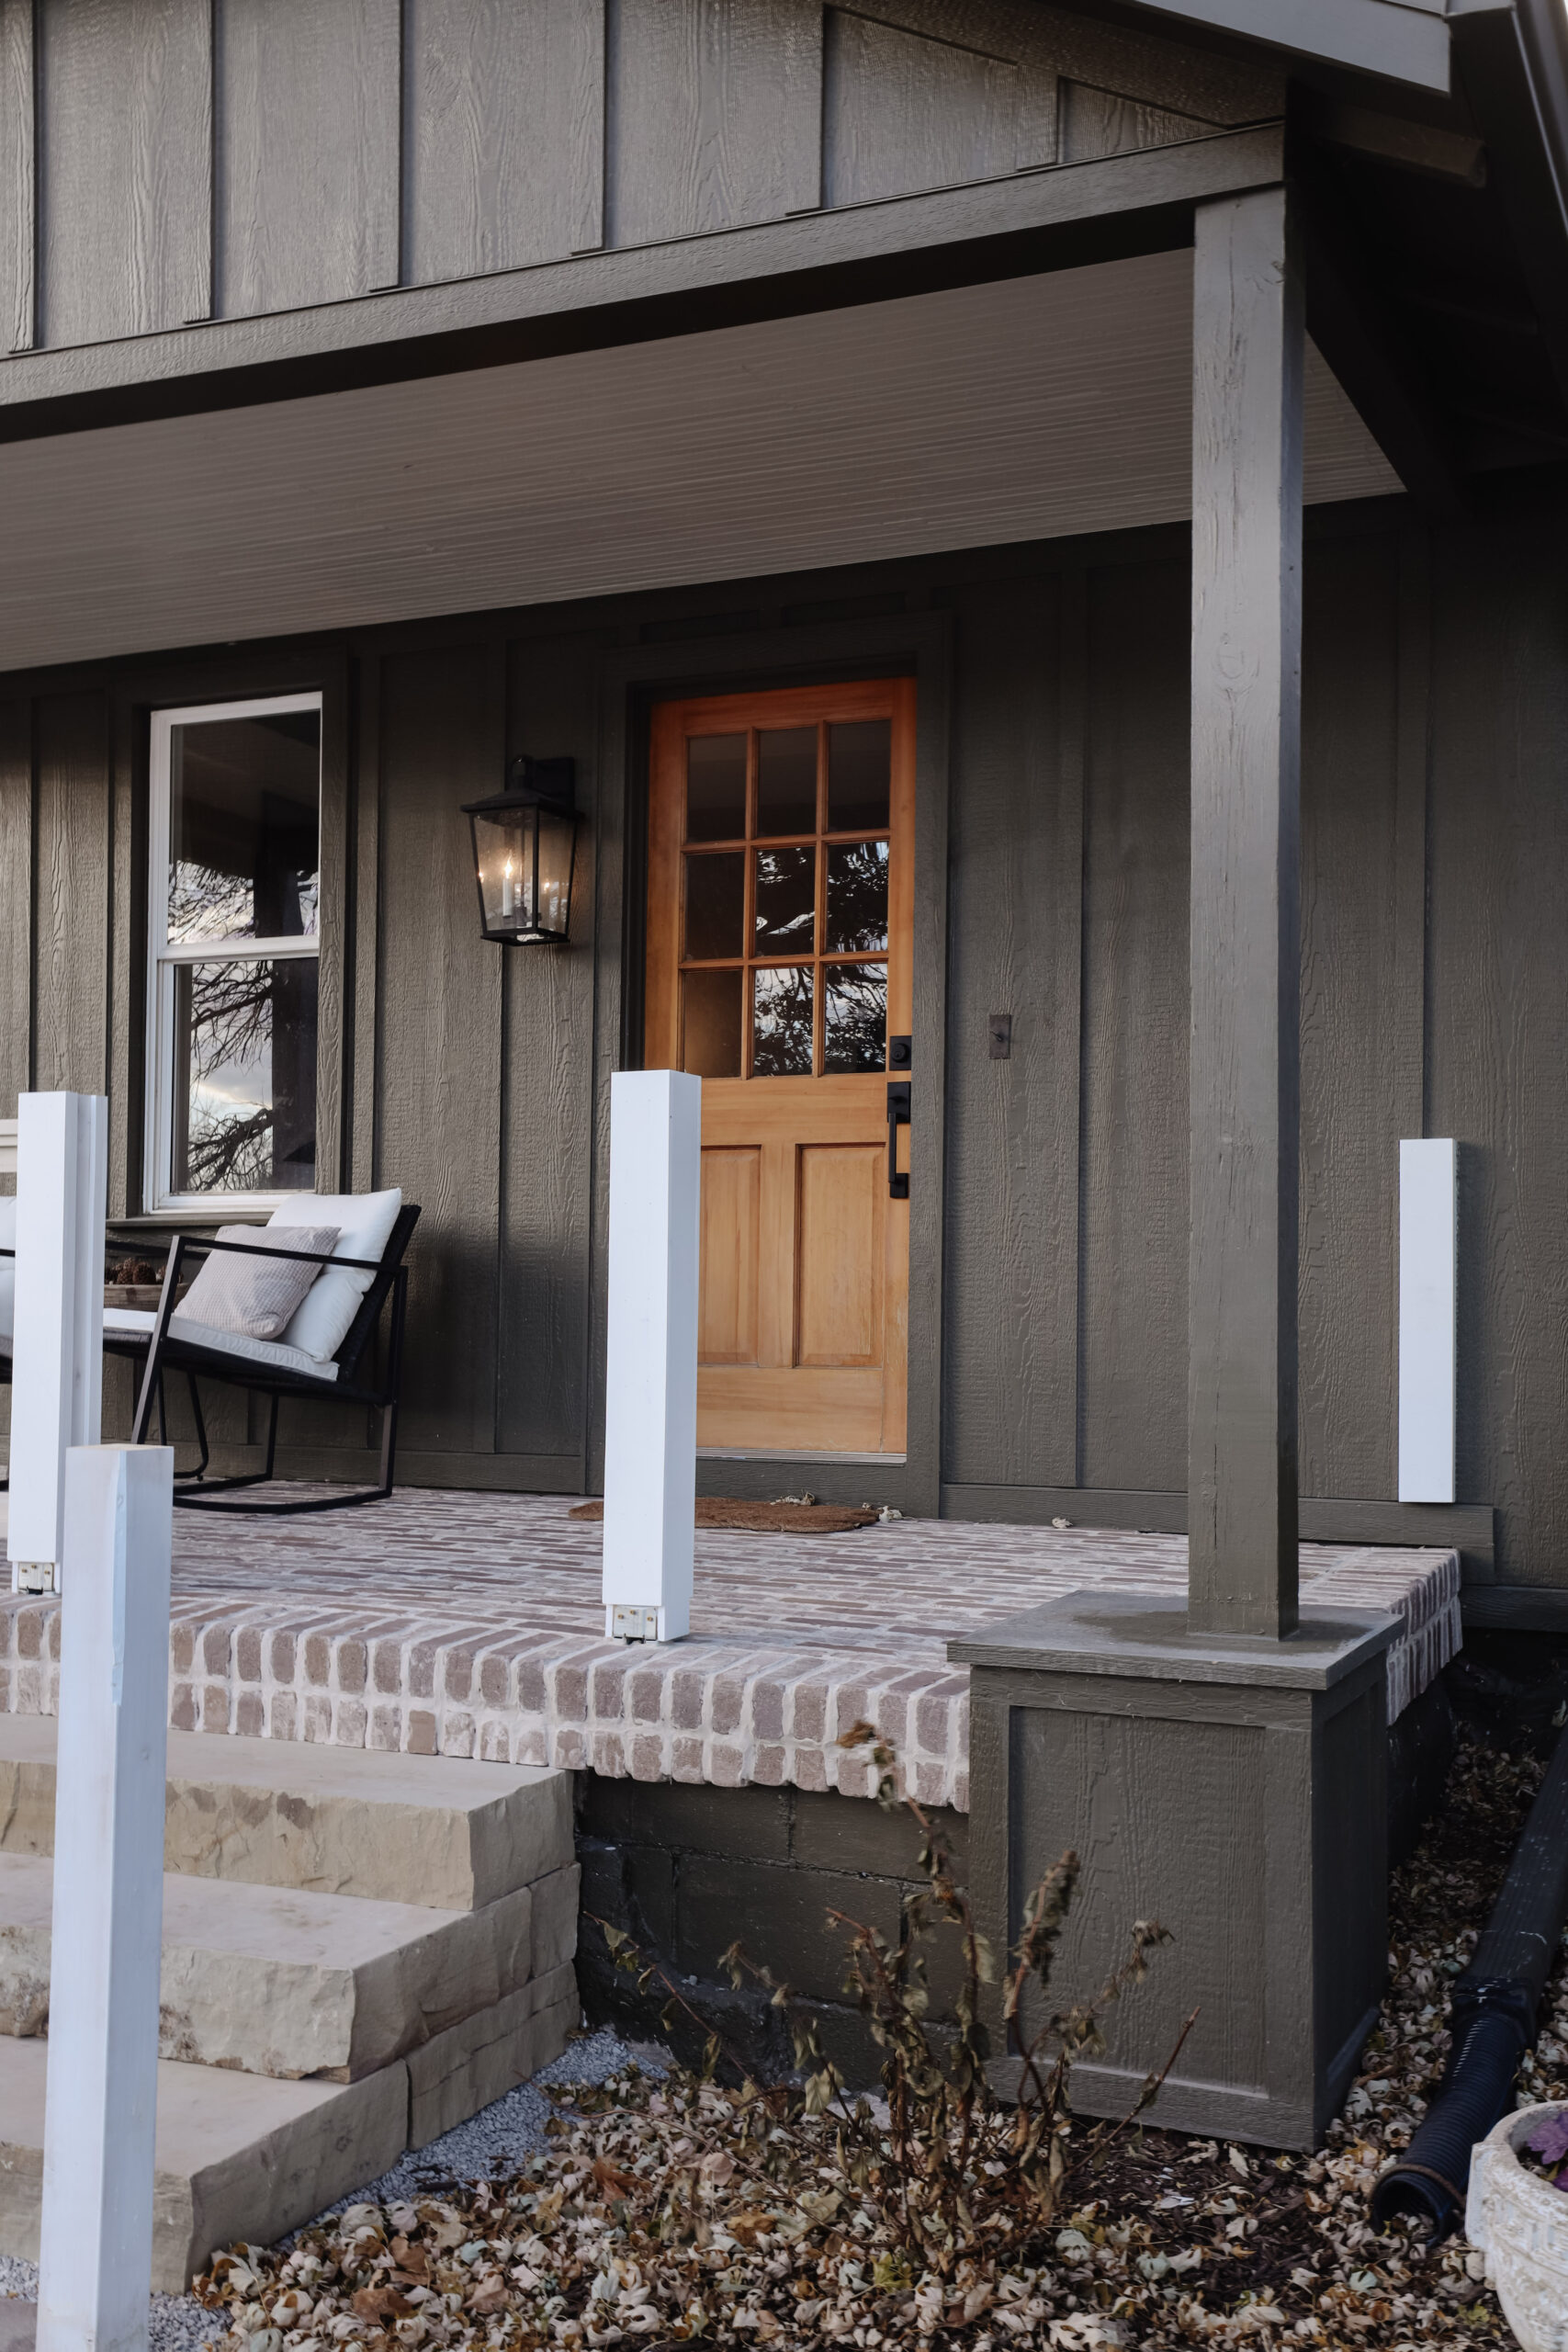
There’s something about a brick porch that feels so historic and charming. Tumbled bricks just have a way of looking old and original to the home which is a big reason why I chose this material. The muted brick colors paired with the warm cream grout is a stunning contrast against our green home, and I just can’t stop looking down.
I would consider this project beginner friendly. The grout application may take some practice, but all in all, it’s a very doable project. So if you’re intrigued by the thought of having a charming brick porch, I’m happy to share a step by step guide so you know exactly how to achieve it.

Step 1: Clean The Concrete Porch Floor
In order for the mortar to have the best adhesion, it’s best to clean your porch floor to remove any dirt, grease, residue, or paint. Our power washer worked well for us. In our case, we had roughly 7 layers of chipped paint on our porch floor so we spent a good couple of days power washing that off.

Step 2: Install Corner Bricks
We started by installing all the corner bricks along the entire front of the porch. We troweled mortar onto the concrete floor and sides as well as the back of each brick to ensure there were no voids or air bubbles. I then pressed each brick on firmly and inserted a 1/2” spacer to maintain even spacing.
NOTE: We didn’t install the brick corners on the porch ends until later because we wanted to make sure the corner bricks would line up perfectly with the brick flats. I’ll explain more in a bit.

Step 3: Trowel Mortar On A Small Section
Because we were working outdoors, the mortar dried fairly quickly so we worked in small sections at a time. Chris troweled mortar on roughly a 36”x36” section and I laid the brick sheets.
We used this mortar and a 1/4” trowel. Don’t be shy with the amount of mortar you use and work quickly. We found that when the mortar was sparse or if Chris got too far ahead of me that the bricks didn’t stick as well.

Step 4: Lay Brick Sheets
Right after Chris troweled the mortar, I laid the brick sheets. The bricks are in a running bond pattern and are glued to a mesh backing so it makes application a lot easier…and faster. They stack end to end seamlessly!
I eyeballed a straight line against our house and was happy with the outcome. But if you’re not one for risking it, marking a level chalk line first would eliminate any risk of installing the brick at an angle.
To ensure that the bricks stuck, I applied pressure on each individual brick after laying the sheet in place.
We chose these bricks in the color Rushmore.
TIP: Some excess mortar may squeeze through the mesh backing where the next row of bricks need to lay. While the mortar was still wet, I scraped up the excess mortar from the mesh to ensure it wouldn’t dry before we could get the next row of bricks on.

Step 5: Cut Bricks & Install Remaining Corners
When you come to the edge of your porch, you’ll need to decide how you want your bricks to end. To make it look as authentic as possible, we installed brick corners along the sides of the entire porch. (Just like we did on the front of the porch.)
This step requires a little bit of brain power. We dry fit the flat bricks to the edge of the porch and then we dry fit a corner brick on one end. We took note of where the corner brick ended, added a half inch (to account for a gap) and made a mark. Then we did the same thing on the other end.
You still with me? Using our two marks, we made a chalk line across the flat bricks (that are dry fit). This line is where we cut our flat bricks. We peeled the bricks off the mesh backing and used a wet tile saw to cut them one by one. Once all the brick flats were cut, we dry fit both the flats and the corner pieces to ensure we cut everything correctly. And then we mortared it all on. The flat bricks first, and then we installed the corner pieces in line with the flats.
In the end, your porch edge should look a little something like the photo below –


Step 6: Grout The Brick (Part 1)
During our laundry room brick install, we tried every grout application method on the internet and finally landed on a method that worked best for us. We used the same method for this project. Chris piped the grout into the gaps so that it was level (if not slightly above) the brick.
Again, Chris worked in small sections and I cleaned up the grout behind him. See next step.
We used Prism grout in the color Bone.

Step 7: Grout The Brick (Part 2)
I let the grout dry just a little (about 5 minutes or so) before I went over the grout with my finger to clean it up. With wet gloves, I removed all excess grout by sliding my fingers across the grout. Once all excess grout was removed, I smoothed out any rough surfaces with wet fingers.

Step 8: Clean Grout Residue Off Brick
You’ll most likely notice that some of the bricks have grout residue on the top of them. Once the grout has dried for 3 hours, you can wet this scrubber and brush the surface of the bricks. I rinsed the scouring pad every 3 bricks or so to ensure it stayed clean and I wasn’t wiping more residue back on.

Step 9: Seal The Brick
To ensure that the bricks and grout don’t stain, and to create a water barrier, it’s best to brush on sealer. We used this water based sealer. Brush it on, wait 3 minutes, wipe it off with a white rag. We did two coats.

Railing coming soon!
I hope this helps you feel confident that can take on a project like this. You got this!
Complete List Of Supplies Needed

Leave a Reply Cancel reply
Where behind the scenes, exclusive advice, and candid conversations are sent straight to your inbox every week.


Hi! How has this thin brick held up?
We have since moved from that home, but in the year that we had the brick, it was perfect. No issues!
Hi, I read some reviews that this type of brick was better for walls then horizontal traffic areas. How would you respond to that claim? I am very interested and I have a large front porch to do. I want to cross all of my T’s and dot all of my I’s before I commit to a certain way to proceed. Thank you
Hi Peter, we didn’t have any issues with the bricks on our porch or laundry room! It would be worth chatting with Old Mill Brick about this claim. From what I read in my research, their bricks are genuine kiln-fired clay which make them durable. Improper installation can cause issues however. For example, if mortar isn’t applied correctly, air gaps/bubbles can form under the bricks, creating a weak spot. I’d recommend reading their knowledge base articles for more information!
Can I ask what color your house is? I love it
Hi Laura, it’s Muddled Basil from HGTV Home by Sherwin Williams which can be found at Lowe’s!
Do you think this would work in a kitchen over top of Vinyl flooring?
Hi Holly! Unfortunately Old Mill Brick only recommends installing bricks over concrete or wood substrates.
Love This!! Do you live in an area that gets a lot of snow during winter months? Is this product freezing temperature friendly?
Yes and yes! It’s made to handle the cold and there were no issues from winter.
Hi! This is SO helpful. We’re thinking of tackling this in the spring to replace beat up painted concrete, (assuming we can get all the old paint off…) How did yall do the second layer of bricks below the edge pieces if the porch is taller than just the one layer of edge brick? Any help would be greatly appreciated!
Hi Lindsey, I’m so glad this was helpful to you! For the perimeter of the porch, we just used additional corner pieces and stuck them on with mortar. Despite gravity working against us, most stayed in place while the mortar dried. Only a few needed clamps to hold them in place while they dried.
This is wonderful thank you, and it looks so nice, great job.
Thank you so much Kimberly!
Beautiful result!! And such detailed pictures and steps. Thank you. You’re making me think I could actually do this. 😜
You totally can!! 🙂
I LOVE the brick on your porch. What a great idea! I was going to paint ours but this is a much better idea. Also, what type of siding do you have, and was it pre-painted? We are looking to re-side our house and are looking for a dark green color. It has to be sturdy siding as we live in Montana, and have very extreme weather conditions.
Thanks so much for sharing your project!
Hi Shawna! Thank you so much! Our siding is LP SmartSide and it comes primed. We painted it Muddled Basil from HGTV Home by Sherwin Williams. If you’re curious to know more about our siding, click here to read the article where I shared all the details!
Thank you, Danica! It’s a decision that needs much thought. I appreciate the research you did and shared with others that are in need of advice. Congratulations on your beautiful home!
Of course! And thank you so much! 🙂
How did this do over the winter? And how cold or wet do you get? Also do they break easily. Love the look
They’ve held up perfectly! Moisture varies year to year but our winters can get as low as -15° and our summers get to be 100°. These bricks are made to be incredibly durable and suitable for a wide variety of weather conditions so we’ve had no cracks, loose bricks, or crumbling grout!
Beautiful job! Have wanted to do this to my small porch for some time, your tutorial will be very useful, very detailed, thank you for that. I am very curious about your columns and their attachment to your porch, is that wood or pvc they sit on? I have had so many issues with rot over the 25 years I have had my porch.
Hi Pam, thank you so much! Our posts are cemented into the ground and we built boxes around the base of them. The boxes are built with LP siding and are primed, painted, and caulked so we shouldn’t see rot as long as they’re well maintained!
Where did you purchase these brick sheets?
Hi Della! We purchased them online. Here’s the link to the brick!
Would this work on a driveway?
Hi Vicky! Unfortunately I wouldn’t recommend this brick for a driveway.
Without adding height to the steps, you just created a tripping hazard. stair risers, including the landing cannot vary more the 3/8″, nor exceed 7-1/2″ in height. I looks as though the landing is now about 1/2 higher with the bricks installed.
The added height of the brick was accounted for when we installed the stone steps. All steps are the exact same height.
Just beautiful! I hope to do the same with ours this summer!