After 6 weeks of demo, framing, electrical, HVAC, leveling out the floors, and yet more demo, we finally reached the next phase of this project when things start to get exciting. When the space starts looking like a room again! This laundry room project has felt like we’re just crawling along making tiny progress each week because it has brought more brain teasers, obstacles, and demo than any other project we’ve done before. (And we thought the bedroom was a brain teaser…) But alas, we’re onto the fun part – starting with the ceiling.
We have to work in a particular order: first install the ceiling, then the walls, then the floors.
The stairwell to the basement with a temporary platform so we could reach the ceiling.
I loved the wood planked ceiling in our primary bedroom so much that we decided to use the same wood planks in this room too. The ceiling is lower than standard height (only 7 ft at the shortest points) so it’s the perfect product for our needs. Lightweight, only 1/4” thick so it doesn’t take up valuable headspace, and it has tons of wood texture to make it feel old and original to the home. If you’re curious how we installed it, I shared a full tutorial here when we installed it in our bedroom.
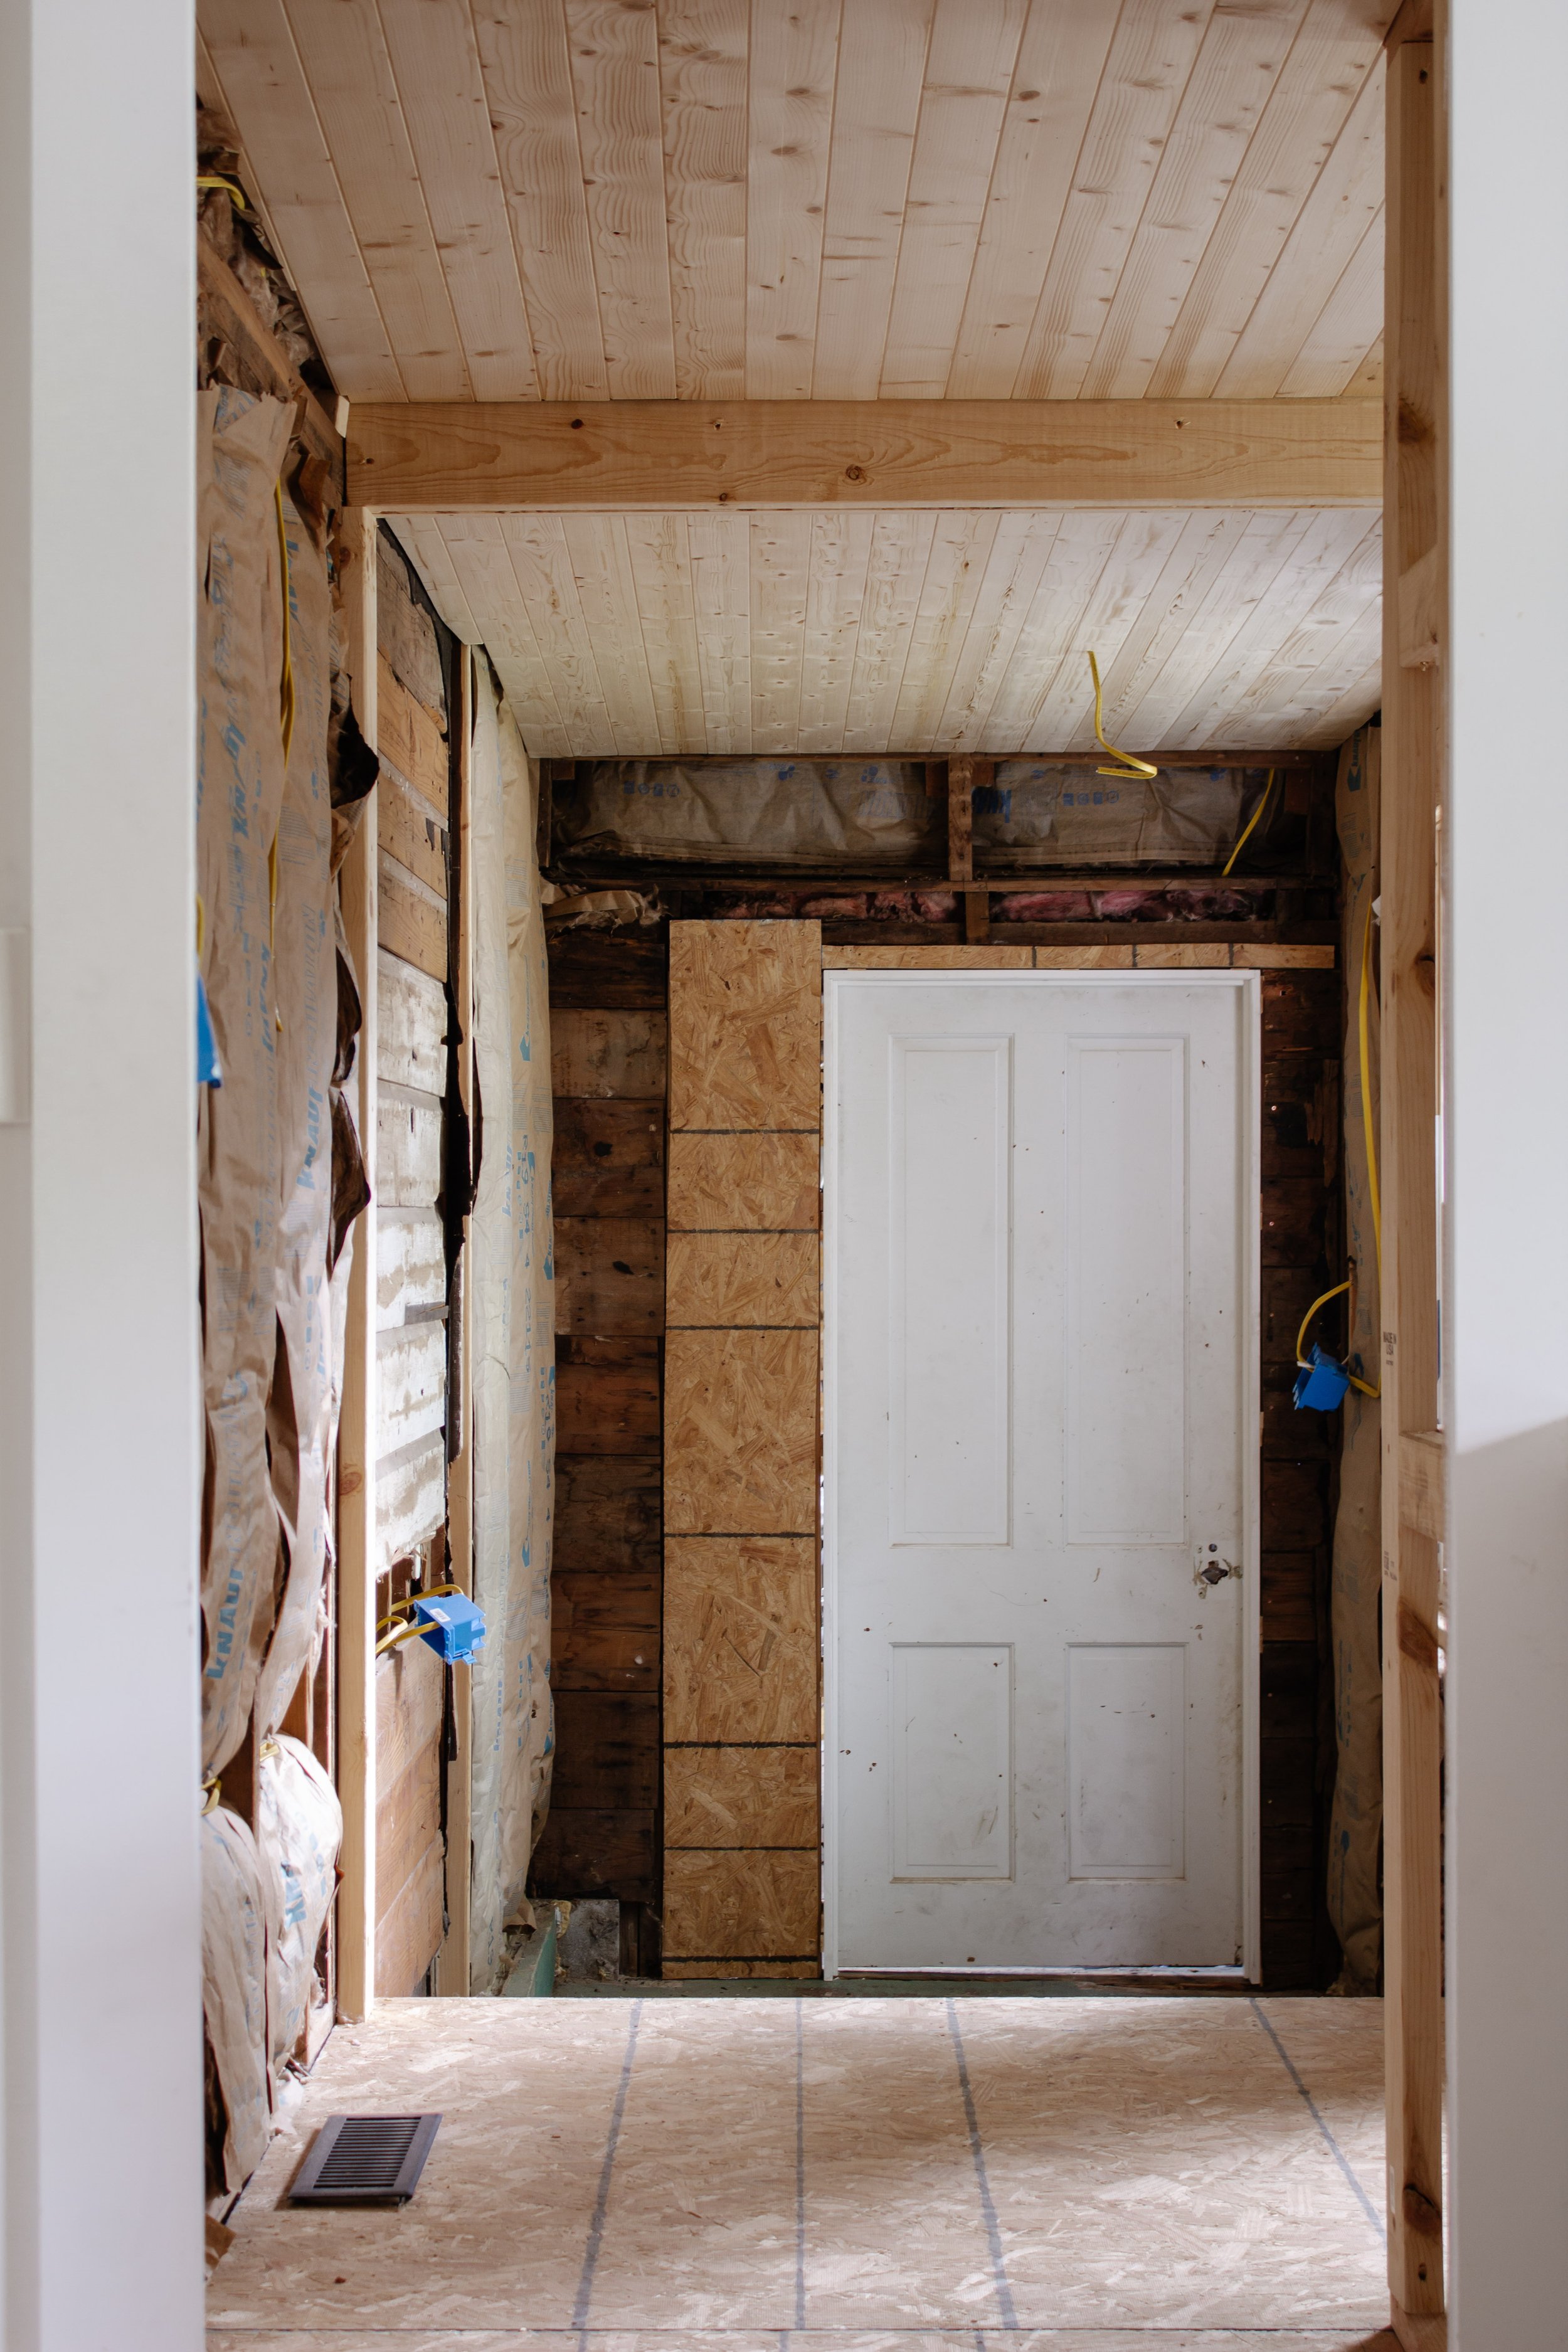
We framed out a closet where the washer & dryer and storage shelves will go.
You can see in the photo below that there’s a beam separating the two spaces. Originally I was concerned this would feel obstructive to the view, but I actually think it’ll be quite charming. The ceiling (and floor) steps down on the right half of the room and having a beam down the center helps disguise the ceiling height difference. Once it’s all finished, the beam will be a charming addition!
One thing we did differently from the bedroom ceiling is we installed the planks parallel with the rafters instead of perpendicular. That’s not typically something that would be done, however, I wanted the planks and the beam to run in opposite directions – visually speaking that’s my preference. But more so, I love when ceiling planks run in the same direction that you face when you walk in the room. It’s hard for me to explain why, but in my eyes it elongates the space and feels like more of a continuation than a boxed in ceiling. In fact, that’s the first thing Chris noticed once we had the ceiling in: “The room looks so long!” That’s the illusion! 😉
To run the planks parallel with the rafters, we had to add wood cross supports in between the rafters so the planks would have something to nail to. A fairly simple task with 2”x2” furring strips and a nailer.
As of now, the plan is to paint the ceiling the same color as our walls. But first, we have to install the wood plank walls next which I’m BEYOND excited about! I know it’s hard to visualize this room with exposed studs so I think once the walls go in, you’ll be able to picture how this room layout will be. More on that soon!
Leave a Reply Cancel reply
Where behind the scenes, exclusive advice, and candid conversations are sent straight to your inbox every week.


it is so much easier to paint the wood first before you hand it