When I first started Nadine Stay, I refurbished furniture for a living. I found beat up dressers and weathered tables and I spent hours refinishing them so that I could sell them again on good ole craigslist.
But before I refinished my very first piece of furniture (which was an oak dining table donated by Chris’ grandad), I felt incredibly clueless as to how to refinish furniture properly and in a way that would last.
Painting furniture was somewhat of a revived concept back then and I remember researching online for hours trying to learn the proper techniques. I found little bits of information here and there but I couldn’t find one article that listed all the steps from start to finish or explained the process in a way that was easy to understand!
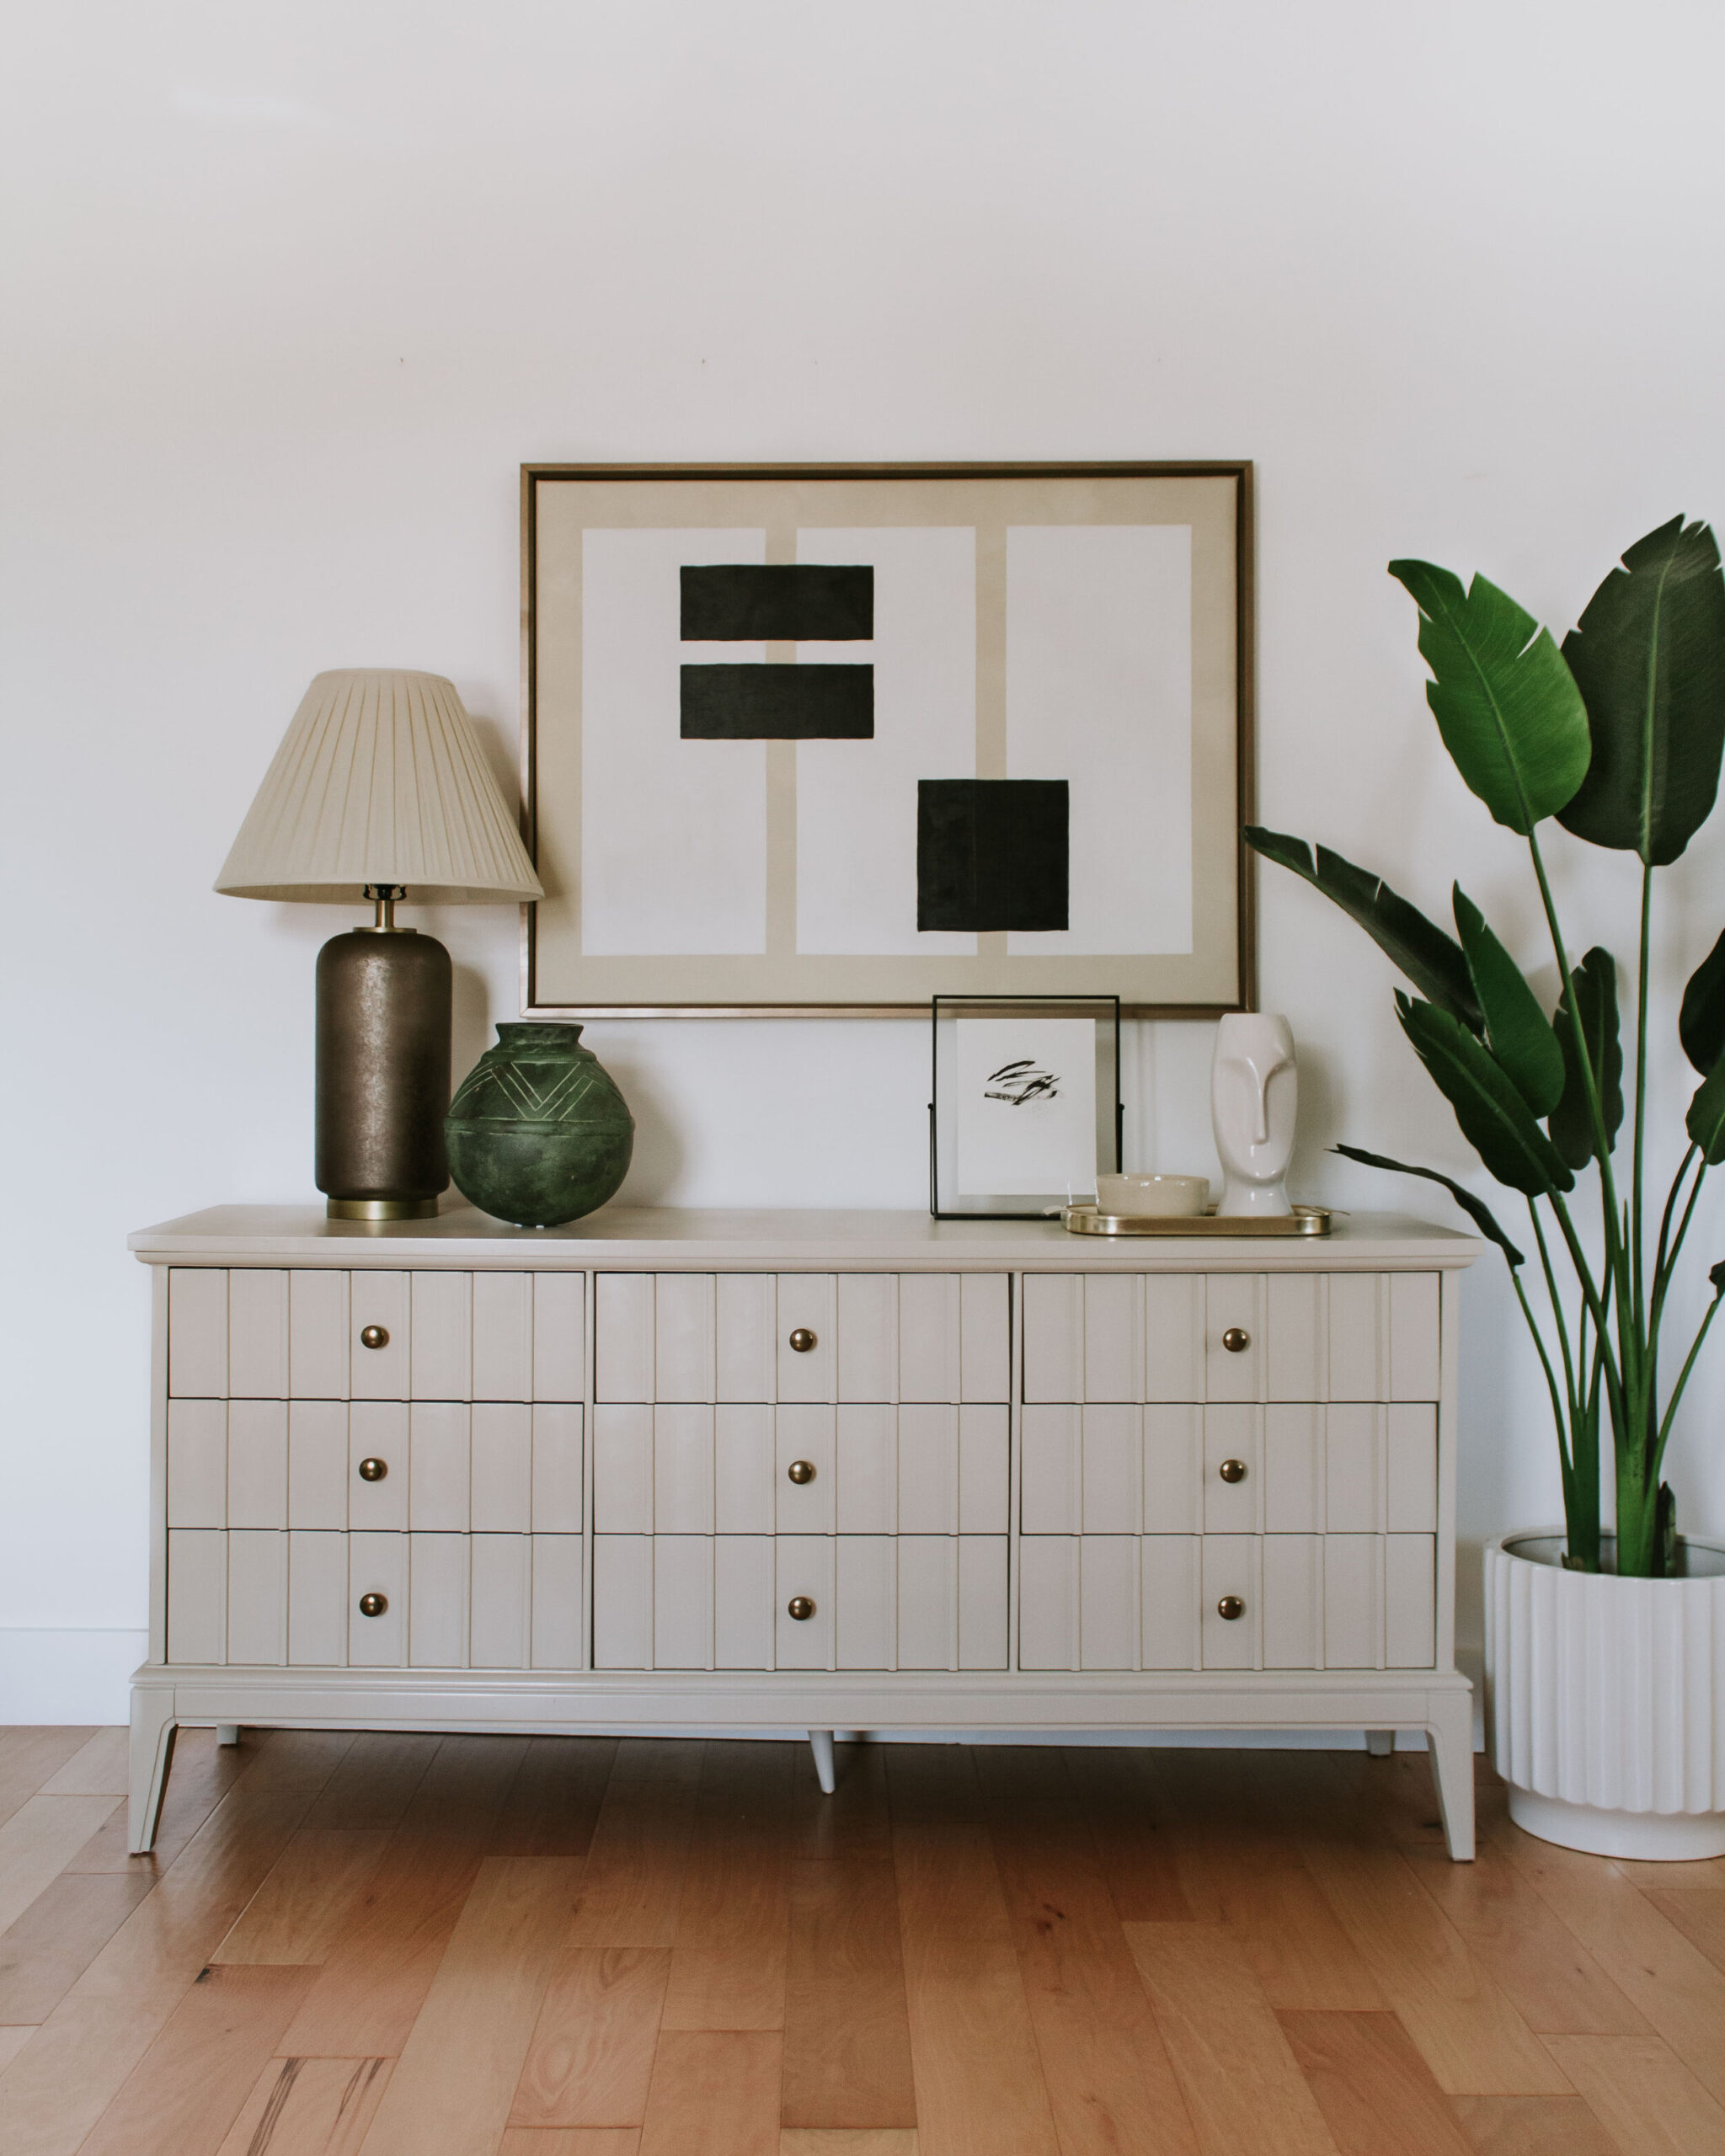
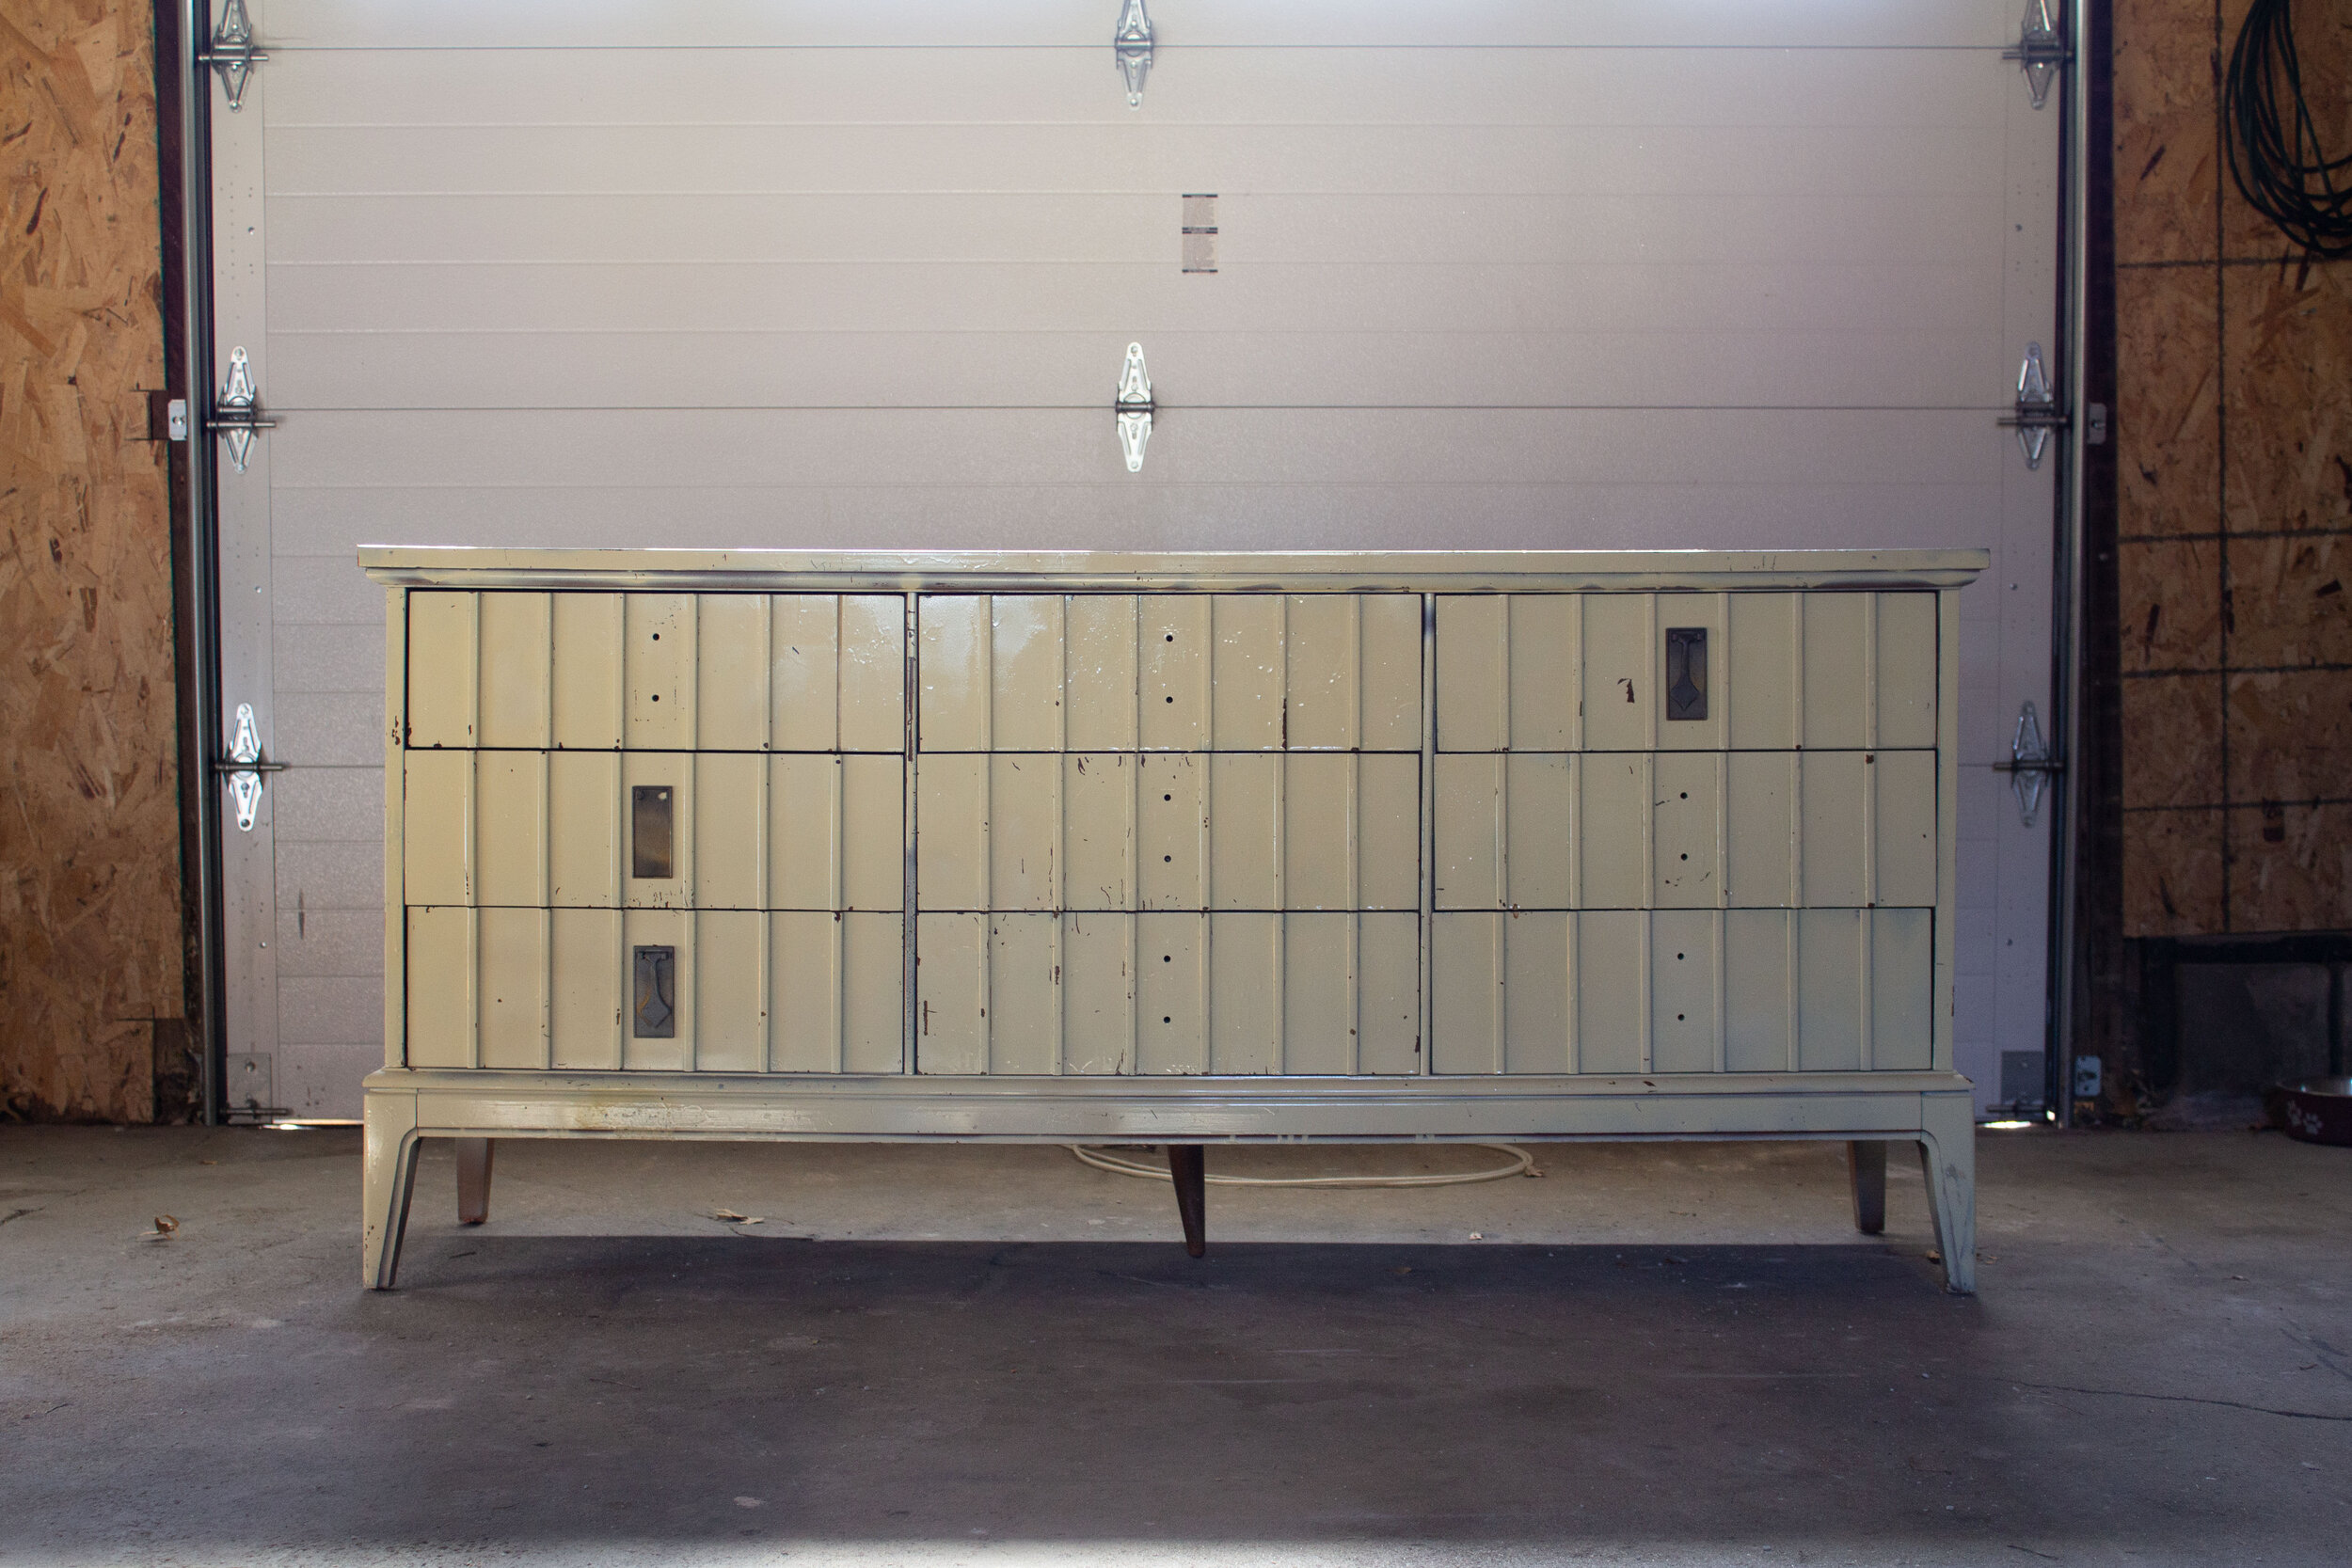
So I’m doing that today….starting with step 1. To demonstrate my process, I found this dresser at a local thrift store and I’m excited to add this piece to our bedroom! Here’s how it looked before –
Before
I love the size of the dresser as well as the detailing on the drawers! So much potential but that paint job was one of the worst I had seen. The game plan was to repaint it and I picked a beige color with far less yellow undertones.
Here’s how it looks now –
After
STEP 1 – THE PREP WORK
Grab that screwdriver and start removing all the knobs, hinges, and hardware. Take off all doors and drawers as well. Trust me, this will make painting so much easier!
STEP 2 – SAND WOOD FURNITURE
There are some paints (chalk paint) and DIY blog posts claiming that you don’t need to sand before painting. In my experience, I have found sanding to always be necessary! Your primer and paint needs something to adhere to and a chipped, peeling, smooth, or glossy surface is the worst thing for the longevity of your paint. So step one, you need to sand your furniture.
If there’s a layer of paint, varnish, or any top coat on your furniture, use a power sander. I usually start with 80 grit sandpaper and go over everything. You don’t necessary need to get back down to the natural wood, although your paint will adhere better if you do. The point of sanding is to rough up the surface to give your primer something to stick to. So if sanding down to bare wood is proving to be extremely difficult, I usually just sand it until the surface starts to feel slightly rough to the touch.
Then, to smooth out the surface I sand everything again with 220 grit sandpaper. If the furniture you’re refinishing doesn’t have a thick layer of paint or varnish on top, you may be able to skip the 80 grit sandpaper and just use 220 grit.
On occasion, you may be able to get away with sanding with just a fine grit sanding sponge. Although I usually don’t recommend it, (because it doesn’t rough up the surface as well as a power sander) it can be used on furniture pieces that are already bare wood and in excellent condition.
SIDE NOTES:
Laminate furniture cannot be sanded! It’s not real wood and sanding it will simply scratch the finish. If you’re working with laminate
furniture, skip to step 2.
Veneer furniture can be difficult to work with. Since it’s such a thin layer of solid wood, a power sander can easily sand through the real wood and expose the plywood or particle board underneath. If you feel comfortable working with veneer, you can carefully power sand it. However, for beginners I often recommend sanding with a fine grit sanding sponge to rough up the surface as much as possible without sanding through the veneer.
STEP 3 – MAKE REPAIRS + PREP FOR PAINT
If there are any scratches, gouges, or holes, now is a good time to fix them. If you plan on swapping out the knobs or pulls, check to see if the existing holes will align with the new hardware. To fill in any holes or imperfections, I use this stainable + paintable wood filler. Once the wood filler is dry, I sand it smooth with a fine grit sanding sponge or power sander.
Once the repairs are complete, I prep the furniture for priming and painting. It’s important to wipe down the furniture and get rid of all the dust. If there are any sections of the furniture that you don’t want painted (like the interiors of the drawers) you can tape that off. Since this dresser is just for me, I didn’t really care about protecting the interior of the drawer, but when I do care I just use painter’s tape and newspaper for that.
Now we are finally ready to prime!
STEP 4 – PRIME
Again, there are a lot of paints out there saying “no priming necessary” or “paint and primer in one”. To make sure your furniture won’t chip, scratch, or peel, it is always, always, always necessary to apply a quality primer! My go-to primer that I use and trust is Zinsser Bulls Eye 1-2-3. It’s water based and sticks incredibly well to all surfaces.
I prefer the spray primer since it gives the best finish. I’ve tried using their liquid primer with my paint sprayer but haven’t figured out a pressure (yet) that sprays a thick enough coat.
1 spray can goes a long ways and covers incredibly well so I typically just spray one coat. If a second coat is necessary, proceed to step 5 and then do a second coat of primer.
I also recommend you use a spray can nozzle (like the one in the photo above) for easier application. And I highly suggest wearing a respirator while spray painting. The fumes can be incredibly harmful when inhaled so I wear this mask every time I spray paint.
STEP 5 – SAND AGAIN
Zinsser spray primer dries really quickly and can usually be repainted after 30 minutes to an hour. Once the primer is dry, I lightly sand over everything with a fine grit sanding sponge to get rid of any rough patches or imperfections. Then I wipe the furniture down with a rag.
STEP 6 – PAINT
NOW for the fun part! Once again, I prefer to spray paint my furniture because it just has such a smooth, professional finish. I use this sprayer and I couldn’t be more impressed with it! It’s incredibly user friendly (I learned how to use it in 5 minutes) and all you need is an air compressor and hose. Bonus – it’s less than $50!
If you opt for brushing or rolling your furniture, I suggest a quality angled brush and/or this roller. A brush is good for detail work and a mini roller is best for large flat surfaces.
As for paint, I often use the Infinity paint from Lowe’s which is an acrylic enamel. There are furniture and cabinet paints available as well. I don’t have much experience with them but I would assume they do a good job as well.
(The color I chose for my dresser is “Accessible Beige” at 75% by Sherwin Williams.)
HOT TIP:
If I choose not to use my sprayer, I typically use both my brush and roller. I go over the details, edges, indents, etc with my brush and then go over it (or as close as possible) immediately after with a foam roller to eliminate the brush strokes.
STEP 7 – SAND
Once again, give the furniture a light sanding with a fine grit sanding sponge and wipe it down with a damp rag.
STEP 8 – PAINT A SECOND COAT
I almost always paint a second coat (if not a third as well) to ensure that my layer of paint is thick enough. This is especially necessary if you’re spray painting. Spray paint sprays such a thin layer of paint that if scratched, it could easily show the primer underneath. A second (or third) coat will drastically help with coverage whether your spraying, brushing, or rolling the paint on!
STEP 9 – APPLY A CLEAR TOP COAT
I cannot stress this step enough! No matter how wonderful your paint covered, it will not withstand everyday wear and tear without a top coat. There are a bunch of options for painted furniture but I use these 2 products on a regular basis –
Polycrylic – This is my preferred top coat for painted furniture because it provides a hard finish that is crystal clear and comes in a variety of sheens including matte. Polycrylic comes in both spray and liquid form. I prefer the liquid over the spray because it has a thicker coat and better coverage for protection.
To apply this product, I use a foam brush. Polycrylic dries pretty quickly so it’s important to move quickly. You shouldn’t over-brush or touch up a spot that’s already started to dry because it will effect the smooth finish. Allow it to dry for 2 hours and then give it a light sanding with a fine grit sanding sponge. Wipe it clean with a damp cloth and apply a second coat. Repeat until you have applied 3-4 coats.
Minwax Paste Finishing Wax – This wax also has an incredibly beautiful soft luster finish. Although not quite as durable as Polycrylic, it is a suitable top coat for lightly used furniture and frames. Working in sections, I wipe on a layer of wax with an old t-shirt. Once the wax has dried for about 15-20 minutes, I then buff it off with a clean t-shirt. One coat is all that’s necessary. (This is the product I used for my dresser!)
STEP 10 – ADD HARDWARE + LET IT CURE
This step is arguably the most important step but it’s often neglected. There’s a difference between dry time and cure time. Most paints are “dry” within 2-4 hours, but most paints need to cure for several days or weeks. Depending on the paint, I usually suggest allowing paint to cure for 1-2 weeks before normal use. I know that seems obnoxious but it drastically helps reduce paint peeling, chipping, and scratching. I highly recommend not placing any objects on your furniture or closing the doors/drawers until the paint has cured.
And that’s it! I hope this guide is incredibly helpful to you! I’m planning on sharing another complete guide soon for staining furniture! I’ve got even more helpful information for wood pieces and I can’t wait to share that with you soon! Keep scrolling for product sources and specs.
SOURCES + SPECS
FURNITURE PAINTING ESSENTIALS –

CLICK BELOW TO SHOP

DRESSER SOURCES + SPECS –
I either made or thrifted 75% of what you see in the images above but there are a few pieces you can purchase!
-
Dresser – thrifted
-
Dresser Paint Color – “Accessible Beige” at 75% by Sherwin Williams
-
Brass Tray – thrifted
-
Tan Bowl – thrifted
-
Black Scribble Painting – I made it
-
Black Float Mounted Frame – similar version in brass or this smaller black one
-
Green Vase – thrifted
-
Lamp Shade – thrifted
Leave a Reply Cancel reply
Where behind the scenes, exclusive advice, and candid conversations are sent straight to your inbox every week.


Great post, thank you for the info!
Absolutely, happy it was helpful!
Do you happen to clean the items with tsp?
Hi Victoria! I don’t use tsp since I sand my furniture. That almost always gets rid of any grime on its own eliminating the need for a tsp cleaner.
Hi this piece is beautiful! I am going to use your guide to try my hand at a MCM dresser I snagged from FB marketplace. I do have one question though… when referring to the Sherwin Williams paint you mentioned “at 75%” I don’t want to assume I know what is meant by this. Can you explain?
Happy to help! Any paint color can be ordered at a lower percentage to make it lighter without changing the undertones. So if the color you like is a smidge too dark, you can order it at a lower percentage strength (75% for example) to lighten it up. I talk more about this in this blog post – https://nadinestay.com/blog/interior-design-basics
Hope that helps!
This looks awesome! Thanks for the step by step instructions, you’ve inspired me to paint some old night stands we have. One quick question, the Sherwin Williams paint, do you use the satin, semi-gloss or flat finish?
I used satin paint on my dresser! Good luck with with your project! 🙂